Showing posts with label 28mm. Show all posts

Thursday, April 17, 2014

Bolt Action: Squad Level Combat

I like Bolt Action but I don't always want to play a big skirmish game. Sometimes I would rather play something smaller but just reducing the points in BA doesn't really work for me either. I got into WW2 skirmish gaming before I started playing BA. I was really interested in playing two different games in particular. The first game was Disposable Heroes and the second was Operation Squad. I have difficulty ordering things from online vendors, and so prefer to go through a local game store. So this is how I ended up with Bolt Action. That plus I went to the BA Game Day and had a great time and played an excellent 6000 point game.

However, I tend to like games where each model is its own unit, squad level combat. So I have recently been throwing around some ideas of how to alter the rules to work at this smaller skirmish scale. I think I have made a few minor modifications that will make it work i hope. Of course there are probably things I have overlooked so if there is anything you see let me know. 

I hope to be able to try them out this weekend and see how it goes. If I can get my SD card reader to work again I will do a quick AAR and post my thoughts on how it works.

So after I wrote this I decided I wasn't really liking the single d6 roll for shooting, so I changed those too. I haven't included them here as I have tried to make this as close to the original BA rules as possible. Sometime in the next month or so I post up my own set of rules separately. Currently they are still a work in progress and I have been staring at way to many statistics on probabilities trying to make it work the way want. As a result I remember why I took symbolic logic as an advanced math course in college.

-----------------------

Bolt Action: Squad Level Combat

These rules follow the standard Bolt Action rules except those below.

Each model is considered to be its own unit, except for team weapons or squad integral weapons which always activate on the same order die.

Small Units
Since all models are treated as individual units, with the above exceptions. All units all infantry and infantry support units are treated as small units. When a team weapon is hit by exceptional damage, even if caused by sniper fire, only a single model is removed and the weapon can be re-crewed if a morale check is passed first. Optionally, these additional men may abandon the weapon (temporarily or permanently) in which case they are then treated as individual infantry men.

Squad Cohesion
Normally squads are forced to maintain cohesion for ease of play and to keep a squad together. Under these rules a squad is in cohesion if a model is in within 6” of another model and it is in cohesion with (through other models) to the squads NCO. A model that has lost cohesion with the rest of the squad has a -1 morale penalty.

NCO’s
These men are the core of your squad, the driving force that gets things done. With them your squad maintains cohesion and discipline. Though, this may not always be the case, Sarge may send a few guys around the flank of the enemy or have them hang back to provide covering fire. While alive, the NCO provides a +1 moral bonus to all models that maintain cohesion with him and the rest of the squad. When an NCO dies all models in the squad lose a point of morale. Models already out of cohesion do not suffer an additional penalty. Regardless of whether the NCO is an inexperienced, with no combat experience or a grizzled veteran, the morale bonus they give to other troops is the same. The more experienced they become the harder they are to kill.

Mixed Experience
Bolt Action doesn’t allow for members of the same squad to vary in level of experience, but at this level it is okay as each member of the squad is considered its own unit. I would even encourage it. Imagine any war movie you have seen, the grizzled NCO, a couple of regular guys who have been around a while, and then the new guys. Of course, it’s your squad so build it to suit your tastes.


Building a Squad
Since this game is on a smaller scale, force selection is slightly different than normal. First, you need to decide what type of squad you are going to run; US Rangers, Volksgrenadiers, SAS, Paratroopers, Pioneers etc. Your squad then follows the basic set up for that type of squad. Your core force is as usual, an NCO + four men. These men are Inexperienced, Regulars, or Veterans as usual. Any additional men can be added to the squad and they may be chosen at any experience level. Though in order to maintain your squads stated level, there must always at least one more man at the regular experience level for that squad, than the rest of the squad who are not at that experience level.

Force Selection
For a typical squad on squad game the number of points is 100. For a game with a reinforced squad the point total should include another 70 points that go toward buying only support units, additional squad members or squad upgrades. The original 100 points should be allocated first before purchasing support units, and if not used for that purpose may not be spent on support options. Support options can include any type of infantry support, light artillery, or transports. With only 70 points your options are limited somewhat, and hopefully not overpowering in anyway.

Special Rules
Normally purchasing a special rule is an option applied to all members of the squad. Using these rules, it is again, on a per model basis. So every member of the unit may have that special rule, none, or any number between.

To add a bit of fun and variety the following additional rules may be purchased or deducted from the squads point cost, but at double the normal rate if the squad would not normally be allowed this special rule.

Tough Fighter: +4 points per man
Fanatics: +4 points per man
Green: +1 points (Inexperienced only)
Shirker: -4 points per man
AT Tank Grenades: +2 points per man

Weapons Ranges
All weapons ranges are doubled, but anything beyond the normal range incurs an additional -1 penalty to hit. Ideally terrain should limit ranges more than anything else.

HE Damage
HE shells explode in a radius equal to their HE rating. So a HE d2 gets a chance to hit everything within a 2” radius around the point of impact.  A d3, a 3” radius and a d6 will have a 6” radius. Anything larger than this is unlikely to ever see play but would be 12” (2d6) and 18” (3d6) respectively.

Indirect Fire Deviation
Because it might matter, a miss with indirect fire will deviate in a random direction (roll your order dice and move target in the up direction of the showing order die, or however you like). The distance of deviation is based on the minimum range for indirect fire. 12” = d6”, 18” = d6+3”, 24” = d6+6” (though ranges are double for this as well). The greater the range the greater the chance of deviation, at least that’s the working assumption.

Vehicles Damage
Normally vehicles hit by small arms fire are destroyed. When playing at this level, larger vehicles will be rare if not totally non-existent. So in order to add a little detail use the Damage Results for Armored Targets table and apply them to the soft skinned vehicles.

Units Aboard Transports
Models on a transport that is destroyed receive the usual d6 hits per squad, but these hits are distributed between the available models starting with 1 hit per model, then starting over if necessary.

National Rules
The American lose their free Air Strike.
The British lose their free Artillery Observer.
The Soviets do not get a free squad.
The Germans lose nothing.

All other national rules remain in effect as normal.

Monday, March 31, 2014

Mediterranean Barn

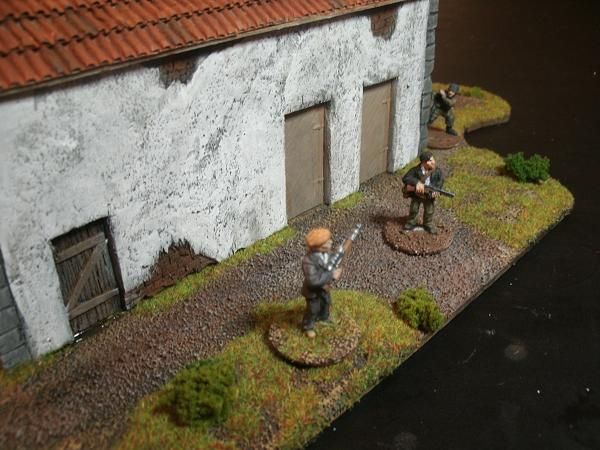
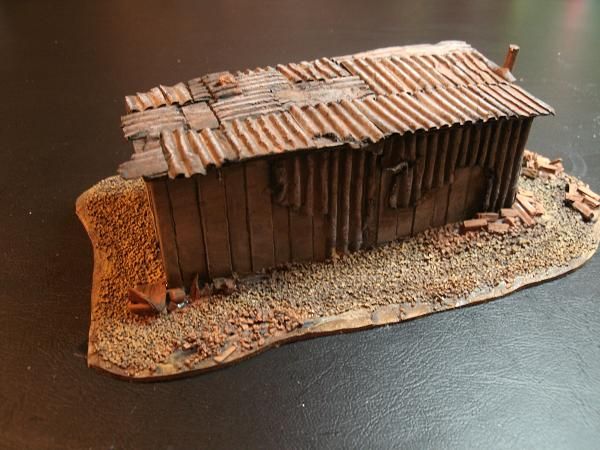
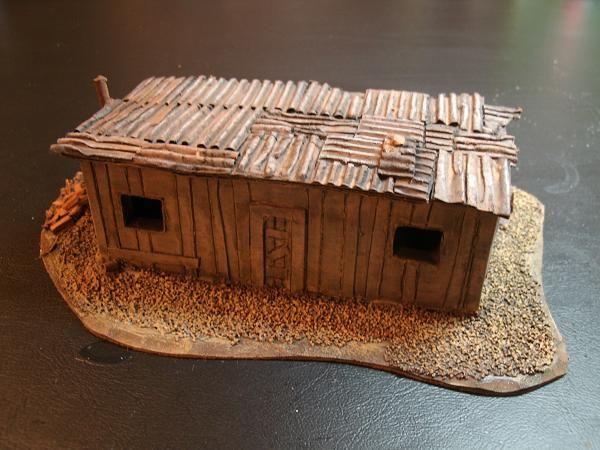
Well, it's been one of those months. I worked on quite a bit of stuff done and actually got some of it done. Though it never seems like I dig myself out from under the pile of projects in the works. That's probably because I keep starting things, and never finishing them. So this post is dedicated to a project that I was totally excited about, jumped into without any planing and managed to get everything done, except flocking the base in a couple of days. Then I promptly set it on the shelf where it has sat since that day in early November. There were a few more things I had originally planned, like adding a broken down wagon to the dung pile behind the barn, paint the pigs a little better, but things can always be done later if I get in the mood. Right now, I am going to pronounce this done, even if it kinda isn't really...


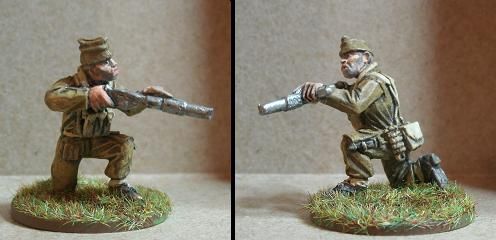
Fritz takes a peak around the corner spotting the Greek Andartes who are guarding the tsipuro still.


Monday, February 24, 2014

Foam Tank

So this weekend I got a little tired of painting and decided to take a break and do something else. I have a lot figures for my VACW campaign but I don't have anything armor wise. So I thought, I would see if I could slap something together using some foam. I didn't have any expectation that anything would come of it, but it turned out not to bad. My only concern is that the thing doesn't look very 1930ish in design and might be a bit to advanced looking to be honest.


I just started cutting out pieces until I had a basic shape blocked out then though I would add some pins to make it looked like riveted construction. I don't much care for the pins, they don't look the part very well. I think they are too large and flat and so I will pull them out before I go any farther and cover those areas with card stock like I have done with other areas. So if anyone knows of something good to use as rivets I would love to know.


The front hatch is just another piece of card with two bits of wire added above to act as hinges. Not sure what else if anything I should add to the front. Also I have now idea how to do the tracks and road wheels yet, will have to think about it for a while. Was thinking to have them mostly covered to make it easier.


I built two inter-changeable turrets for the beast. The first one is reminiscent of a Soviet T-26, but not an exact copy. The lower one reminds more of a Early WWII German turret a little bit.


So there  you go. My first attempt at building a vehicle. My second is underway as I found the perfect bits for it this weekend while I was out at the American Science Surplus store. This place is awesome by the way, I used to shop this store online before we moved up here. Yes! this store is nearby, and I go every chance I get, just to much cool stuff to check out.

Monday, February 17, 2014

British Commandos, The Twins, and Other Madness

First, lets start with the Other Madness.

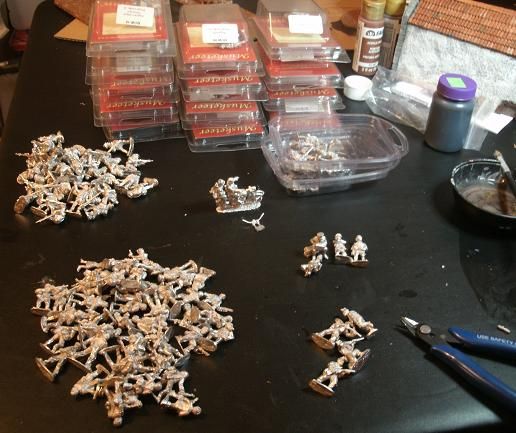
Earlier this week I received two packages in the mail. The first was from my FLGS back home. It contained a few packs from Musketeer Miniatures VBCW line. Originally I had wanted to order some of the 1920's IRA figures as I thought they would be more versatile for use with VBCW and my own VACW game. Sadly, only the VBCW figures could be ordered from Gripping Beast for some reason, and so I went ahead and ordered those. After ordering, I moved about half way across the country and in all the chaos and disorder, it kind of slipped my mind for a while (a couple of weeks). Then when I did remember, I figured I would wait until this temporary move was over, but after a while... it became apparent that the temporary move was going to be a little longer than anticipated. So I had them mail me these along with the Conquest Miniatures, Woodland Indian War party. I figure if I am going to get into the French and Indian War I would start with my own ancestors.

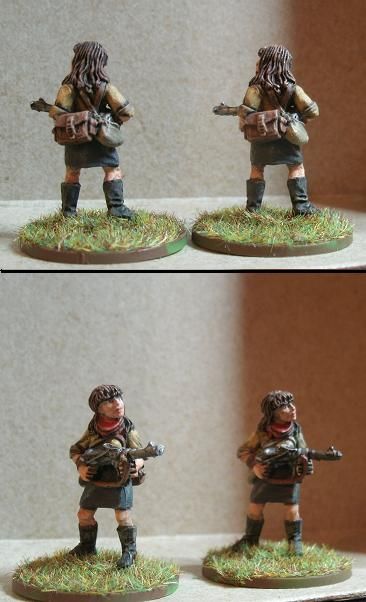
The second order, that came the same day was from Black Tree Designs. I went ahead and ordered some stuff during their 1/2 off holiday sale, after just looking for the last three years. Total I ordered some 96 miniatures from BTD and two vehicles, so now I really have my work cut out for me. My order consisted of 48 partisans, the Soviet character set (which will be my partisan mortar crew), a couple of German motorcycles, and 40 Boers. The Boers are going to get converted into a militant farm faction for my VACW game. Oh yes, and a four pack of British Commandos. The plan for the commandos is to use each as an NCO for a partisan squad. So that they will be easily identifiable as such is the massive rabble they will be leading. Eventually I will pick up a British radio team as well.

See, utter madness!


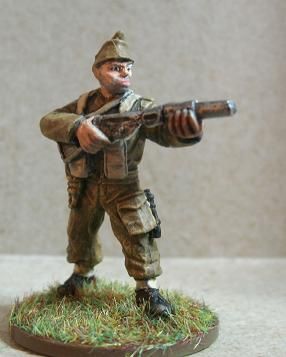
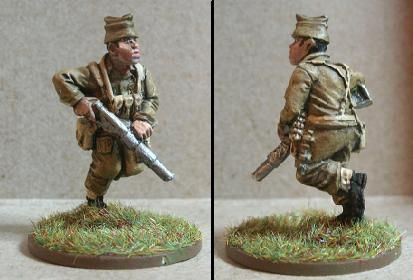
I went ahead a based a few figures the first day using what bases I had. Ten total, out of those ten I managed to get six of them painted on Saturday.

Add caption
So looking at these pictures again I realize that I need to go back and paint the spaces between the open stock of the Sten gun to match the uniform. Seems I have forgotten to do this.


I even painted eyes and 12 o'clock shadows, and I almost never do that.


"We always go commando!"

Well there you go, not to bad for an afternoons worth of work. So far I am pretty pleased overall with the BTD miniatures. The commandos and the twins had lots of details and didn't look at all out of proportion as I had been told previously. A few of the miniatures a bit strange looking, very big in the shoulder etc, but overall I am very happy with my purchase and wouldn't hesitate to order from them again (well except for that I don't need anything else to paint right now). Out of the 96 miniatures in my order, only one was a miscast. One partisan was missing a hand and Molotov cocktail, but that can be easily replaced. 


Wednesday, February 12, 2014

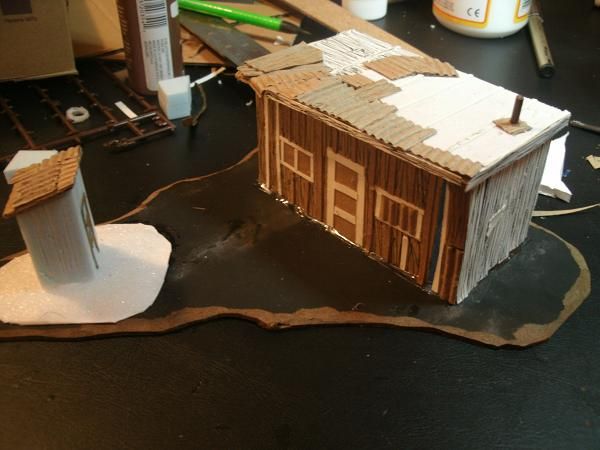
Hooverville Shack Tutorial: A Quick and Dirty Guide to Shabby Chic.

Well somebody asked, so here you go. A step by step guide to building shacks.


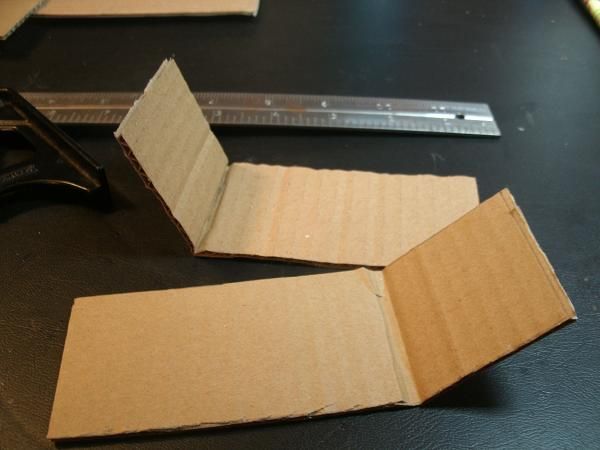
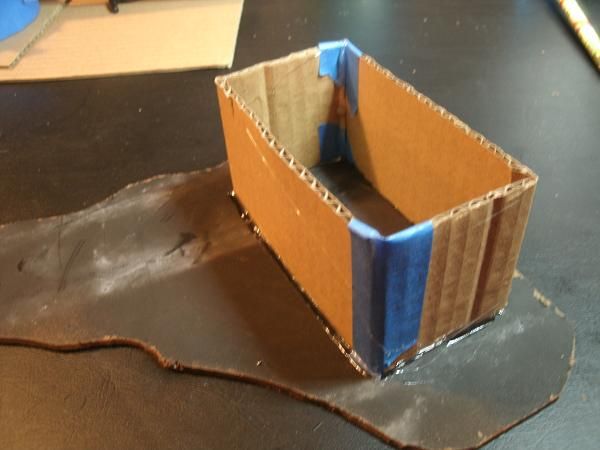
Here we have the humble beginnings of a shack. Two pieces of 2"x4"x6" cardboard, and pretty flimsy cardboard at that. You can also use a small box or foam board of the appropriate size. I am going to use cheap card board for this shack because I am not going to make the interior accessible. If you are wanting to go that route I think I would use something sturdier like the foam board.


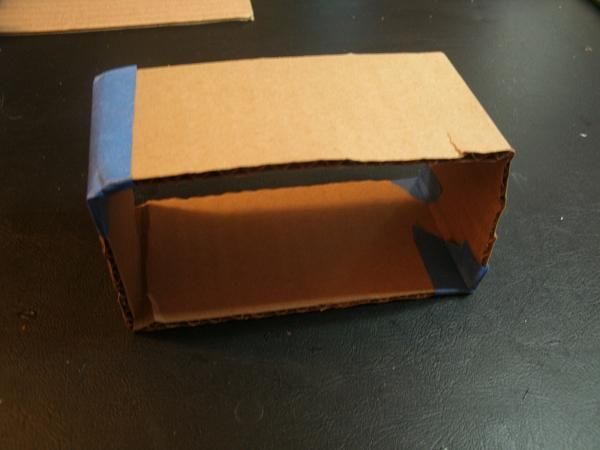
 So then you tape the two pieces together to make your rectangle. Then I hit the inside corners with some hot glue to help it keep its shape and make it a little sturdier.


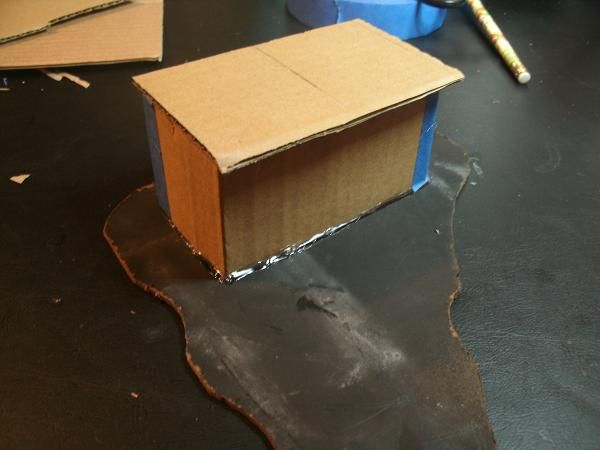
 Then I hot glue it to the base, which is a piece of hardboard or fiberboard. After that I like to run the hot glue gun across the base of the outside to help keep it in place.


Again, this inside will not be accessible so I just hot glue the roof in place. The roof is another piece of cardboard that is slightly larger than the shack. Now the easy part is over, and we will get to work making it look like this thing is made out of wood planks and whatnot.


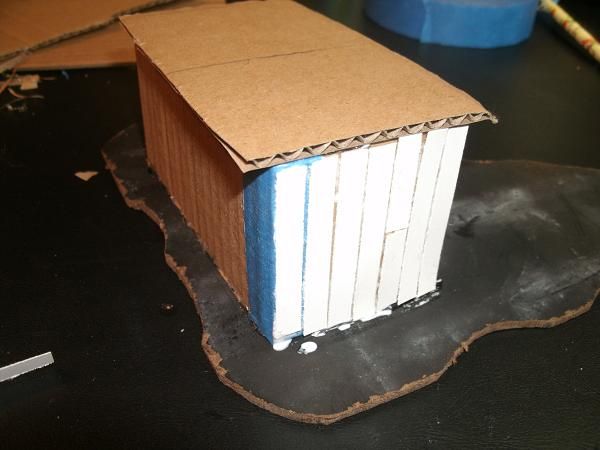
 So here is a shot of the main building material, which is just card stock paper that I ran through my shredder. My shredder will also handle thicker material like the thinner card from some cereal boxes and other packaging. The shredder makes this part easy, but cutting it by hand wont add too much time, but a bit anyway. If you do have a shredder that cut paper into 1/4 inch thickness, another tip is to mark your paper in 2 inch increments (or whatever length you need) this way after you run it through the printer everything is already marked.


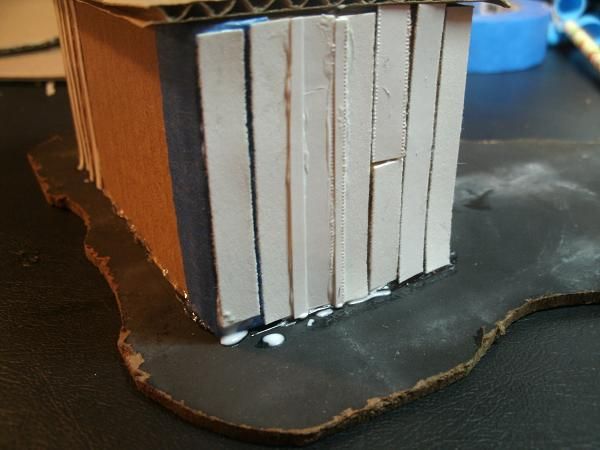
After cutting your paper start gluing it to the sides of the building. Be sure to leave some small cracks between the boards. Every once in a while you might try cutting a piece in half to make the board look like two joined pieces.


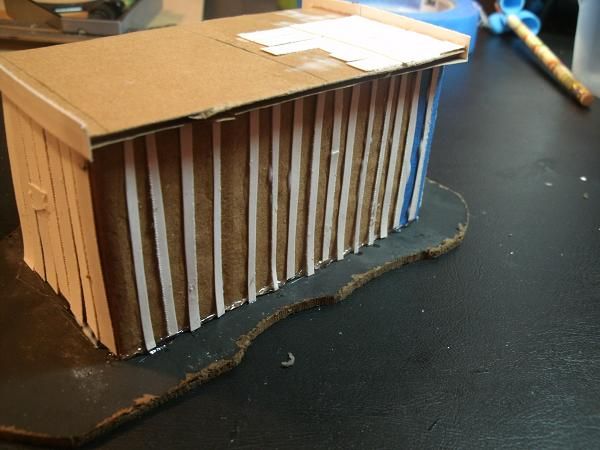
 Next I wanted to show a construction technique that involves overlapping boards. The cracks of the first planks are covered with smaller strips to seal the cracks in the building. I just did two on this side so that when I do the backside it will give the latter the illusion of being constructed using the same method.


Here is the back side of the building and as you can see, I didn't glue the first set of planks on. Instead I just glued the small strips on the entire back of the shack and it makes it look like the side, but in better shape. I just use the ribs of the cardboard as a guide since they are spaced at 1/4" also.


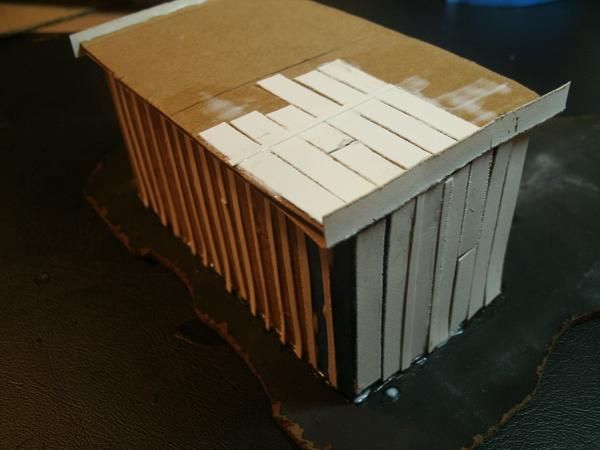
All finished up with the back side, and the second side of the building. I have also glued a couple of strips of paper up on the sides of the roof piece to cover up the corrugated cardboard that was showing. I have also started gluing a few strips of paper on the roof that will be exposed planks on the roof.


 Just a much better shot of the roof planks, and the cross piece that once held the tar paper in place. The side planks on the roof are a bit big as you can see. I was waiting for the glue to dry and when it finally dried, I then simply shaved off the excess with a box knife.


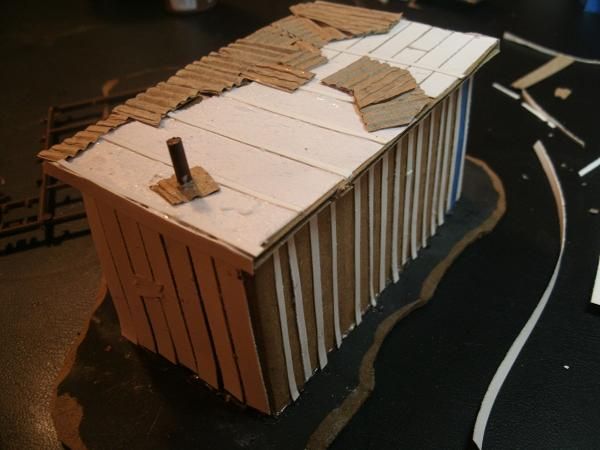
Then I added another bit to the roof. This piece is going to be tar paper. It was the paper from a piece of foam board paper that was in my scrap box. I picked at the edges a bit to give it that torn look, and then scraped off any remaining foam and glued it rough side up.


After the tar paper I put some strips on top to represent the boards holding it down. Then I drilled a hole in the roof and used a bit of plastic sprue to make the stove pipe. You can use anything round for this, bamboo skewer cut to size, juice straw etc. I glued it in place along with a piece of single sided cardboard. The rest of the roof I covered the best I could with bits of SSC.


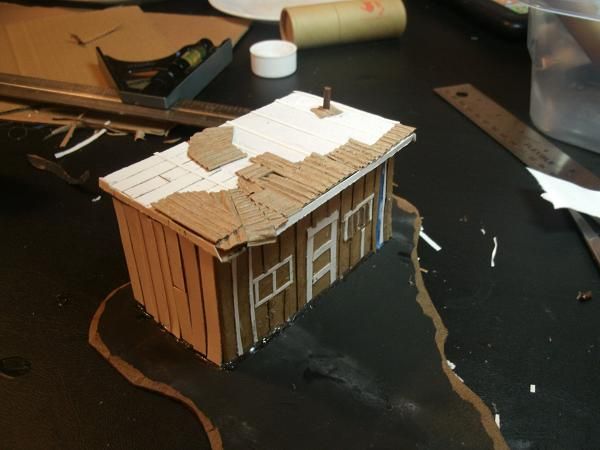
Next I tackled the front of the building. First I started with the door and window frames and then the bits to finish them off. Again, these are just strips of paper glued into rectangle shapes. The right window is covered up with some SSC, as if the windows had been knocked out or shattered at some point. The left window I left intact. After this I finished it off by putting in the strips that will be the smaller boards covering up the cracks in the planks.


I finished the piece of by adding an outhouse and then using a pen to scribble some wood grain on the planks. It's a bit hard to make out in this picture, but I just used a black pen and drew lines up and down any parts that are going to be painted as wood.


At this point I think I have approximately an hour and a half (at the most) into the piece. Tomorrow I will flock the base and seal that, then paint it brown. After that, maybe this weekend I will paint it. I'll do a part 2 in case anyone is interested in seeing it through to completion.

Later.

Monday, February 10, 2014

My Depression Era Hooverville


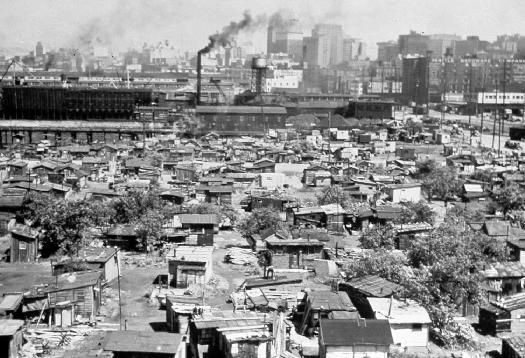
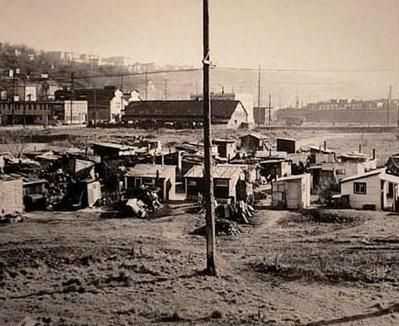
What exactly is a Hooverville? They were shanty towns constructed in the 1930's after the stock market crash in 1929. They popped up all over the country as people lost their jobs and a steady income. These new shanty towns soon came to be named after President Hoover, who refused to use the Federal govt. or create govt. ran programs to help those in need or to stimulate the economy, believing that eventually the market and economy would fix itself.


Many people lost everything due to the stock market crash, the house, the car, all of their money. Eventually many of them ended up cobbling together "housing" from what scraps they could manage to nail together. Many lived in tents, or under tarps really. Some Hooverville inhabitants didn't even bother to build shacks, but simply burrowed into the sides of hills and
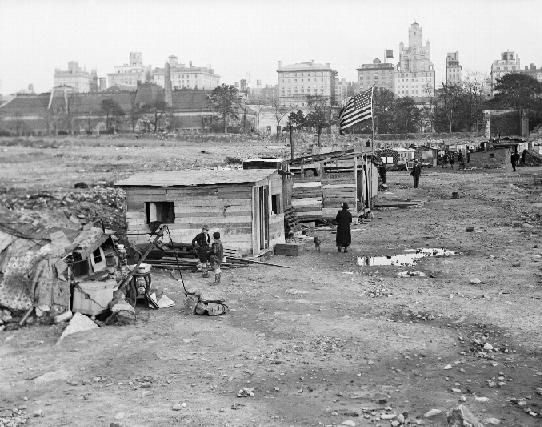
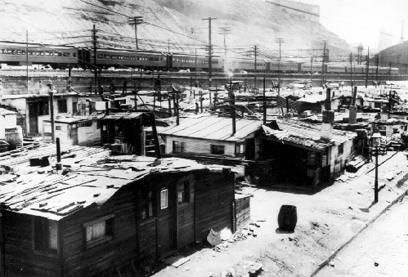
lived in small burrows. As time went on these houses became a little more elaborate. Some people, especially masons managed to build some rather nice brick houses instead of the usual wood framed shacks that were rather ubiquitous. Most of these shacks were built using very simple techniques using milled lumber, plywood, tar paper and occasionally corrugated tin. Hooverville's varied in size, like the one on the right which is pretty small compared to the one above, which was located in Seattle and quite extensive. Whatever the size, these shanty towns shared many features. There was no trash service so trash and junk ended up just being dumped wherever, and after a while many started to look a like junkyards or the city dump. No running water, open latrines, and no utilities obviously. Some had hand dug wells, but given the poor sanitation this water wasn't really fit to drink. In fact there were many disease outbreaks, typhoid, yphus etc, that hadn't seen large outbreaks in the US for a while. The Hooverville in Oklahoma City was a great  exception to the poor sanitation general rule. After a couple of outbreaks, the city installed clean drinking water and bathroom facilities. Then turned around a few months later and had them removed, based on the theory that providing such amenities would encourage more people to live in the Hooverville and keep those who currently lived there from looking for work.

Most of these shacks were reported to only have outside walls, and if the inhabitants were lucky they might have been able to acquire some tar paper to keep the roof from leaking and the wind from blowing in through the cracks between the boards. As you can see in the picture on the left, most seemed to at least have a potbelly stove to provide warmth and a means to cook. Still, people died from exposure, starvation and I am sure from despair.


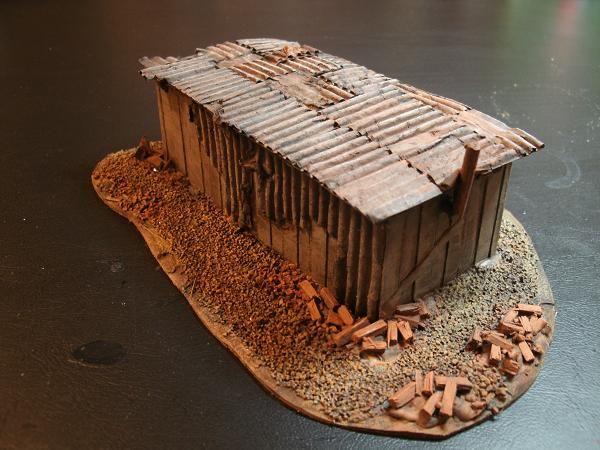
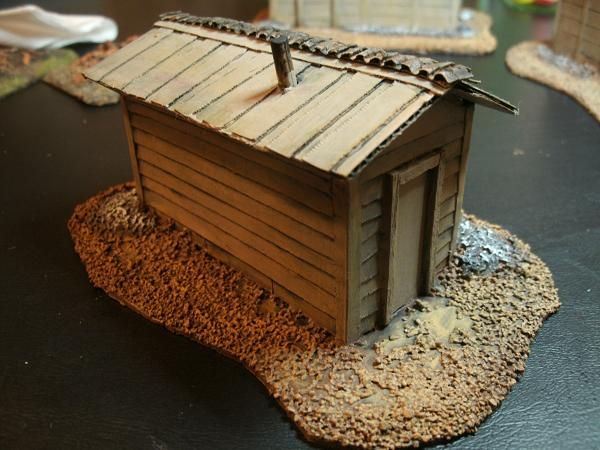
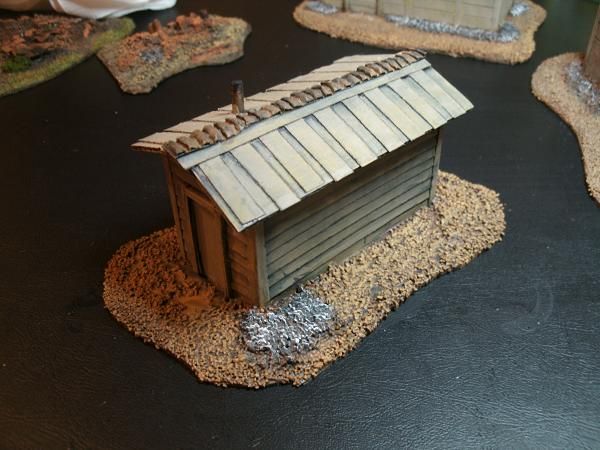
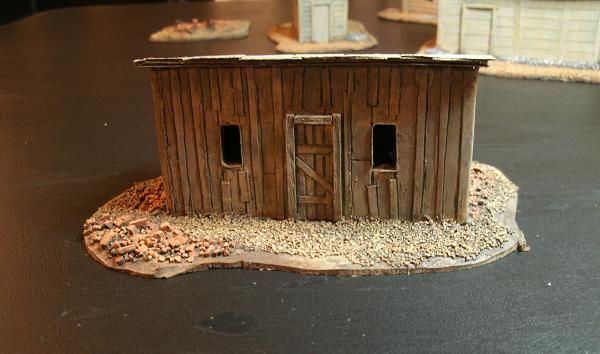
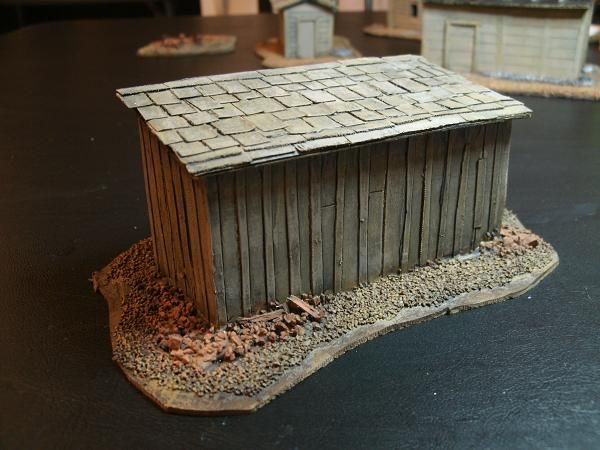
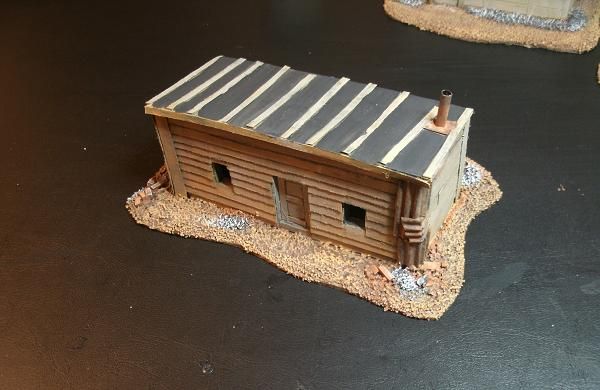
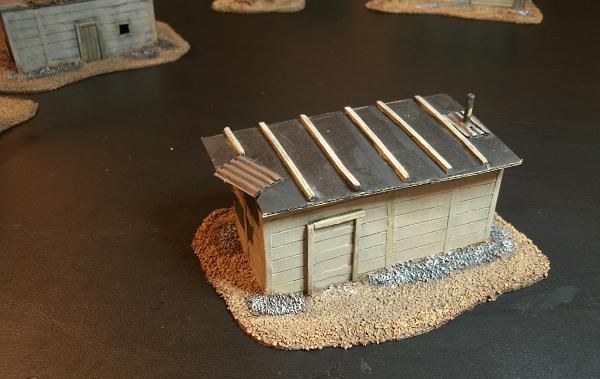
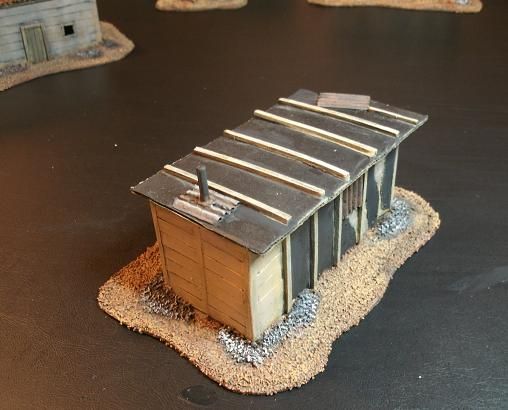
For any game taking place in the US during the 1930's a Hooverville is a must have. So toward this end I started working on a project to build my own. Originally I wanted to do at least a dozen shacks, but I lost steam after the seventh building and just decided to throw in some tents and junk piles to fill things in a bit. First I spent a week or so staring at these pictures and trying to figure out some basic building styles and materials. Then I went to town, and started putting some buildings together. I wanted to try out some different building techniques, that I hoped would be a little faster than some of the other buildings I have done in the past. I settled on using mainly cardboard. I made a simple rectangular shape, then put in a slightly slanted roof in most cases. To try and capture the variability I built a few that used the wall boards as slats and a few to look like clapboard construction. This was done by using 1/4 inch strips of paper and gluing the vertical or horizontally and the construction method dictated. Then I ended up covering a few random areas with card stock, that I later painted black, for tar paper. On a few the vertical boards were covered with another set of boards covering the cracks. The roofs are the same way for the most part. Boards, covered with tar paper, corrugated tin and in one case wood shingles. 

On the outside there are brick piles, broken bricks (shattered bed heaters), and ash dumping piles scattered around randomly outside the shacks.


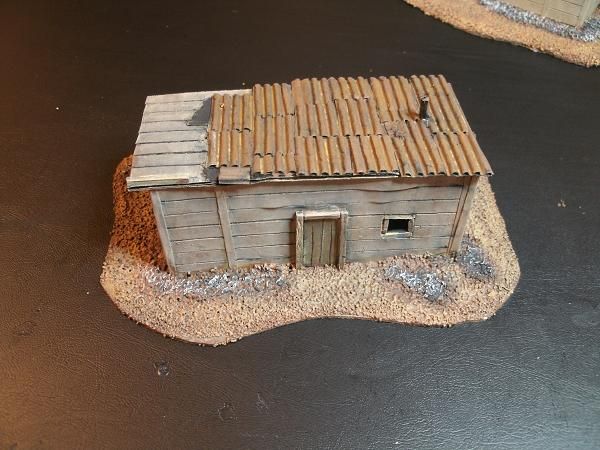
Shack number one has partial but rather rusty tin roof. One small window provides light, but who really needs extra windows when the cracks between the boards provides plenty of light.

House 2
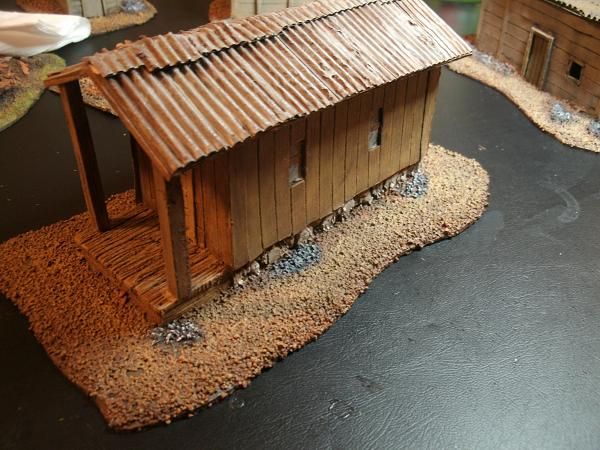
House number two is one the fancier shacks, verging on almost being a house. This is because I intend to use it as a railroad building as well.


House 2
It has a crude stone foundation, a porch, glass windows and a tin roofs. I really want to find a 1/48 scale rocking chair for the porch.


House 2


House 3
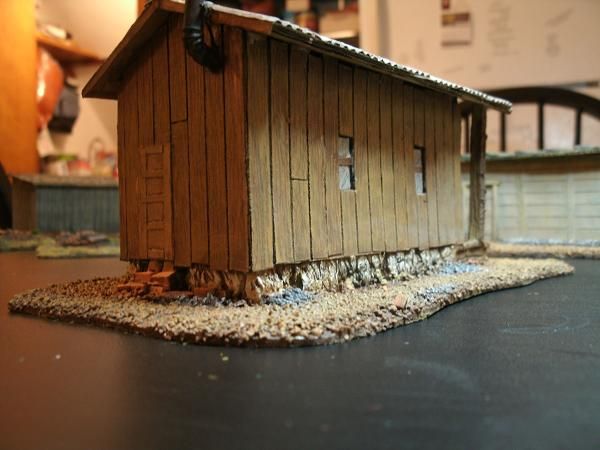
House number three has quite a bit of corrugated tin, covering mostly the roof but also some of the back.


House 3
Quite a few brick and ash piles outside. The outside edge is bare of ballast flocking as I had intended to flock them with grass but I thought it might now look a little odd, as all I have for a gaming mat is a brown blanket.

House 3
The front door is haphazardly nailed together and the window were knocked out. It used to have windows, but apparently I forgot to glue them in place and they were just sitting there. So when I went to paint them I pushed them into the building, of which the interior in not accessible as they are rather small. Probably to small to put more than a few miniatures inside. I had intended to put a miniatures next to them for scale, but forgot to do that to. Forgetting, the theme of my life.


House 4
House four is a really small shack with a single window in the back. The general construction method is clapboard, while the roof is some hot board on board (originally I typed broad on broad, but that is something else entirely), with the peak covered with some tin scraps.


House 4


House 5
House five has some more board on board action, with a wood shingle roof.

House 5


House 6

House six is clapboard with a few bits of tin holding the corners together. The roof is covered with tar paper and the occasional board to hold it down.


House 7

House seven, tar paper roof with some tin around the stove pipe, a little tar paper covering the back walls.


Are you staring at my junk?

Last, but not least, some junk piles, you gotta have some trash laying about. I also have some bits that I picked up from the local train store that sells O scale scenic elements, but more on them later.

Hopefully in the future I will get the bug and build at least a few more shacks and junk piles. For now though, these will work and can't wait to have a skirmish or two at the local Hooverville.

Tuesday, February 4, 2014

Sand Pebbles 28mm Naval Shore Patrol


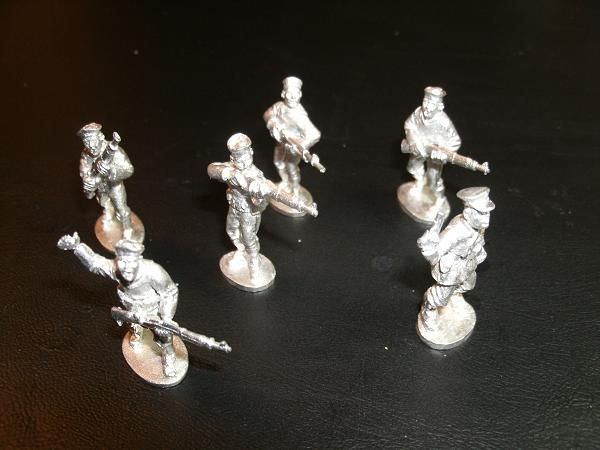
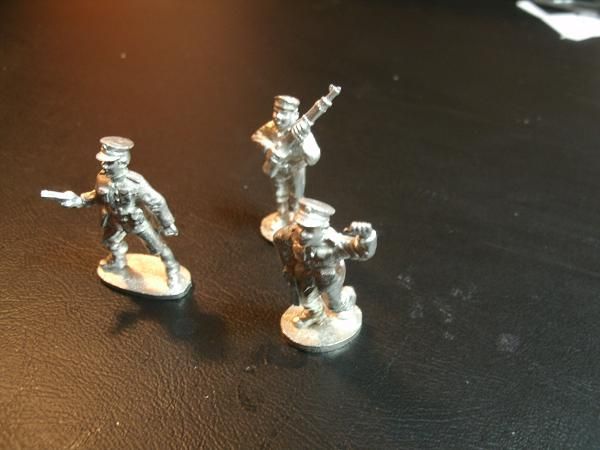
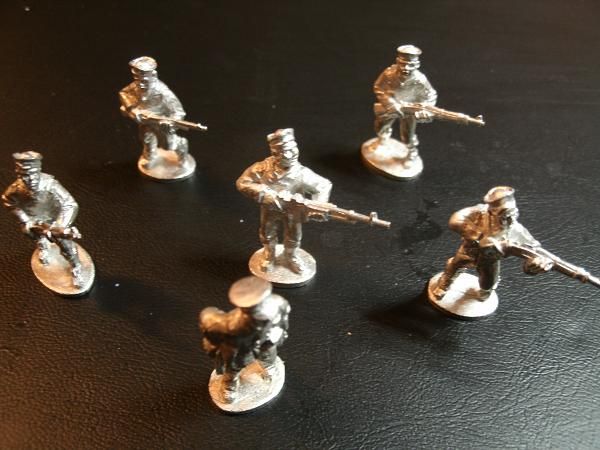
To add some forces to the White faction (Federal forces loyal to FDR) in my VACW game. I recently ordered some Sand Pebbles miniatures from Recreational Conflict. If I'm not mistaken the miniatures are made by Tiger miniatures, a U.K. company. The Sand Pebble miniatures are US sailors from the 1920's and are based on the movie Sand Pebbles. I had planned to use them as a later addition to the campaign as second platoon to back up some US Marines. Now the Jar Heads are on hold, but I hope to have them soon, if not they may get worked in faster than excepted.

Fortunately for me I have a color picture of US interwar sailors from the book A World Aflame, to work off of when painting. Not to mention the 1966 movie on which the Sand Pebbles miniatures are based. On the downside it is still cold as $h!t here and is about to start snowing again. So spray priming probably won't be on the agenda any time soon.

A few quick pics. I have them sorted into two sections and the command team. This is roughly how I will use them. Maybe dropping the third guy from the command section if playing Bolt Action to take advantage of the Small Unit rule. Each section has an NCO, the guy with the pistol and a BAR.


The miniatures are very well cast with little flash or mold lines. Size wise, they are a bit bulkier than my Wargames Factory miniatures but not any bigger than my Bolt Action plastic Americans.


Also just wanted to say that Recreational Conflict has some excellent miniatures, many that I haven't seen anywhere else. The American Siberian Expedition miniatures I think are especially cool and I have my beady little eye on. They also have (last I looked) very cheap Lledo vehicles which scale pretty well with 28mm miniatures. Not to mention, excellent service!