Showing posts with label Warlord Games. Show all posts

Sunday, September 15, 2013

.50 Cal Jeep

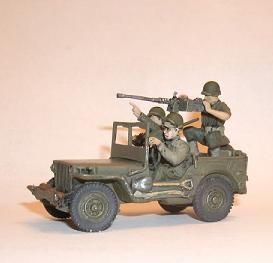
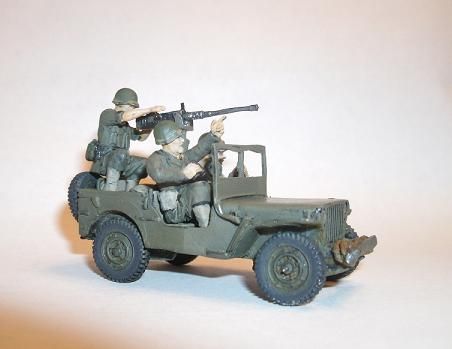
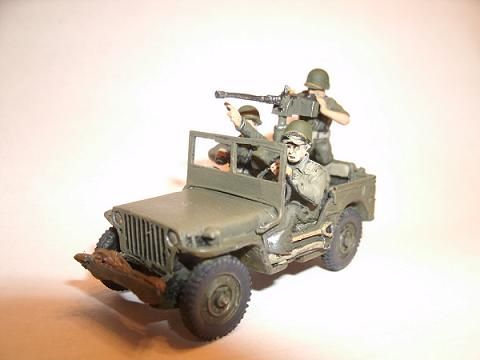
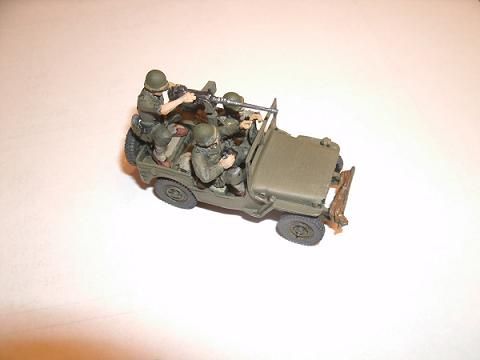
I finally got around to putting together my U.S. jeep by Warlord Games that I bought over a year ago. It was something that I just love the look of, but because my U.S. force languished while I worked on my Germans and Soviets, it just got put aside.When my 2 1/2 ton truck arrived after being on back order for six months I dug my jeep out again and put both of the vehicles together. Then I left both of them sitting on the shelf all summer unpainted.

"Sir, Alpha Company reports that they have discovered an intact wine cellar at a Chateau just up the road"

The assembly was very easy and took about 15 minutes. Which left me wondering why I hadn't gotten to doing this earlier. The kit comes with a driver and nothing else. So I looked around the internet trying to find some extra crew because it looked rather empty. I found some good vehicle figures at Old Glory Miniatures from Westwind's, Berlin or Bust line of figures. I was going to order these, but life was so hectic this summer I just never go around to it. So later in the summer, in an effort to get some stuff finished and put away I started chopping up some of my extra figs from my War Games Factory Americans.


"Private, get to that wine cellar before those bastards drink all of the good stuff"

I had to remove the legs with an exacto knife and reposition them so that I could get them into the jeep. Overall the figs were a good size match for the jeep and look pretty good. The gunner is loading the .50 cal in preparation to fire, while the commander is holding his binocs in one hand and pointing to something with the other.

"load that .50 cal soldier, I want anyone who touches the 1921 Conti before I arrive shot"

The .50 cal is from Company B and was pretty easy to mount. The driver I altered slightly by sawing off the top of his knit cap and sticking a helmet over the top of it. This was it looks as if it is about to fall off, or he has it sitting on top of his head as if so he can hear the radio chatter over the walkie talkie better. I then also removed the rifle from his right hand and added a walkie talkie using green stuff and a little wire.  As usual, the painting is mediocre and the photos are atrocious.


Perhaps some day the U.S. decals that I ordered though my LGS and Warlord Games will come in and I can pretty up some of my American Vehicles. However, I have pretty much just given up hope that these will materialize before I drop dead.

Thursday, June 20, 2013

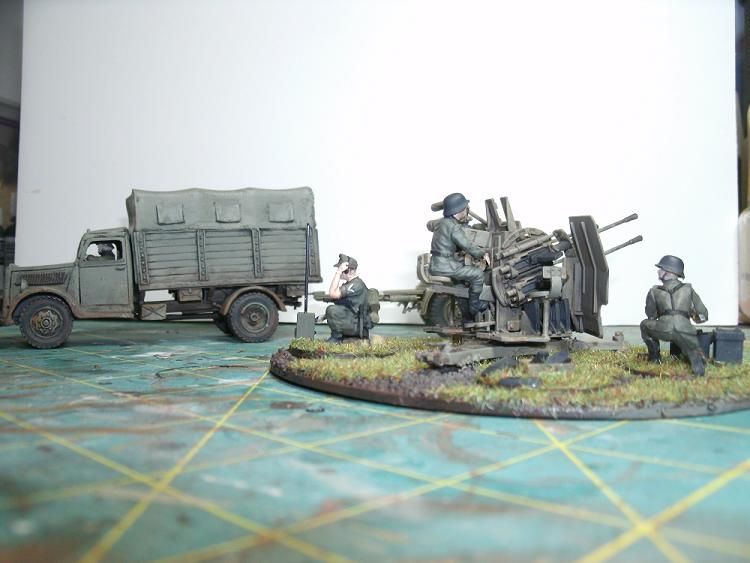
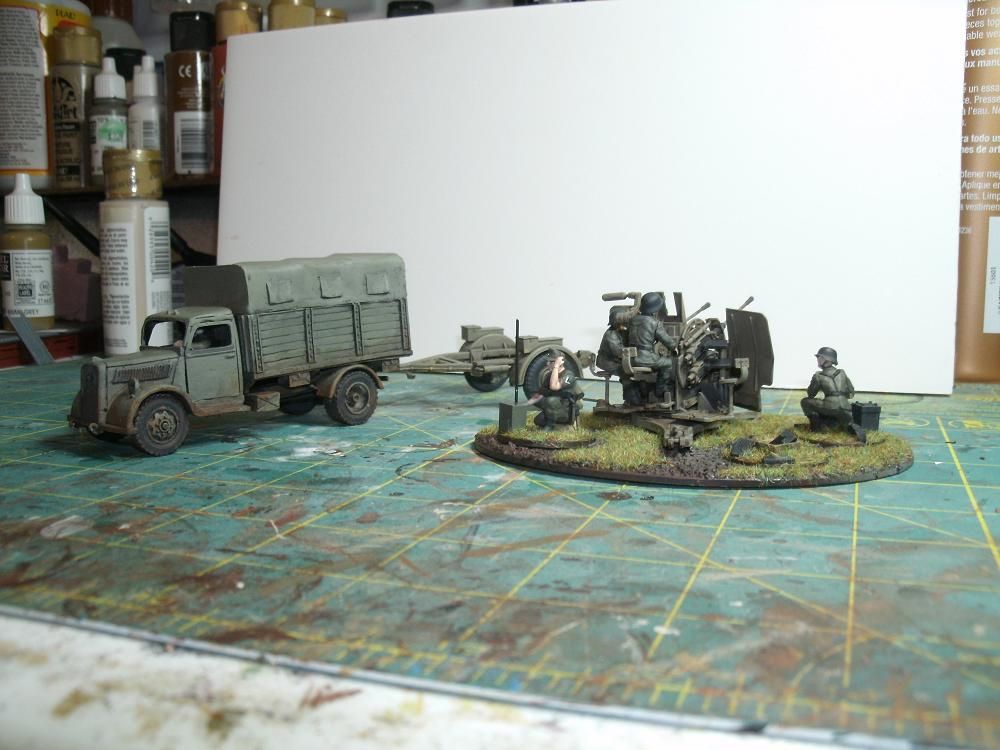
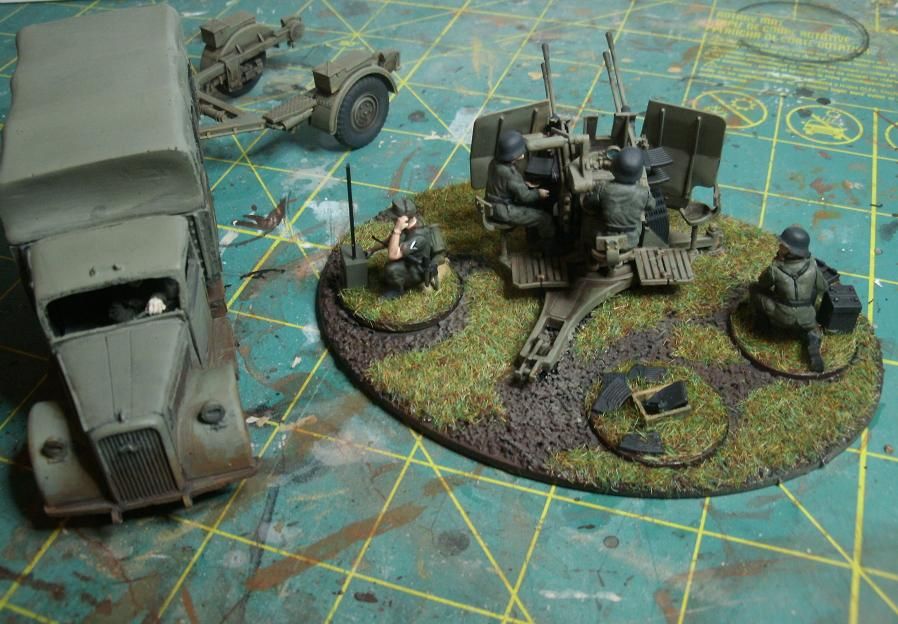
Flakvierling 38 and Opel Blitz

A short one for today. This are two models that I did a couple of months back for my German Army. They are still one of my favorite units as far as modelling and painting goes. Both turned out really nice and have gotten a fair bit of use. Occassionally the Blitz gets used for transporting my infantry, but it's main job is towing the Flak 38.


The Flak 38 is a Tamiya model that I got on sale for $10.00 and though it had a good number of pieces it really wasn't that difficult to put together. The Opel Blitz in from Warlord Games and was easy to assemble and paint and looks great. However the amount of time involved is a good 3-4 hours. Oddly enough the Opel Blitz hitch and the trailer for the Flak 38 actually hook together which is a nice bonus, even though the two models are different scales. Even though the two are different scales it is not that obvious. The trailer is slightly wider that the truck, which doesn't really bother me.


Also in the shot, between the Flak 38 and the Blitz is my German Observer. He was made out of a Wargames Factory body and extra arms, head and radio from the Tamiya kit. I particularly love the rolled up sleeves, and the hand painted rank actually turned out really well.


As far as the Bolt Action games rules go, the Flak 38 kind of gets the short end of the stick. Even though the gun shield is clearly visible on the model, there is no way in the rules to get a gun shield, and the gun shield rule for the Flak 38. So this unit is easier to kill than it should be. Also there seems to be some confusion in various forums as to how many shots this thing gets.

Friday, June 14, 2013

Soviet Specialist Teams


I have been working on my WW2 Soviet forces for a while now. They are in various states of…being. Few are done, but most of them are almost done. Part of the problem lies with my personal taste. I finished all but 12 soldiers from the Plastic Soldier Company box. Then by the time I got around to painting the last dozen soldiers I had lost my painting guide and the finished soldiers were boxed up and buried amongst the debris of my work area. So I went from memory and painted the dirty dozen I had left. After I finished I then dug out the rest of their comrades. This was when I discovered that my memory was faulty and I had mis-remembered the color that I had painted the uniforms. I decided to just dry brush the last bunch to help them match, and maybe look as though they were veterans with stained, discolored or otherwise dirty uniforms. Long story short, the dirty dozen ended up looking way better than the original guys and so I decided to repaint the 40 some others to match. However, I just haven’t had the energy to get around to redoing so much work, and so while they bulk of my infantry languishes on the shelf. I have working on some of the special teams that I have acquired for my Soviet forces.

So with the imminent release of more Soviet troops, this time from Wargames Factory, who’s other WW2, especially the Germans I really like, I figured I should get things moving. I know that at this point I should probably just skip the new Soviets box, but I know that I won’t. After all, the PSC models are early war, and the Wargames Factory models are late war. So clearly, I am going to NEED both sets if I am going to have enough options adequately play the Soviets, because I am going to NEED an early war force and I will NEED a late war force. Okay, now that I have rationalized that, let move on to what I have done so far. 

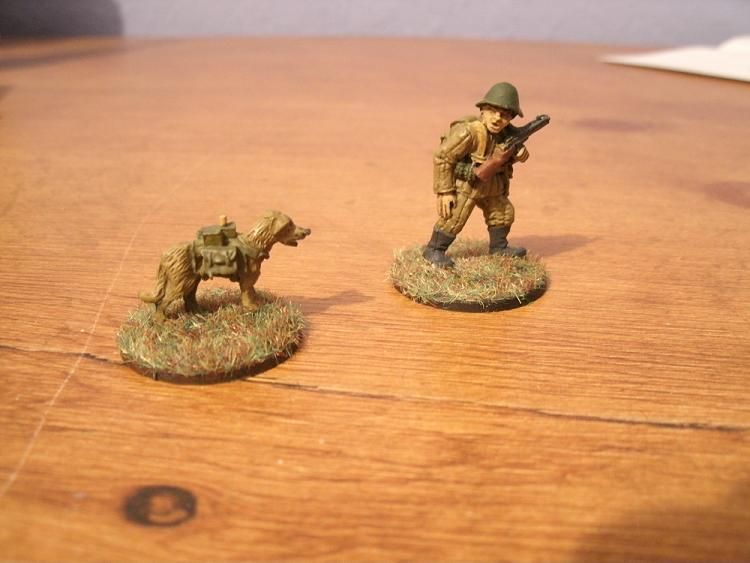
For me one of the most interesting teams fielded by the Soviets would be the anti-tank dog teams. What’s not to love really? The testing of man and dogs status as best friends by blowing the latter to smithereens; the sheer audacity of any plan that involves strapping explosives to an animal and having any, and I mean ANY expectation that things just might go as planned; not to mention the whole thing makes the sphincters of animal lovers the world over pucker right up. 

I have a better Idea, how about you go fetch the Tiger I you crazy...


As far as the game mechanics for this unit in Bolt Action, there is a good chance that you can unleash the dogs and nothing will happen. There is also a chance that you might blow up one of your own tanks or non-armored vehicles. Now this might bother some people, as some people just can’t seem to handle anything that does not mesh with their “Master Plan”, but it just makes me smile because I don’t have a master plan. So if I blow up my own T-34 I am just going to laugh, then hope that my opponent FUBAR’s and blows up his own Panther, or Puma.

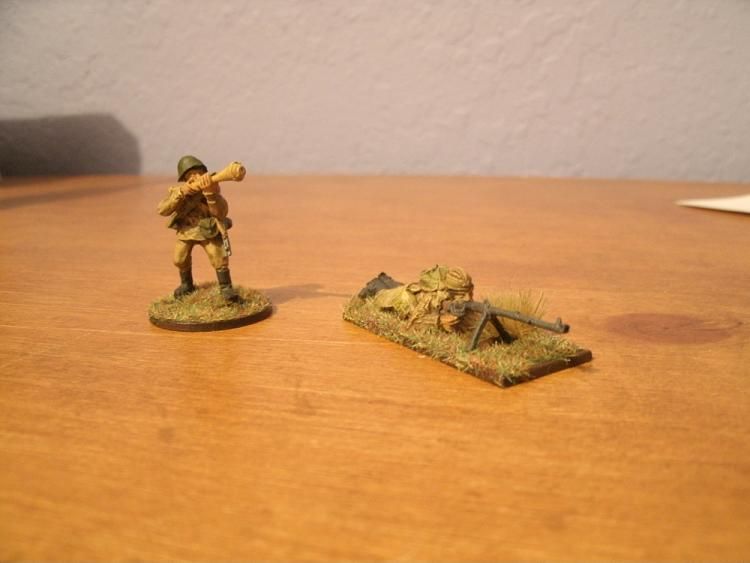
My biggest complaint about the anti-tank teams pack that I got from Warlord Games only comes with one bomb dog and two handlers, and the unit in the Soviet Army book requires two dogs per team. So I am one dog short of a full team. Sure, I could buy another pack, and then I would have four handlers and two dogs. Though I suppose I could use the extra guys as grunts. However my plan was to acquire some dog miniatures and then make some explosive packs out of green stuff. This way I could have plenty of dogs, as well as some variety in the dogs, as I think Warlord Games just makes the one dog. So after some looking around I found some dogs at Sgt. Major Miniatures that I like, well actually some wolves but I think they would work well for this project. I am thinking to paint them up to look like Siberian Huskies. I like the Mastiff’s as well, but I am not sure that I really want to use such a big dog for this project.  Given that you can take up to three anti-tank teams for each selection in the Soviet book, I am thinking I might get two packs, or try to find some more dog miniatures. Maybe somebody makes a Dachshund that I could convert into a bomb dog, death by wiener dog. Anyway, that’s the plan for building up my Anti-tank bomb dogs from this humble beginning. 


These guys also came with the anti-tank team pack but they are not nearly as interesting as exploding dogs. Maybe more useful and dependable but certainly not as interesting. 


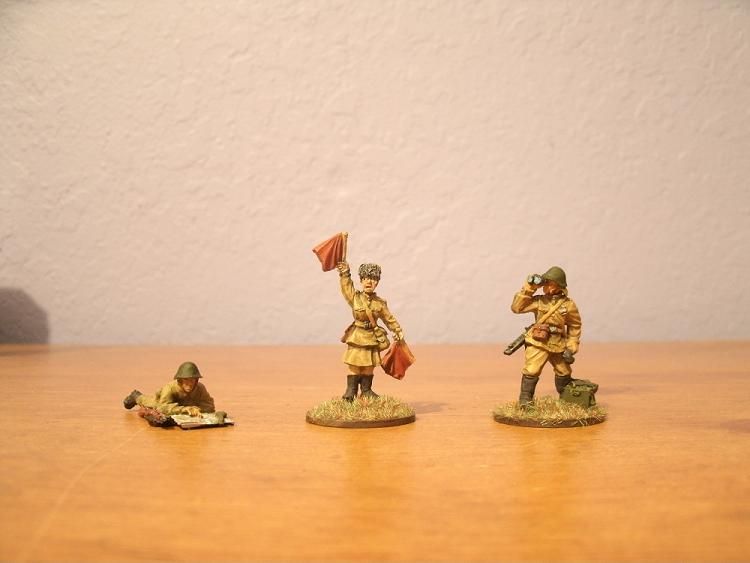
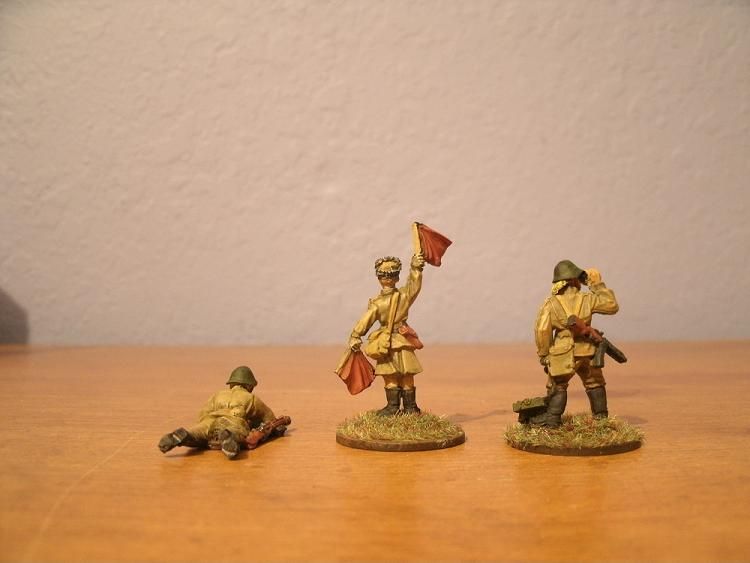
The second group that I have finished are the Forward Observers. This pack contains three figures for use as spotters and observers or whatever you want to use them as. I really like the figure with the semaphore flags. The other two figures are also pretty nice. The one on the left is laying down and checking out his map before you calls in that artillery barrage. Knowing how I roll, it will probably result in the death of half of my forces. The figure on the right has a field phone and set of binoculars. The heads are inter-changeable, and can be used on any of the figures.
Thursday, June 13, 2013

Dead Livestock


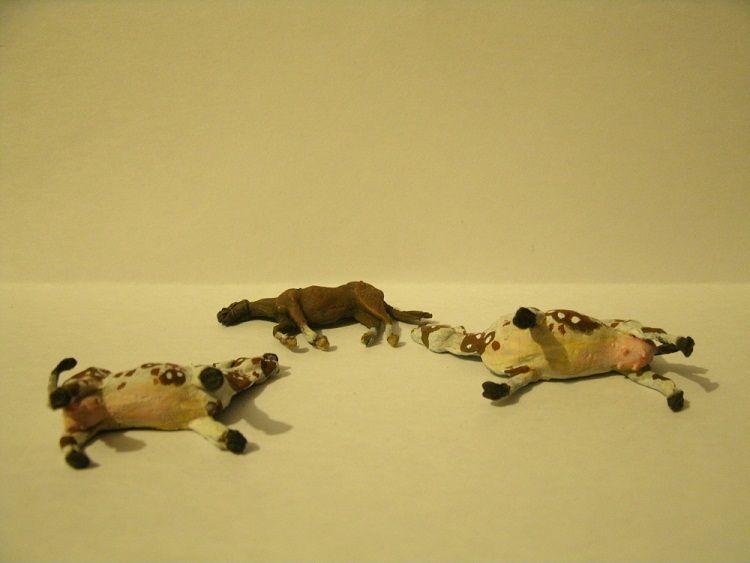
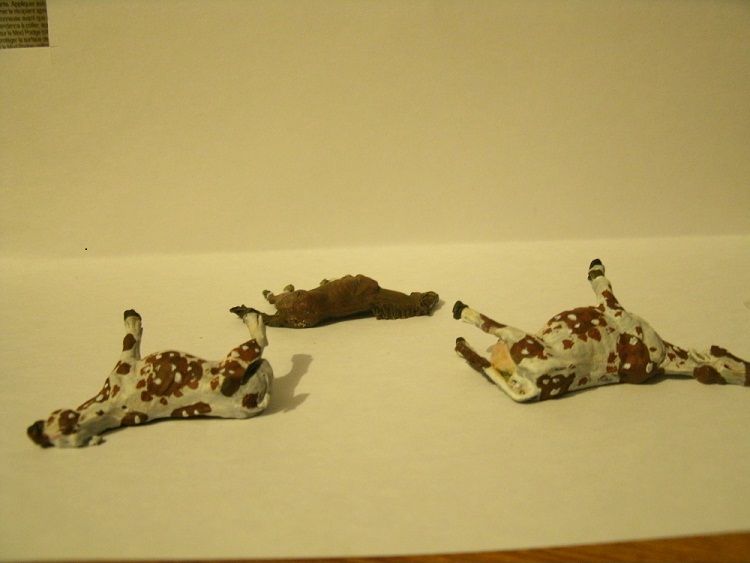
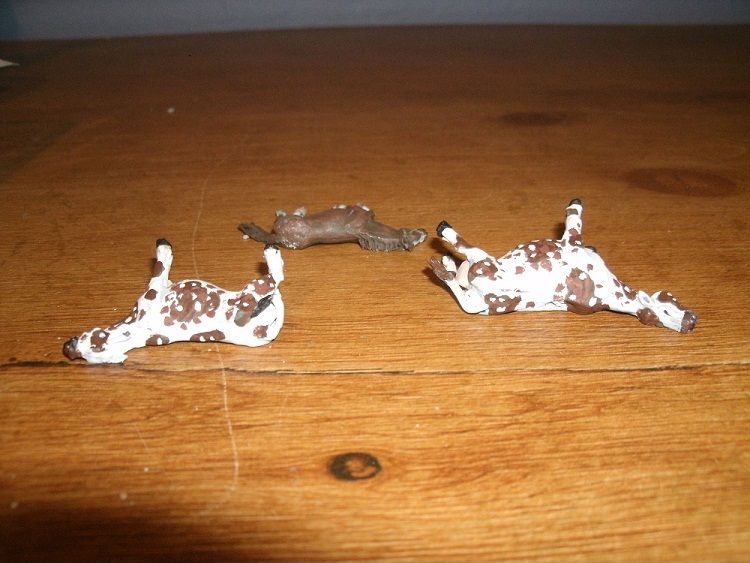
These are a recent purchase from Warlord Games that I have wanted for some time and finally picked up. There as some pretty famous pictures of dead livestock in the Normandy area during or after the D-day invasion. The Allied bombing campaign prior to D-day was pretty intense and took a heavy toll on the livestock of the region, especially the Normande breed of cattle that was nearly wiped out as a result. I thought that these would be a great addition to the gaming table. While not your ordinary terrain, to be sure,they look good in any skirmish game.

 I thought that as terrain they should have an impact on game play. So I have been tossing around some ideas, and for Bolt Action I think I am going to classify them as an obstacle that does not provide any cover. This way you just have to move around them, and they are just minor annoyances, but still something to be considered. 


The blister contained three models, a horse and two cows. The models are made of white metal and are well cast. There is not much flash in general but there is a lot of small bits on the hooves that are easy to overlook, as I did. I primed them and then started painted before I discovered these and so had to redo a little bit of painting. 

Painting was pretty straight forward. The horse I decided to paint brown and give him white socks, a white blaze on the nose, and some white mottling on his hind quarter. If you are not familiar with horses, perhaps because you were not raised by a horse fanatic who taught you to ride before you ever attending school, then you might appreciate some further information. Wikipedia, as always, has some basic information to help you with painting your own Horses, Horse Markings.  As for the cows, well there are some 800 breeds and vary quite a bit. So we have to focus in a bit more and look at dairy cows from the Normandy region. They have a particular type names Normande Cattle that are pretty common in the region, and the site linked to gives some pretty good pictures of what they look like, as well as the variety. Basically, these buggers are white with brown splotches, although these splotches can also be black. They are also many examples of the splotches being a mottled brown and black and white.. So I went the easy route and just made them white and brown, call me lazy. The other details are pretty simple. Paint the eyes, tip of the nose and lips black, with a small white dot in the corner so they look like they are reflecting light. The inside of the mouth, tongue and nostrils I painted pink. The underbelly I painted Vallejo Medium Flesh, the painted over the center of this with a coat of Vallejo Light Flesh. Then I put a thin was of pink on the udders. After that dried I painted the whole thing over with a wash of white and tried to blend it in with the white hair on the rest of the hide. The hooves are painted painted black.


Wow, can’t believe I just did a tutorial on how to paint cows, even if they are dead. 

If you want, you might add some dried blood, depending on how gory you like things. Then dull coat varnish the whole thing to seal it. After that I was thinking to do a satin finish on the horse to give it a shiny coat and maybe a bit of gloss varnish on the eyes to give them that glassy look.

Tuesday, May 14, 2013

Sd.Kfz 222


by Warlord Games

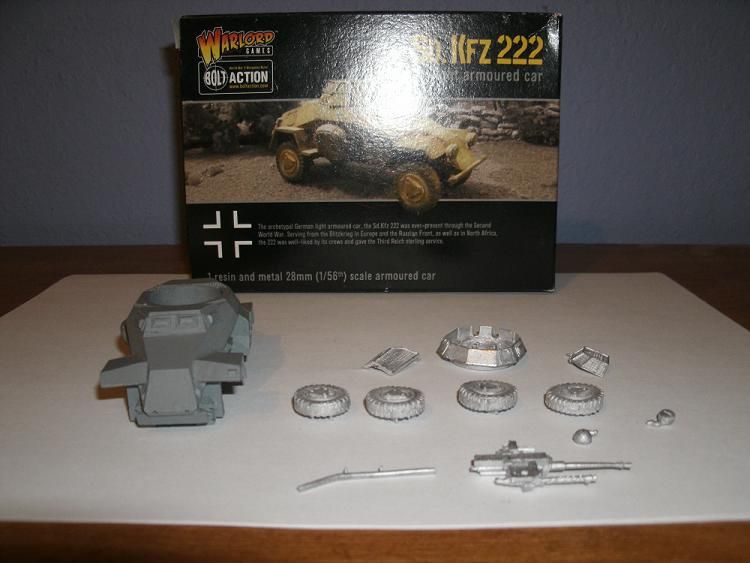
I purchased this model just over a week ago as I lacked any recon vehicle for my Bolt Action German forces. Sure I could have gone with a Puma or an 8RAD but the 222 was a more common vehicle and saw widespread use.


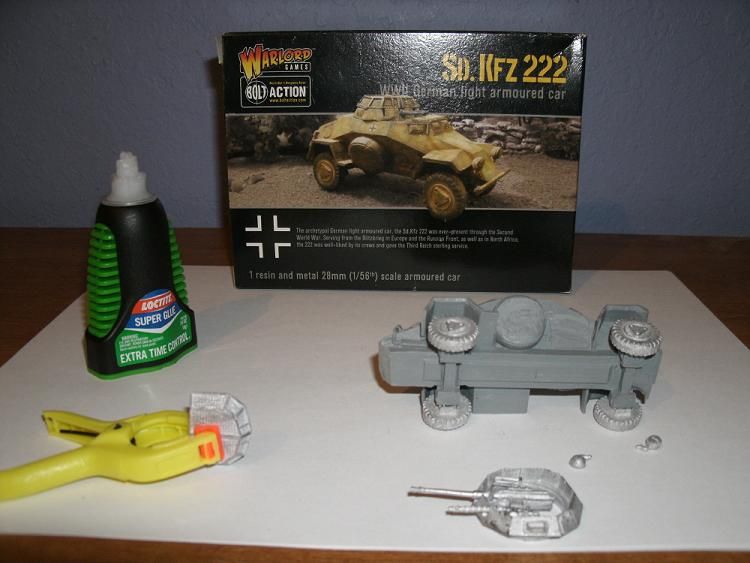
The white metal parts had very little flash and I had them cleaned up in just a few minutes. The resin hull had no defects that I was able to detect. Construction was pretty straight forward and was made even easier by the assembly guide for the model on Warlord’s web site. Wheels went on no problem but the way the model is constructed they can only be put on one way and cannot be turned.


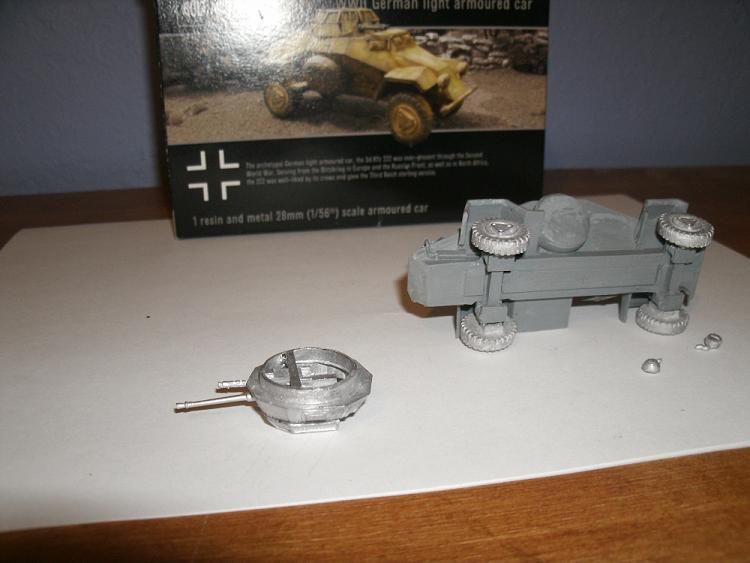
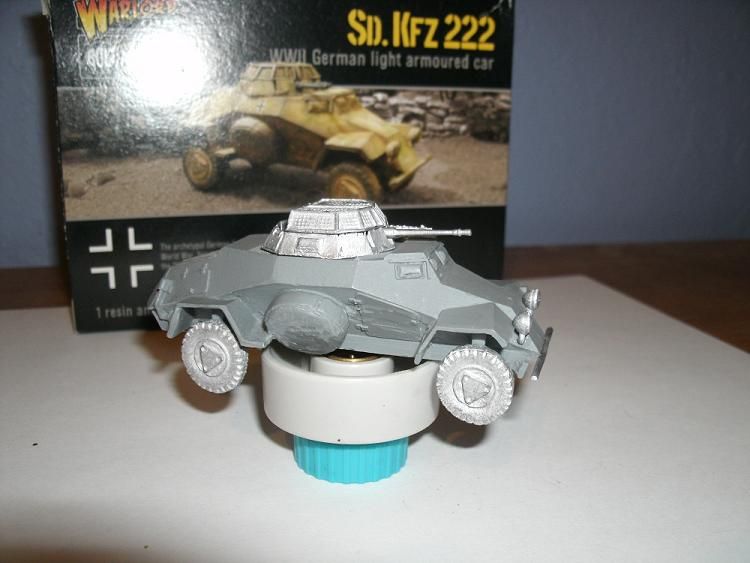
The trickiest part of building the model was gluing the wire mesh hatches together and then to the turret. This was easily enough done by clamping the two halves together while the glue dried. Then I figured out that the turret stayed together better when it was flipped over, and then I simply left it to dry, as shown in the picture below.


Total, it took me 20 minutes to put the model together. This is one of, if not the fastest build of a model that I have done so far. So the 222 gets a big thumbs up in that department. The most difficult and frustrating part of the build was when I broke the tip off my bottle of super glue.


Here is the finished model, propped up the cap of my old (excuse me, I mean vintage) airbrush can adapter while the glue dries thoroughly. 


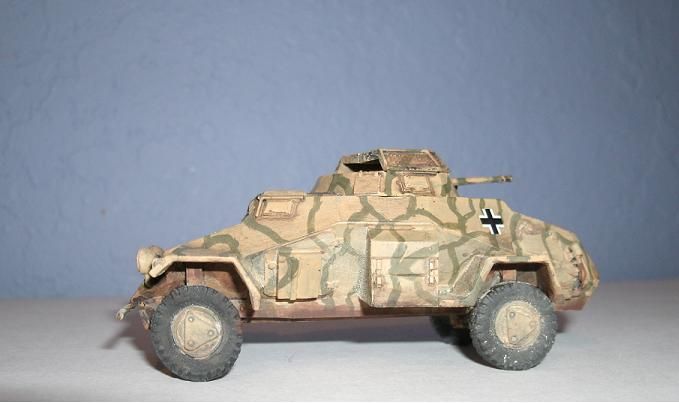
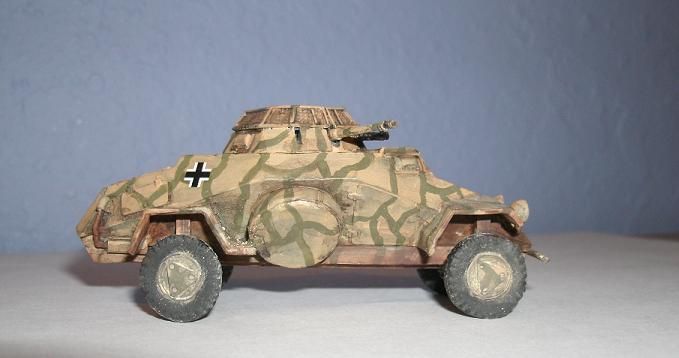
Later that night I primed the model and then went to bed. The next evening when I had time I gave it two coats of Vallejo Yellow Tan. After the base coat had dried I came back and painted the green camo, so that the vehicle would match my Sdkfz 251/1’s that I painted last month.  Once the green camo dried I gave it a light wash of dark brown the painted the under carriage dark brown to make the whole thing look a little muddy.  While that was drying I started looking around for pictures of how and what markings were done on these vehicles. Once the whole thing had dried, I applied the water slide decals as you see in the photos. I don’t currently have any license plates transfers that I can use on this thing, but I am hoping to get some soon. As a result, I have not given it a second was of dark brown. So the decals may look a little too bright and shiny at the moment.


I also recently purchased some Vallejo pigments and used them on the 222 to give it that dusty look. The results weren’t exactly as I had hoped and I will have to do some more research to learn how to use it more effectively, I hope.

I have to say again that this was one of the easiest and quickest builds that I have done so far. Twenty minutes to build and not much more time to paint if you don’t count drying time.

Tuesday, April 9, 2013

Sd.Kfz 251 Hanomag

Here are some pictures of my two 251/1 Hanomags. Number 1022 is the old Ausf. C variant, and the older Warlord resin model that I purchased a while back before the new plastic one became available. The second (317) is the Ausf. D variant, and the new Warlord plastic model. I am not really sure of the differences between the real vehicles, but the two models do have some differences. The older model is thinner and a bit taller than the new plastic one, again, not sure if this reflects actual differences or just differences between the sculpts. The gunner on the new plastic model was noticeably bigger than the old gunner model, but the new plastic infantry are bigger than the older metal models as well so that was expected. The gunner model in the Ausf. D variant is not the original one that came with the vehicle model. Instead, I used a War Games Factory model that I already had so that the two gunners would be closer in size. You may notice that in the rear shot of the Hanomags that the WGF guy is missing his equipment, as I still have a bit of work and touching up to do. 


Image

Image

Image
This is also my first attempt at German camouflage. I am working on some SS that have the Pea Dot camouflage as well. I had hoped to have them done by now, but now they will have to wait until I get back from my trip.


Image