![]() |
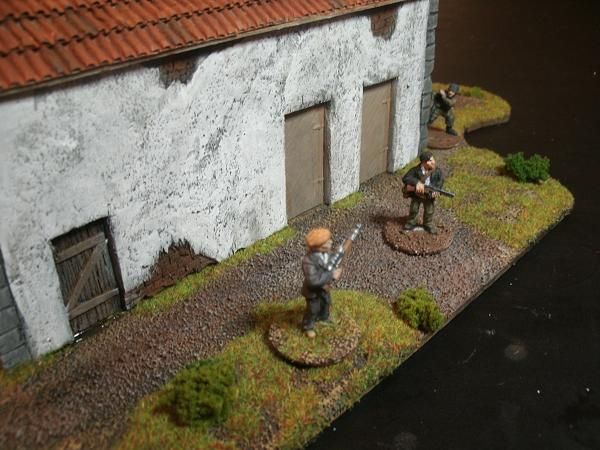
| Fritz takes a peak around the corner spotting the Greek Andartes who are guarding the tsipuro still. |
Showing posts with label buildings. Show all posts
Monday, March 31, 2014
Mediterranean Barn
Well, it's been one of those months. I worked on quite a bit of stuff done and actually got some of it done. Though it never seems like I dig myself out from under the pile of projects in the works. That's probably because I keep starting things, and never finishing them. So this post is dedicated to a project that I was totally excited about, jumped into without any planing and managed to get everything done, except flocking the base in a couple of days. Then I promptly set it on the shelf where it has sat since that day in early November. There were a few more things I had originally planned, like adding a broken down wagon to the dung pile behind the barn, paint the pigs a little better, but things can always be done later if I get in the mood. Right now, I am going to pronounce this done, even if it kinda isn't really...
Labels:
1/56,
28mm,
buildings,
Mediterranean,
Outbuilding
Wednesday, February 12, 2014
Hooverville Shack Tutorial: A Quick and Dirty Guide to Shabby Chic.
Well somebody asked, so here you go. A step by step guide to building shacks.
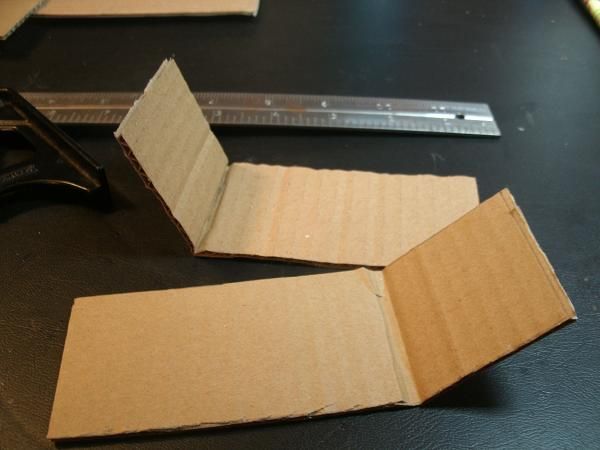
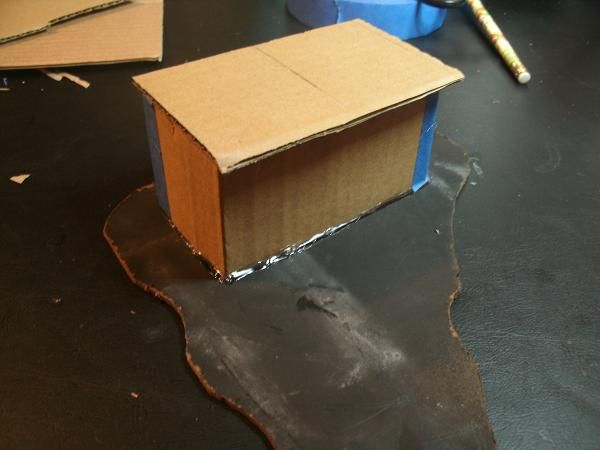
Here we have the humble beginnings of a shack. Two pieces of 2"x4"x6" cardboard, and pretty flimsy cardboard at that. You can also use a small box or foam board of the appropriate size. I am going to use cheap card board for this shack because I am not going to make the interior accessible. If you are wanting to go that route I think I would use something sturdier like the foam board.
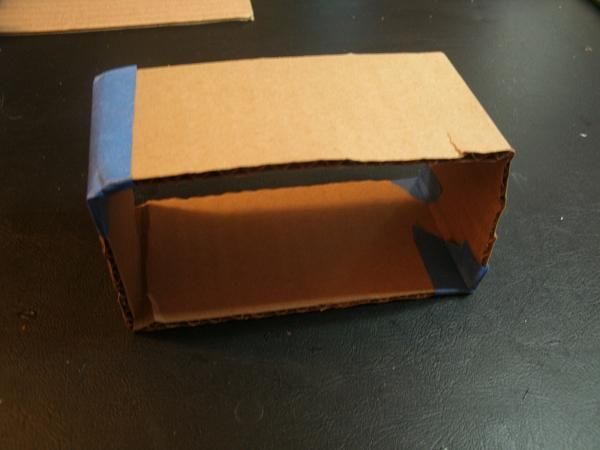
So then you tape the two pieces together to make your rectangle. Then I hit the inside corners with some hot glue to help it keep its shape and make it a little sturdier.
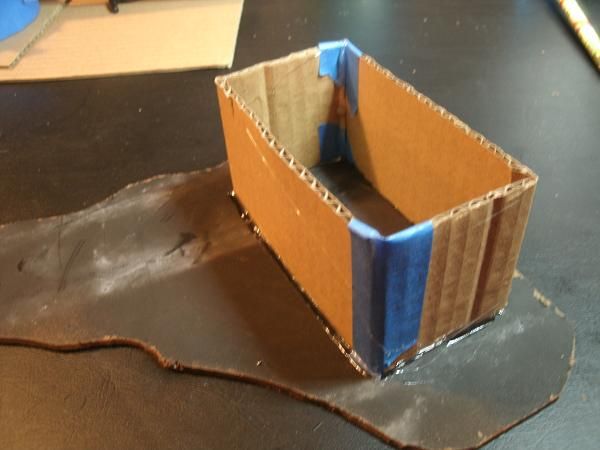
Then I hot glue it to the base, which is a piece of hardboard or fiberboard. After that I like to run the hot glue gun across the base of the outside to help keep it in place.
Again, this inside will not be accessible so I just hot glue the roof in place. The roof is another piece of cardboard that is slightly larger than the shack. Now the easy part is over, and we will get to work making it look like this thing is made out of wood planks and whatnot.
So here is a shot of the main building material, which is just card stock paper that I ran through my shredder. My shredder will also handle thicker material like the thinner card from some cereal boxes and other packaging. The shredder makes this part easy, but cutting it by hand wont add too much time, but a bit anyway. If you do have a shredder that cut paper into 1/4 inch thickness, another tip is to mark your paper in 2 inch increments (or whatever length you need) this way after you run it through the printer everything is already marked.
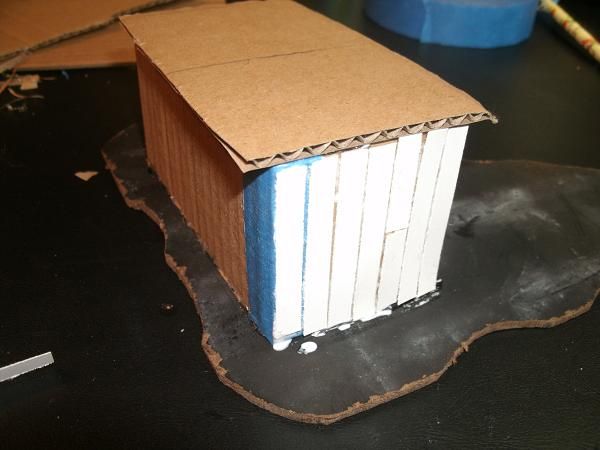
After cutting your paper start gluing it to the sides of the building. Be sure to leave some small cracks between the boards. Every once in a while you might try cutting a piece in half to make the board look like two joined pieces.
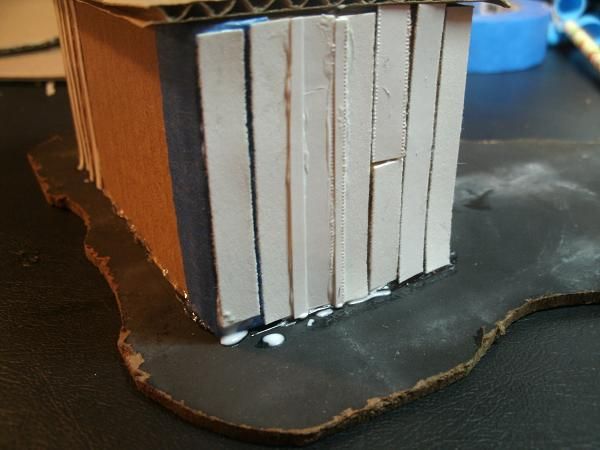
Next I wanted to show a construction technique that involves overlapping boards. The cracks of the first planks are covered with smaller strips to seal the cracks in the building. I just did two on this side so that when I do the backside it will give the latter the illusion of being constructed using the same method.
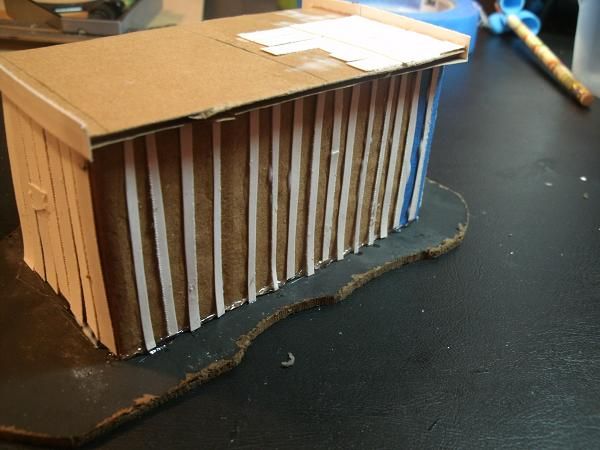
Here is the back side of the building and as you can see, I didn't glue the first set of planks on. Instead I just glued the small strips on the entire back of the shack and it makes it look like the side, but in better shape. I just use the ribs of the cardboard as a guide since they are spaced at 1/4" also.
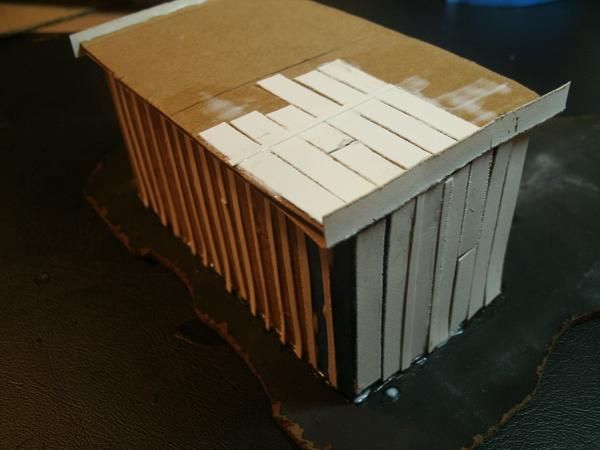
All finished up with the back side, and the second side of the building. I have also glued a couple of strips of paper up on the sides of the roof piece to cover up the corrugated cardboard that was showing. I have also started gluing a few strips of paper on the roof that will be exposed planks on the roof.
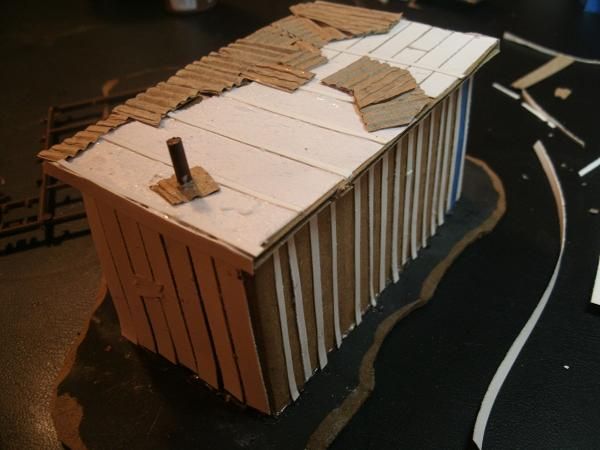
Just a much better shot of the roof planks, and the cross piece that once held the tar paper in place. The side planks on the roof are a bit big as you can see. I was waiting for the glue to dry and when it finally dried, I then simply shaved off the excess with a box knife.
Then I added another bit to the roof. This piece is going to be tar paper. It was the paper from a piece of foam board paper that was in my scrap box. I picked at the edges a bit to give it that torn look, and then scraped off any remaining foam and glued it rough side up.
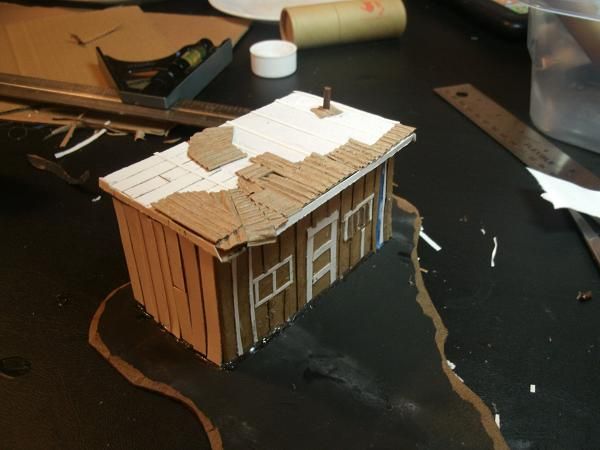
After the tar paper I put some strips on top to represent the boards holding it down. Then I drilled a hole in the roof and used a bit of plastic sprue to make the stove pipe. You can use anything round for this, bamboo skewer cut to size, juice straw etc. I glued it in place along with a piece of single sided cardboard. The rest of the roof I covered the best I could with bits of SSC.
Next I tackled the front of the building. First I started with the door and window frames and then the bits to finish them off. Again, these are just strips of paper glued into rectangle shapes. The right window is covered up with some SSC, as if the windows had been knocked out or shattered at some point. The left window I left intact. After this I finished it off by putting in the strips that will be the smaller boards covering up the cracks in the planks.
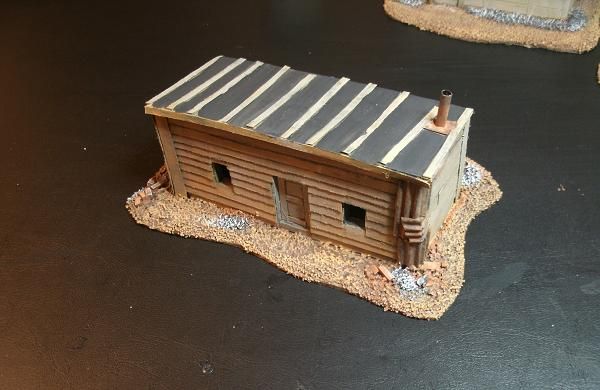
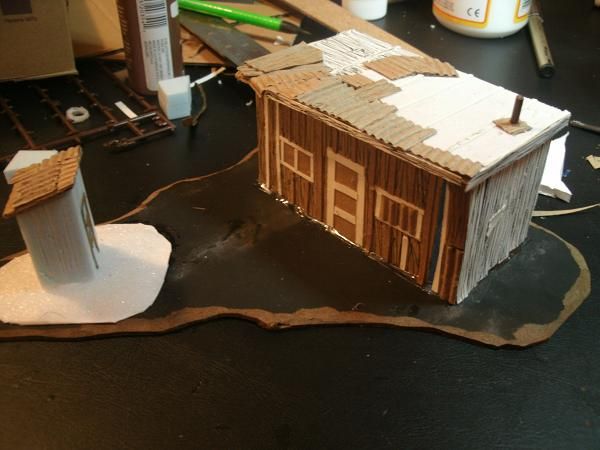
I finished the piece of by adding an outhouse and then using a pen to scribble some wood grain on the planks. It's a bit hard to make out in this picture, but I just used a black pen and drew lines up and down any parts that are going to be painted as wood.
At this point I think I have approximately an hour and a half (at the most) into the piece. Tomorrow I will flock the base and seal that, then paint it brown. After that, maybe this weekend I will paint it. I'll do a part 2 in case anyone is interested in seeing it through to completion.
Later.
Here we have the humble beginnings of a shack. Two pieces of 2"x4"x6" cardboard, and pretty flimsy cardboard at that. You can also use a small box or foam board of the appropriate size. I am going to use cheap card board for this shack because I am not going to make the interior accessible. If you are wanting to go that route I think I would use something sturdier like the foam board.
So then you tape the two pieces together to make your rectangle. Then I hit the inside corners with some hot glue to help it keep its shape and make it a little sturdier.
Then I hot glue it to the base, which is a piece of hardboard or fiberboard. After that I like to run the hot glue gun across the base of the outside to help keep it in place.
Again, this inside will not be accessible so I just hot glue the roof in place. The roof is another piece of cardboard that is slightly larger than the shack. Now the easy part is over, and we will get to work making it look like this thing is made out of wood planks and whatnot.
So here is a shot of the main building material, which is just card stock paper that I ran through my shredder. My shredder will also handle thicker material like the thinner card from some cereal boxes and other packaging. The shredder makes this part easy, but cutting it by hand wont add too much time, but a bit anyway. If you do have a shredder that cut paper into 1/4 inch thickness, another tip is to mark your paper in 2 inch increments (or whatever length you need) this way after you run it through the printer everything is already marked.
After cutting your paper start gluing it to the sides of the building. Be sure to leave some small cracks between the boards. Every once in a while you might try cutting a piece in half to make the board look like two joined pieces.
Next I wanted to show a construction technique that involves overlapping boards. The cracks of the first planks are covered with smaller strips to seal the cracks in the building. I just did two on this side so that when I do the backside it will give the latter the illusion of being constructed using the same method.
Here is the back side of the building and as you can see, I didn't glue the first set of planks on. Instead I just glued the small strips on the entire back of the shack and it makes it look like the side, but in better shape. I just use the ribs of the cardboard as a guide since they are spaced at 1/4" also.
All finished up with the back side, and the second side of the building. I have also glued a couple of strips of paper up on the sides of the roof piece to cover up the corrugated cardboard that was showing. I have also started gluing a few strips of paper on the roof that will be exposed planks on the roof.
Just a much better shot of the roof planks, and the cross piece that once held the tar paper in place. The side planks on the roof are a bit big as you can see. I was waiting for the glue to dry and when it finally dried, I then simply shaved off the excess with a box knife.
Then I added another bit to the roof. This piece is going to be tar paper. It was the paper from a piece of foam board paper that was in my scrap box. I picked at the edges a bit to give it that torn look, and then scraped off any remaining foam and glued it rough side up.
After the tar paper I put some strips on top to represent the boards holding it down. Then I drilled a hole in the roof and used a bit of plastic sprue to make the stove pipe. You can use anything round for this, bamboo skewer cut to size, juice straw etc. I glued it in place along with a piece of single sided cardboard. The rest of the roof I covered the best I could with bits of SSC.
Next I tackled the front of the building. First I started with the door and window frames and then the bits to finish them off. Again, these are just strips of paper glued into rectangle shapes. The right window is covered up with some SSC, as if the windows had been knocked out or shattered at some point. The left window I left intact. After this I finished it off by putting in the strips that will be the smaller boards covering up the cracks in the planks.
I finished the piece of by adding an outhouse and then using a pen to scribble some wood grain on the planks. It's a bit hard to make out in this picture, but I just used a black pen and drew lines up and down any parts that are going to be painted as wood.
At this point I think I have approximately an hour and a half (at the most) into the piece. Tomorrow I will flock the base and seal that, then paint it brown. After that, maybe this weekend I will paint it. I'll do a part 2 in case anyone is interested in seeing it through to completion.
Later.
Monday, February 10, 2014
My Depression Era Hooverville
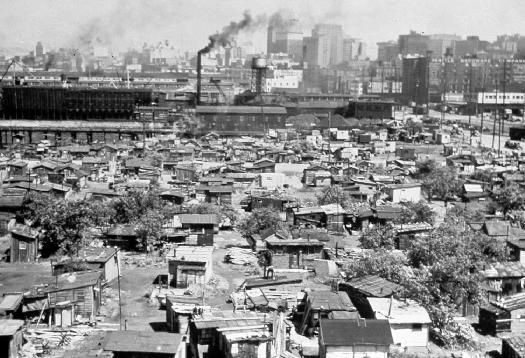
What exactly is a Hooverville? They were shanty towns constructed in the 1930's after the stock market crash in 1929. They popped up all over the country as people lost their jobs and a steady income. These new shanty towns soon came to be named after President Hoover, who refused to use the Federal govt. or create govt. ran programs to help those in need or to stimulate the economy, believing that eventually the market and economy would fix itself.
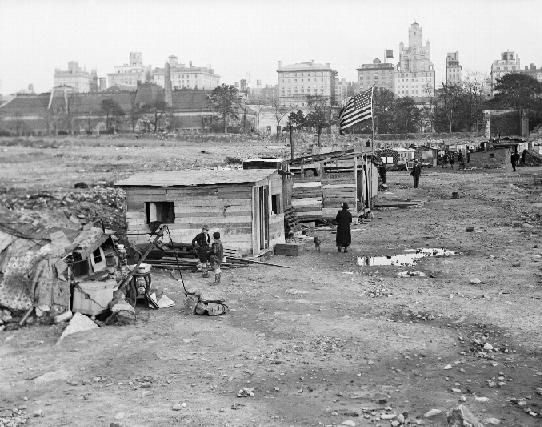
Many people lost everything due to the stock market crash, the house, the car, all of their money. Eventually many of them ended up cobbling together "housing" from what scraps they could manage to nail together. Many lived in tents, or under tarps really. Some Hooverville inhabitants didn't even bother to build shacks, but simply burrowed into the sides of hills and
lived in small burrows. As time went on these houses became a little more elaborate. Some people, especially masons managed to build some rather nice brick houses instead of the usual wood framed shacks that were rather ubiquitous. Most of these shacks were built using very simple techniques using milled lumber, plywood, tar paper and occasionally corrugated tin. Hooverville's varied in size, like the one on the right which is pretty small compared to the one above, which was located in Seattle and quite extensive. Whatever the size, these shanty towns shared many features. There was no trash service so trash and junk ended up just being dumped wherever, and after a while many started to look a like junkyards or the city dump. No running water, open latrines, and no utilities obviously. Some had hand dug wells, but given the poor sanitation this water wasn't really fit to drink. In fact there were many disease outbreaks, typhoid, yphus etc, that hadn't seen large outbreaks in the US for a while. The Hooverville in Oklahoma City was a great exception to the poor sanitation general rule. After a couple of outbreaks, the city installed clean drinking water and bathroom facilities. Then turned around a few months later and had them removed, based on the theory that providing such amenities would encourage more people to live in the Hooverville and keep those who currently lived there from looking for work.
Most of these shacks were
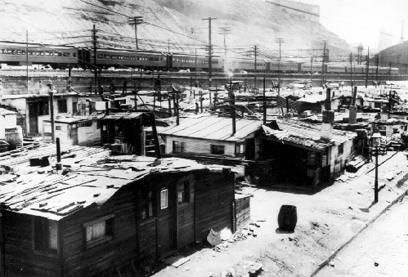
reported to only have outside walls, and if the inhabitants were lucky they might have been able to acquire some tar paper to keep the roof from leaking and the wind from blowing in through the cracks between the boards. As you can see in the picture on the left, most seemed to at least have a potbelly stove to provide warmth and a means to cook. Still, people died from exposure, starvation and I am sure from despair.
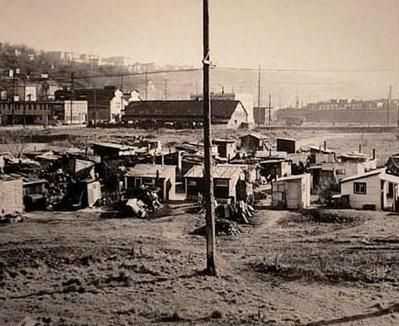
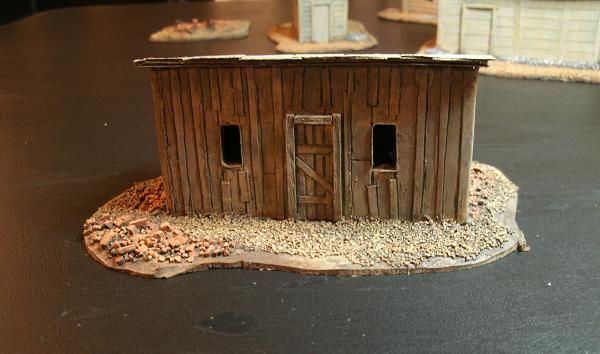
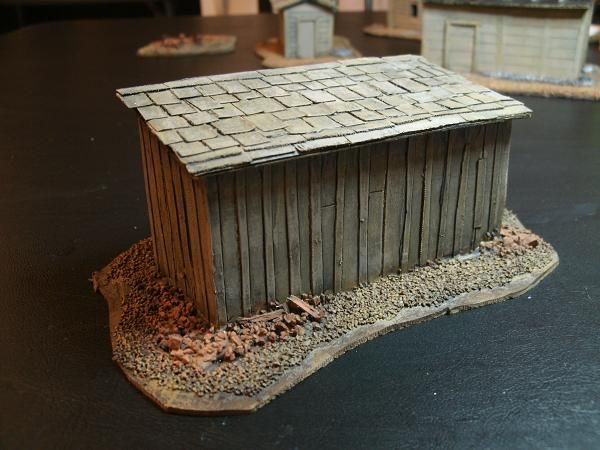
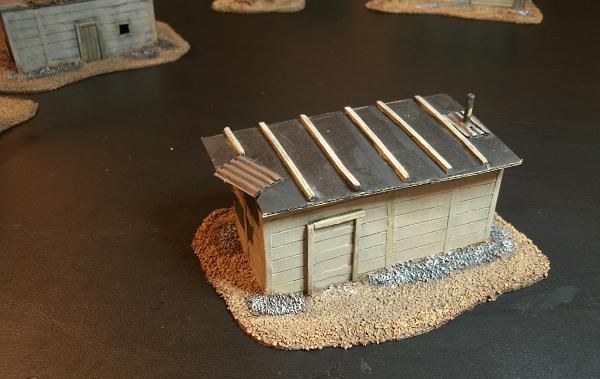
For any game taking place in the US during the 1930's a Hooverville is a must have. So toward this end I started working on a project to build my own. Originally I wanted to do at least a dozen shacks, but I lost steam after the seventh building and just decided to throw in some tents and junk piles to fill things in a bit. First I spent a week or so staring at these pictures and trying to figure out some basic building styles and materials. Then I went to town, and started putting some buildings together. I wanted to try out some different building techniques, that I hoped would be a little faster than some of the other buildings I have done in the past. I settled on using mainly cardboard. I made a simple rectangular shape, then put in a slightly slanted roof in most cases. To try and capture the variability I built a few that used the wall boards as slats and a few to look like clapboard construction. This was done by using 1/4 inch strips of paper and gluing the vertical or horizontally and the construction method dictated. Then I ended up covering a few random areas with card stock, that I later painted black, for tar paper. On a few the vertical boards were covered with another set of boards covering the cracks. The roofs are the same way for the most part. Boards, covered with tar paper, corrugated tin and in one case wood shingles. On the outside there are brick piles, broken bricks (shattered bed heaters), and ash dumping piles scattered around randomly outside the shacks.
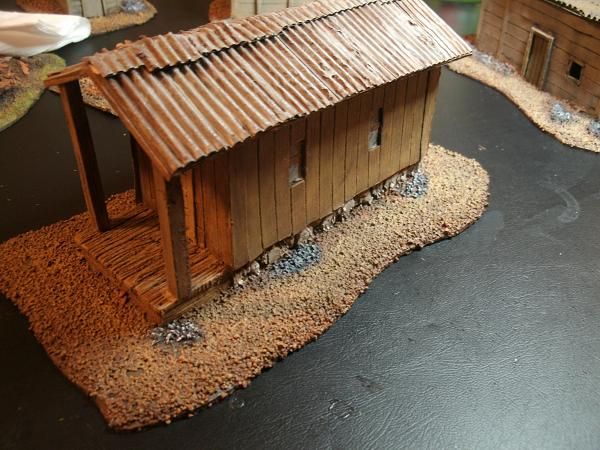
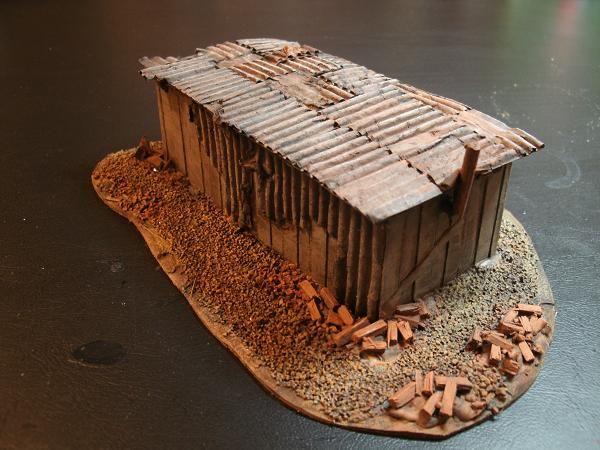
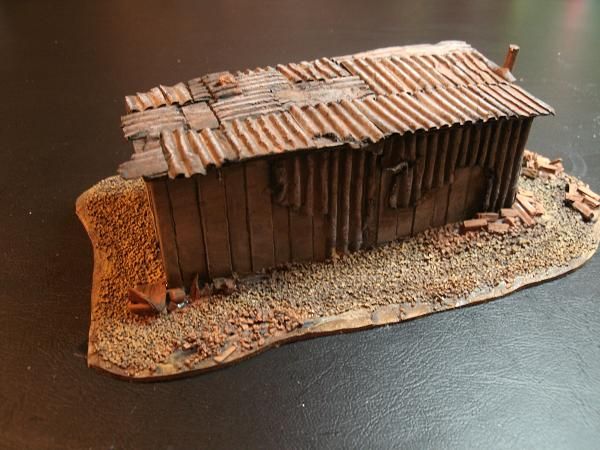
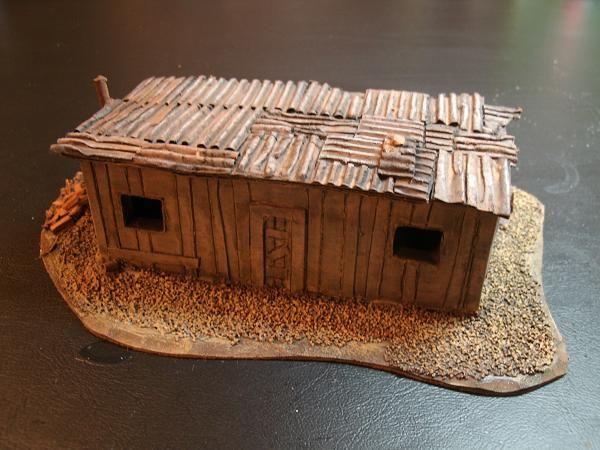
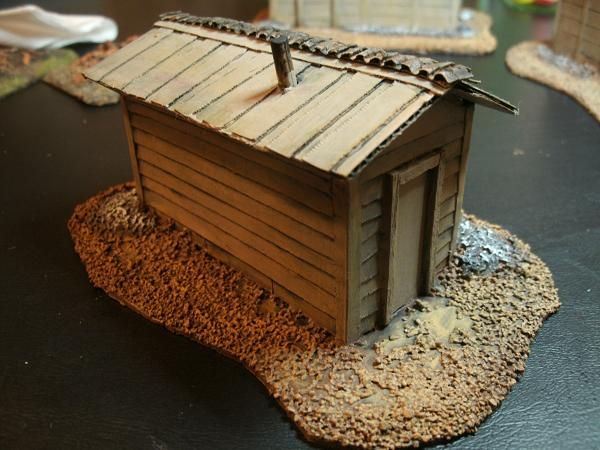
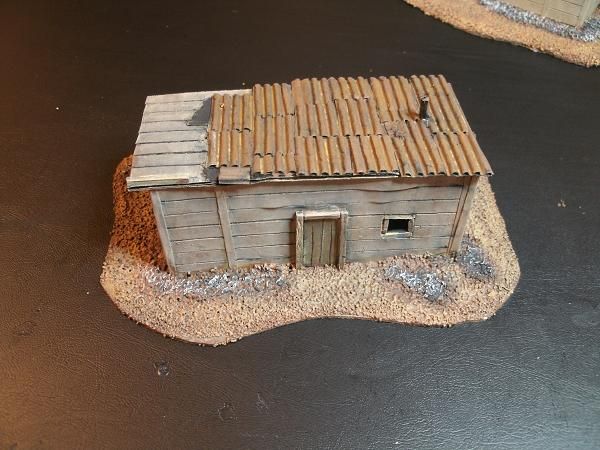
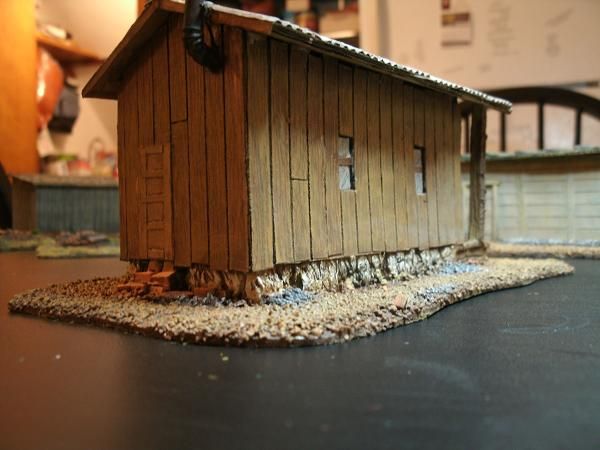
Shack number one has partial but rather rusty tin roof. One small window provides light, but who really needs extra windows when the cracks between the boards provides plenty of light.
![]() |
| House 2 |
![]() |
| House 2 |
![]() |
| House 2 |
![]() |
| House 3 |
![]() |
| House 3 |
![]() |
| House 3 |
![]() |
| House 4 |
![]() |
| House 4 |
![]() |
| House 5 |
![]() |
| House 5 |
![]() |
| House 6 |
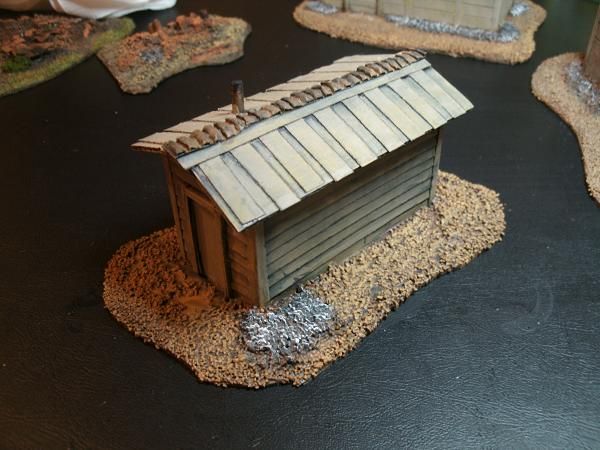
House six is clapboard with a few bits of tin holding the corners together. The roof is covered with tar paper and the occasional board to hold it down.
![]() |
| House 7 |
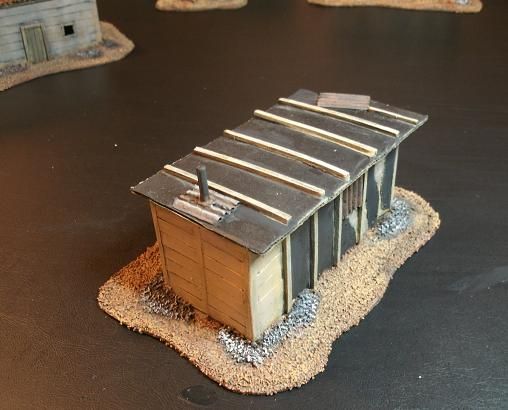
House seven, tar paper roof with some tin around the stove pipe, a little tar paper covering the back walls.
![]() |
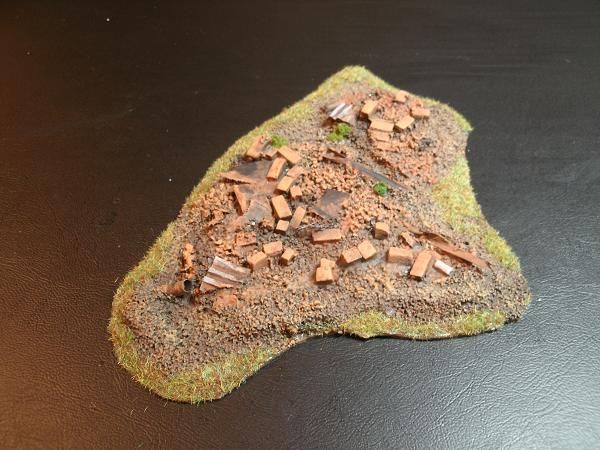
| Are you staring at my junk? |
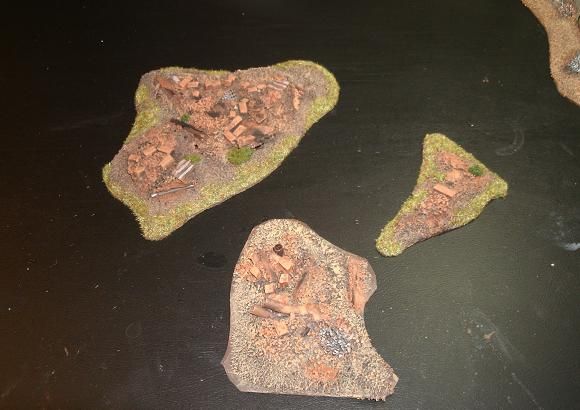
Last, but not least, some junk piles, you gotta have some trash laying about. I also have some bits that I picked up from the local train store that sells O scale scenic elements, but more on them later.
Hopefully in the future I will get the bug and build at least a few more shacks and junk piles. For now though, these will work and can't wait to have a skirmish or two at the local Hooverville.
Labels:
28mm,
2ACW,
buildings,
Glenpool Strike,
scratch build,
terrain,
VACW
Friday, June 14, 2013
Tower
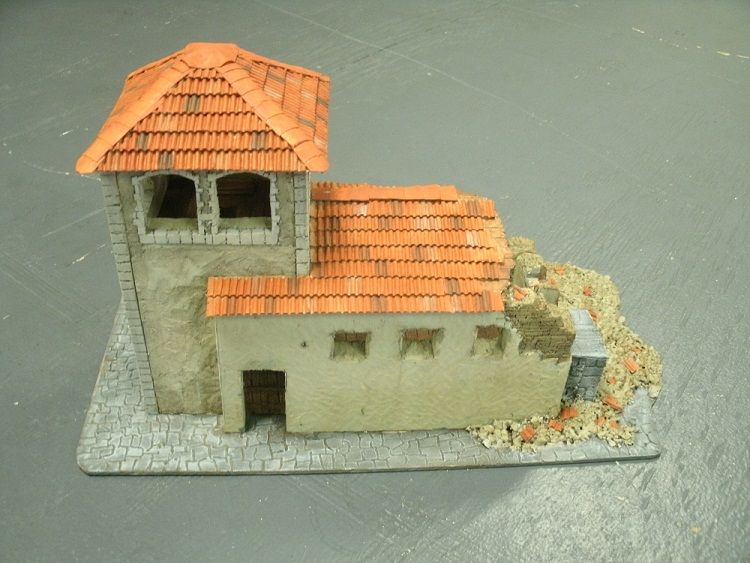
This is a model that I had been planning on building for quite a while but kept putting off to do other projects. Finally, the weekend before last I had an entire Saturday to myself and so I decided to get started on this one. After about four or five hours I had most of the model mocked up and ready to go. The building is kind of vague, maybe it's an old monastery, church or just a clock tower.
The only things that remained after I took this picture, was to add in the rubble and paint the model.
I added the rubble on Sunday night. This was done by covering the area with glue and then sprinkling the area with clay kitty litter and a mix of small gravel (model train ballast). After that I let the whole thing sit and dry overnight. Then the next day I shook off everything that didn’t stick and then poured glue over the top of that and spread it around so that everything was covered. This helps keep everything attached and where it was supposed to be. While that was drying I cut out some single-sided cardboard and added pieces of roof tile to the rubble. After that I let the whole thing dry overnight again.
Then finally on Wednesday I started painting. I did a couple of thin coats of color on everything. Painting the walls a light brown or linen color and then washing them with a dark brown / black mix. After that I highlighted the walls with the original color to make the high points stand out. The stonework I painted a light gray but I didn’t like all that much so I went over it with a light brown color. As you can from the pictures, the light brown color didn’t cover up the gray so it is still quite visible. I painted the wood timbers and the floor a dark brown. The rubble I painted the same color as the walls then washed several times with the brown / black wash. After that I picked out a few bits and painted them to match the dressed stone and painted the busted tiles in the rubble. After that I painted the roofs. These I painted with an orange color then painted various areas of the tile light gray and dark gray. After this dried I repainted the whole roof again with a slightly watered down orange in order to tone down the gray colors.
This was where I finished on Wednesday night. I had planned to go over the building again and give everything at least another coat of paint and repaint the dressed stone which I didn’t like. On Thursday I threw this building in the car with the rest of my stuff and headed up to the Game store to play some Bolt Action. Well, the model never made it back home. I ended selling it to one of the owners of the FLGS, who really liked it, even though I told him that it wasn’t done. It turned out to be a small consolation prize for the fact that I let a guy who had never played before run my Soviet Army and he crushed me and my Germans under his boot heel. Well you know what they say, “if you can’t beat them, rock in the corner and cry”, or something along those lines.
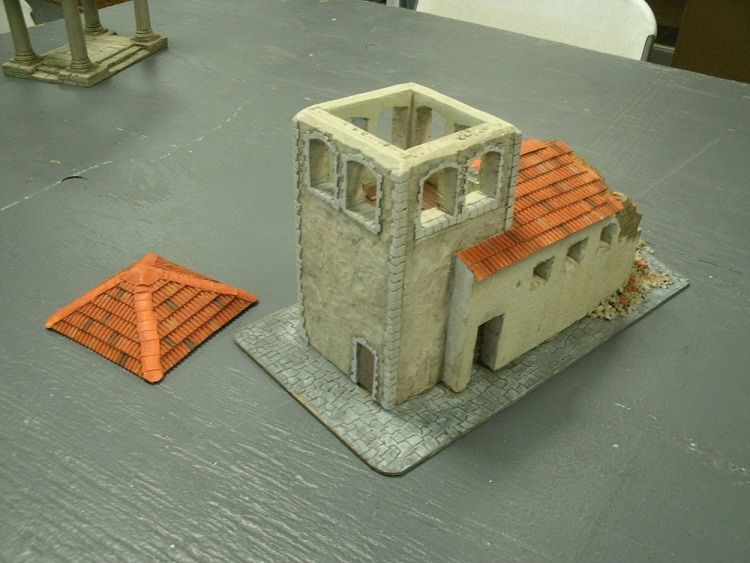
So on Friday I realized that I hadn’t taken any pictures of the tower since I had started painting it Wednesday, so I took a few minutes out of my busy day and stopped off at my FLGS and take some pictures.
As you can see in the last picture the roof of the tower is removable so that you can put a sniper team or observer in there. The bottom floor is also big enough that I could fit my AT gun in the bottom floor or put a squad up on the second floor to shoot out the windows.
Labels:
28mm,
Bolt Action,
buildings,
modelling,
pink foam,
polystyrene foam,
scratch build,
terrain
Wednesday, June 5, 2013
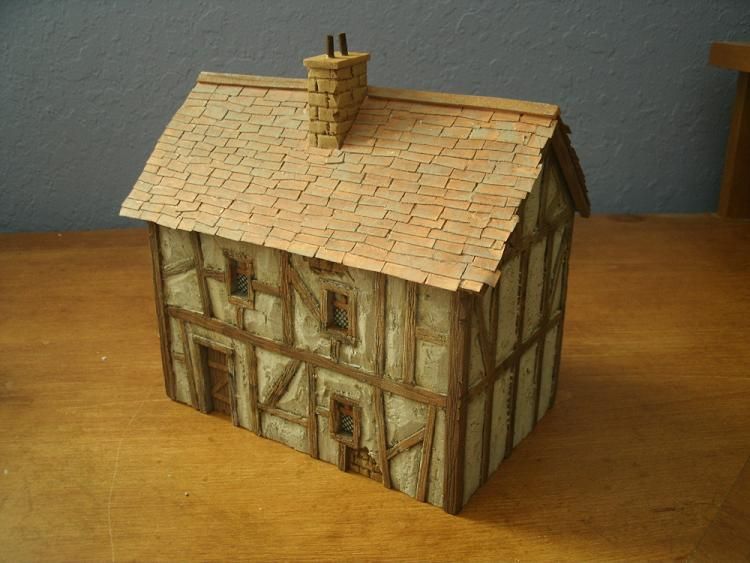
The Half-timbered House. Part 2: Everything Else
After a short break I started
working on the half-timbered house again.
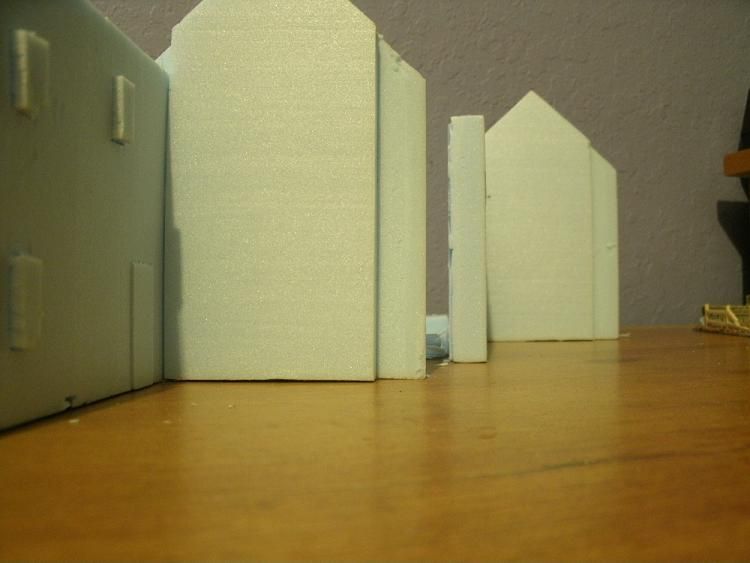
Is started by cutting the eaves, for which I just measures up 4” on both
sides, marked this, then found the center of the top edge and connected the
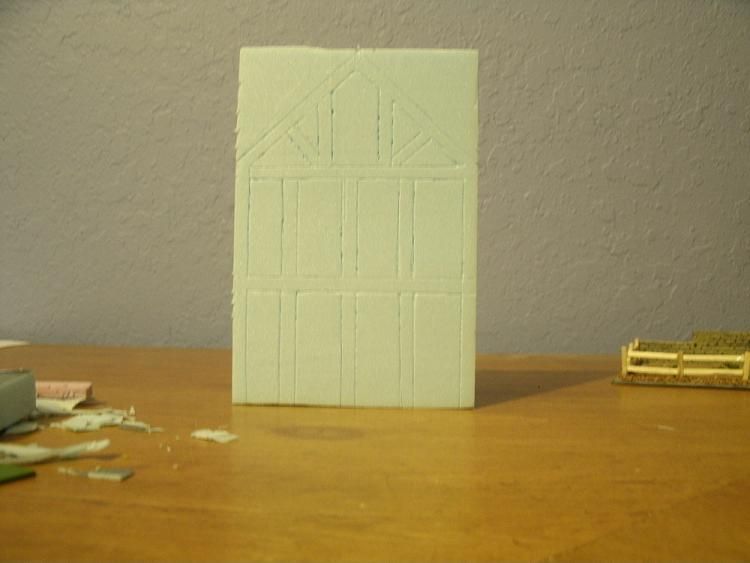
dots. After marking both of these off I etched out the plan for my timbers and
cut them out as well. I decided to go
for a simple plan with no windows and some straight forward timber placement.
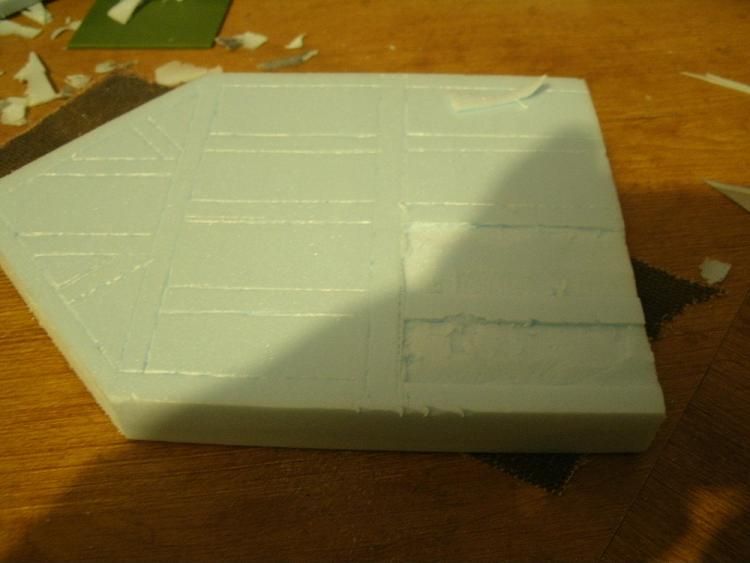
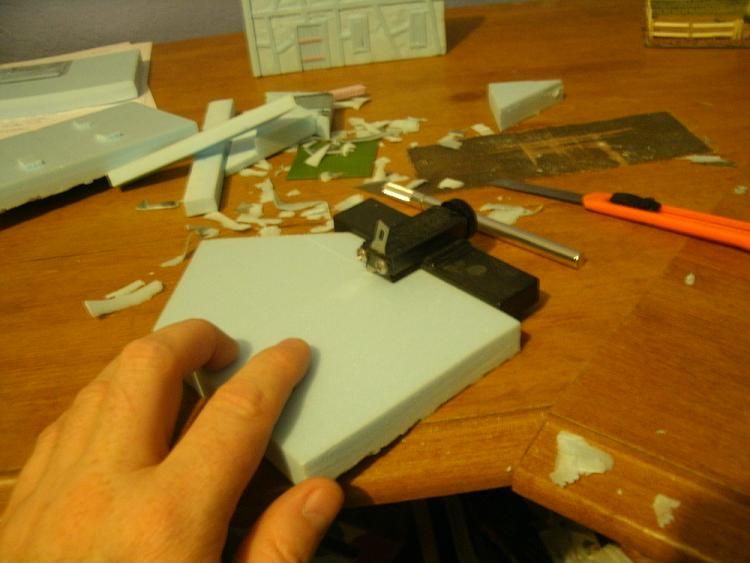
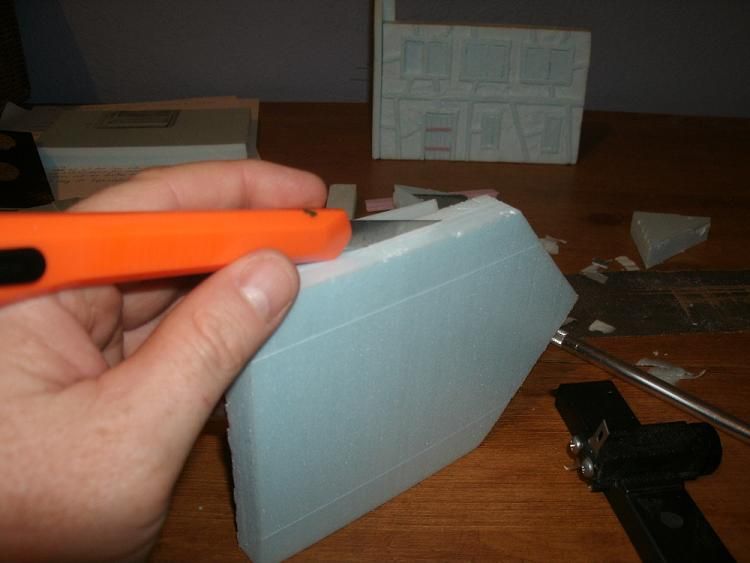
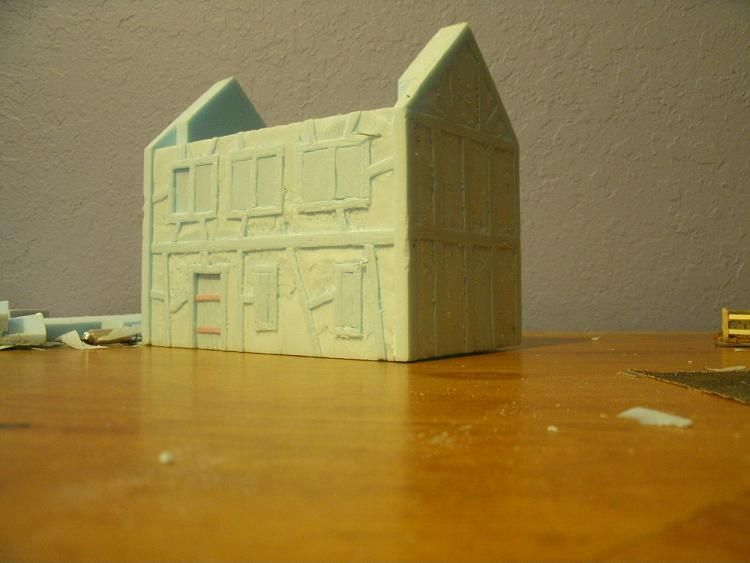
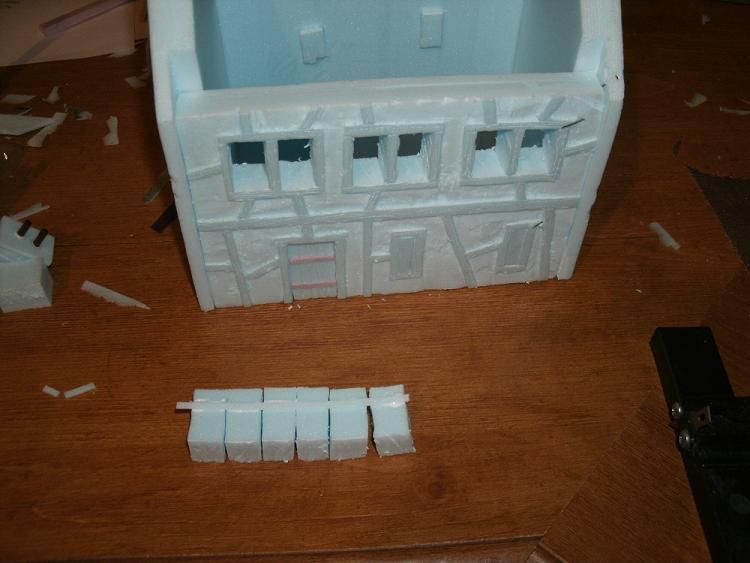
After cutting out the foam along the timbers the area in the center of the stucco walls is much higher that the rest of the area. You can use a file, as I mentioned in part 1 to get rid of these. Or you can use a box cutter and lay it down as flat as you can get it, even bending it slightly and cut it off flat, as shown in the photo below. Making sure to not cut your thumb off.
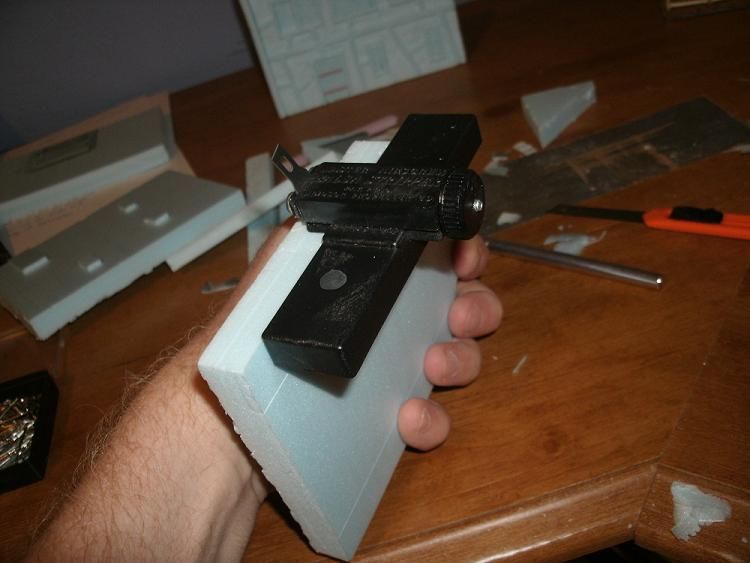
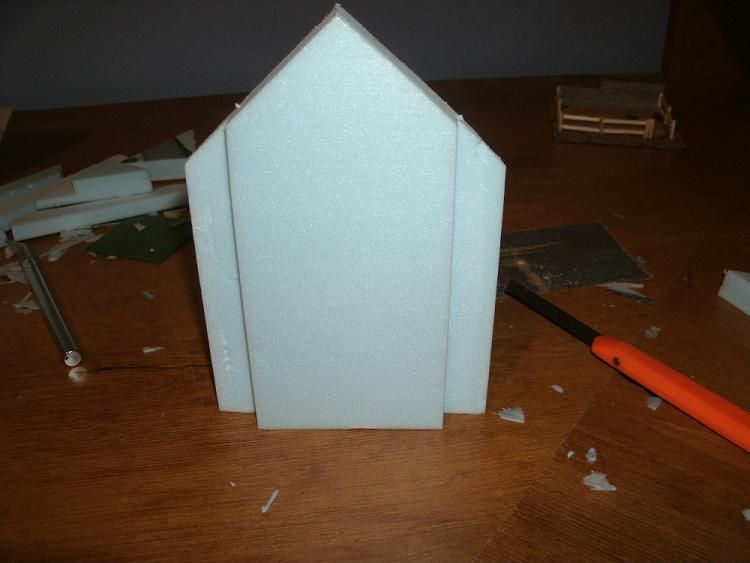
The next step was to make a rabbet cut on either side of
both of the side walls, and then glue the walls together. The rabbet cut was
made using my Master Airscrew balsa stripper.
The cuts were not deep enough to detach the foam, so a little extra cutting with a hobby knife was needed to make the cuts deep enough to get it out. I should note that when doing this, to be careful when cutting the back of the exterior face of the building. As cutting to deep could cut through or even cut off part of the side. So again, just be careful to control the depth at which you cut.
Once you have these removed you can glue them together, I
use a brand of craft glue called Tacky Glue, which is pretty common and it
works fine. When gluing the pieces together I put the glue on then spread it
around in a thin layer then put the pieces together, and use pins to keep them
together while the glue dries. Occasionally I have with the pieces not fitting
together very well. To help alleviate this problem I put some sand paper flat
on my working surface and then take the wall that it causing the problem and
sand it flat. You can also straighten out the inside of the rabbet cut if needed, by wrapping some sand paper around
two sides a small wooden block and lightly sanding. If your corners still are
not as flush as you would like, or separate a little while gluing there a few
more things you can try to get around this problem. The first, is to take some
of those little bits of foam that you cut off from the face of the house, smear
a little glue on both sides and then and shove them in the cracks, and once
they are dried you can cut them off flush. You can also cover any unsightly
cracks by filling them with glue and flocking and making it look like the area
is covered with moss or ivy.
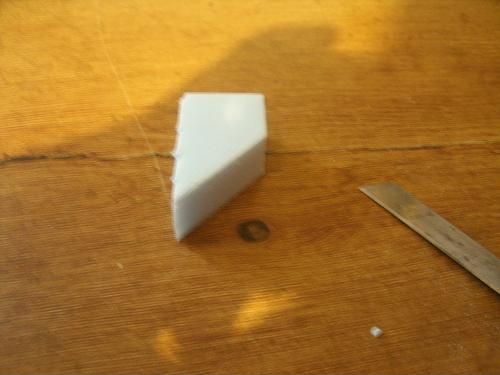
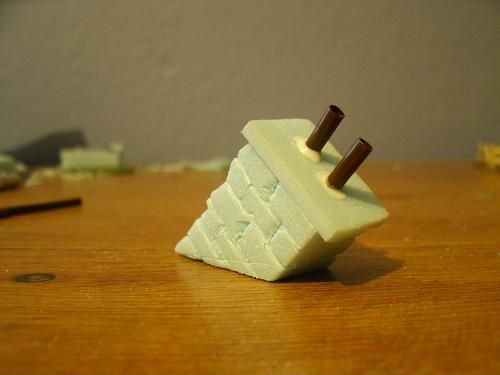
While waiting for this to dry I made the chimney. This was done by taking one of
the excess pieces I cut off when I did the eaves on the side walls. Since the
bottom angle of this matches the pitch of the roof (since that’s what we cut it
off of) it works out really well. Just
trim it up a little, and then etch in a brick or rock pattern as you like. I
topped mine off with a thin strip of foam slightly larger than the chimney, and
two bits from a stirring stick that were secured by drilling into the foam then
gluing them in place.
The next thing to work on are the windows. You need
to decide what type of windows you want.I decided to go with something fairly simple as you can see in the pictures. I glued one strip across the window, and then divided the upper pane into two halves. The bottom windows I split into three panes.
My biggest problem here is keeping track of the windows and
putting them back in the right spot instead of getting them all mixed up.
For the roof I use card board. I start by measuring the roof
and then add 1/4” for both sides (1/2” overall) to the measurements. You can
add more if you want a larger overhang. I cut this out as a single piece when
possible, then score it down the center line and fold over. On this particular
house there seemed to be a shortage of appropriately sized cardboard so I used
two pieces and taped them together with masking tape. After you have your roof
cut, just glue it straight to the building. Smearing the glue around in a thin
even layer and pin it until it dries.
You may notice the house isn’t exactly straight but gluing the roof on
should help bring everything back into line.
So after getting some feedback on the first part of the
tutorial, I decided to go back and make some changes to the original walls. I
added a few extra timbers under the windows. This highlights another advantage
to using polystyrene foam, its flexibility.
To add the timbers I cut flattened out the areas where I wanted to add the
timbers then glued thin strips of foam to the face of the wall. When the glue
dried I added the wood grain to match the other timbers. In two other areas I
cut back the foam a bit and made the area into a brick wall in order to show
the underlying structure. You can see all of this in the pictures below in the Roof section.
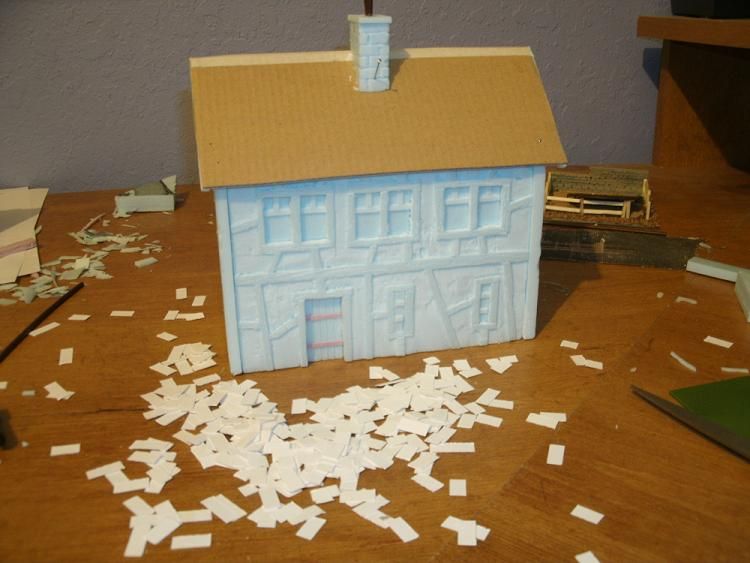
Starting on the roof required getting the material required, mainly my 1/4" strips of card stock that I had ran through my strip shredder many projects ago. These I cut, in bunches, into shingles of various lengths.
I also attached the chimney to the roof. On this house I choose the center of the house but you could put it on either end or wherever you prefer. After pining that in place I started putting the shingles on.
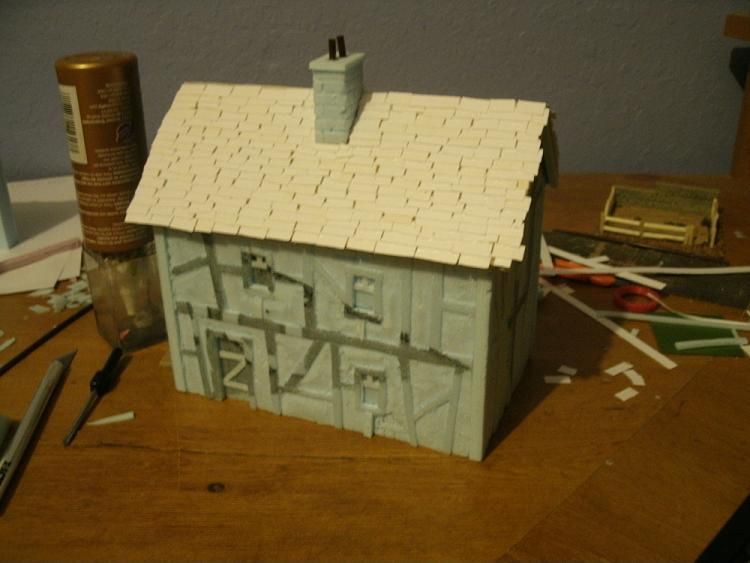
Putting the shingles on is relatively easy. I just put down a bead a glue from the left side to the right, starting with the bottom row. Then I lay down a layer of shingles. After the first row, I put the glue half on the row below and half on the cardboard above the previous row. I generally leave a little gap between shingles and occasionally put them on at a slight angle so that some of the shingles look a little loose. I try to keep the rows as straight as possible but there will always be a little variation. If you have trouble keeping a straight line, you might try drawing a line, or lines across the roof to use as a guide. For me, if it is reasonably straight, it's all good.
After you are done with the roof and it has all dried you can come back with a sharp pair of scissors and straighten up the edge of the roof, or you can leave it as is. The final step is the roof cap. For this house I choose to use a center timber as the top of the roof. So I cut a piece of foam and glued it to the peak of the roof. If you want you can also use a strip of balsa wood and sit it in the gap of the cardboard at the peak of the roof, which is what I usually do. In this case, since I taped the roof together I went with the foam. ![]() |
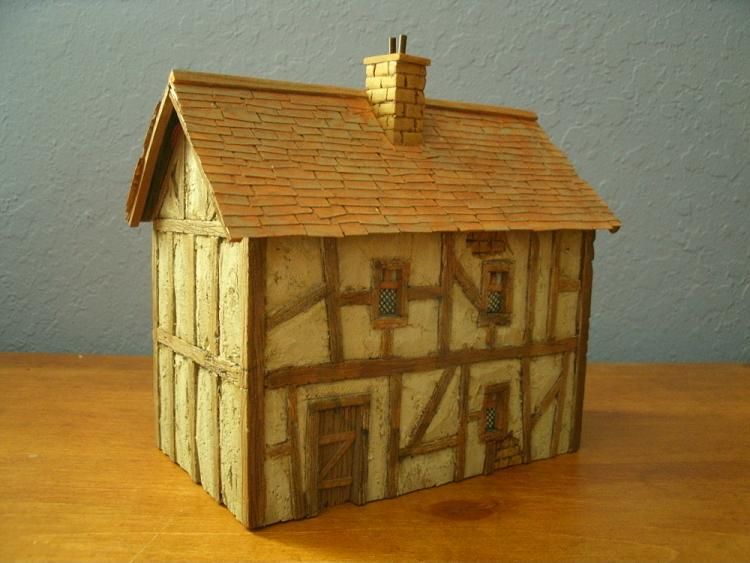
| If you look closely you will notice I forgot to paint the underside of the eaves. Oh the shame! |
The next step is painting. I painted the stucco a light linen or cream color. Then I gave it a wash of a slightly darker color then highlight it with the same linen color. Timbers I paint dark brown then dry brush with a lighter brown. The chimney and stone work I kept a brown color, but gray, red or orange would work fine I think. The shingles I painted a shade of brown then highlighted slightly. If you wanted a more weathered look you could paint them gray, or a gray brown color. You could also paint them blue, red or green if you wanted.
Here is the final and parting shot. All done and over with...well except somewhere along the way I decided I didn't like the windows so I decided to add the fancy diagonal frame pattern on the bottom pane of the window. For this I used carbon fiber screening material that you can pick up from the hardware section of Wal-Mart and pretty much any DIY center as well. This stuff runs about $10.00 for a gigantic roll that will last an eternity if all you use it for are windows. To add these to the windows I cut out little sections, turned them to a 45 degree angle and put my window face down on it, and cut around the window. I then glued them into place with some tacky glue. When dry I shoved my windows back in place. You will also want to paint your windows before you do this, otherwise you will get an excruciating exercise in tedium trying to paint all of those little diamond shaped panes of glass. I painted my window glass a pretty benign light gray color, but light blue, green, yellow, or brown will also work. As many of these houses were built in the days before clear glass.
Labels:
28mm.,
buildings,
Half-timber house,
house,
polystyrene foam,
scratch build
Subscribe to:
Posts (Atom)