Showing posts with label modelling. Show all posts

Wednesday, April 2, 2014

Rock Outcroppings

 I decided that if I am going to play a Greek Andartes army then I could probably use some rocky terrain. I haven't made any rocky terrain in a good number of years and thought I would give it a try again using rigid foam insulation. I know a lot of people use tree bark to make rocks, but I don't like the look of it all that much. Thus the reason I tried the foam insulation. I don't think it turned out to bad. I tried to vary the size quite a bit and so the outcroppings vary in size from slightly larger than man sized up to around 12 inches or more.


The center piece is made from a single slab of foam and is supposed to be two rock outcroppings with a small saddle between them.


This is actually one of my favorites, though I think that it could use a little rock debris on the ledges to break up the straight lines, and perhaps a little work on the overhanging bits in the first picture.


Again, another one with multiple rocks outcropping. 


The two smaller rocks.


The biggest one of the bunch with a few boulders laying on top of the large exposed rock shelf. Below are a few overview shots of all of the pieces together. A pretty good spread across the table though I would like to do a few more to get a really rock strewn table.


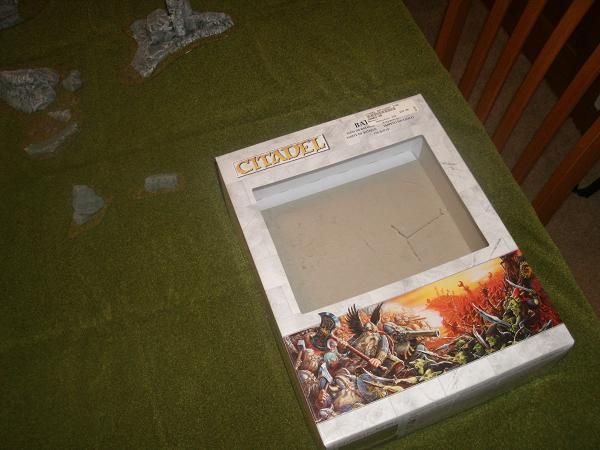
I just bought the Citadel gaming mat as well. I scored it at a local hobby store that doesn't specialize in miniatures, and so I found it on the clearance shelf for half price. A pretty good deal at $15.00 considering these things are out of production now. Though, I am now kinda partial to my $8.00 green blanket from Target.

Thursday, June 20, 2013

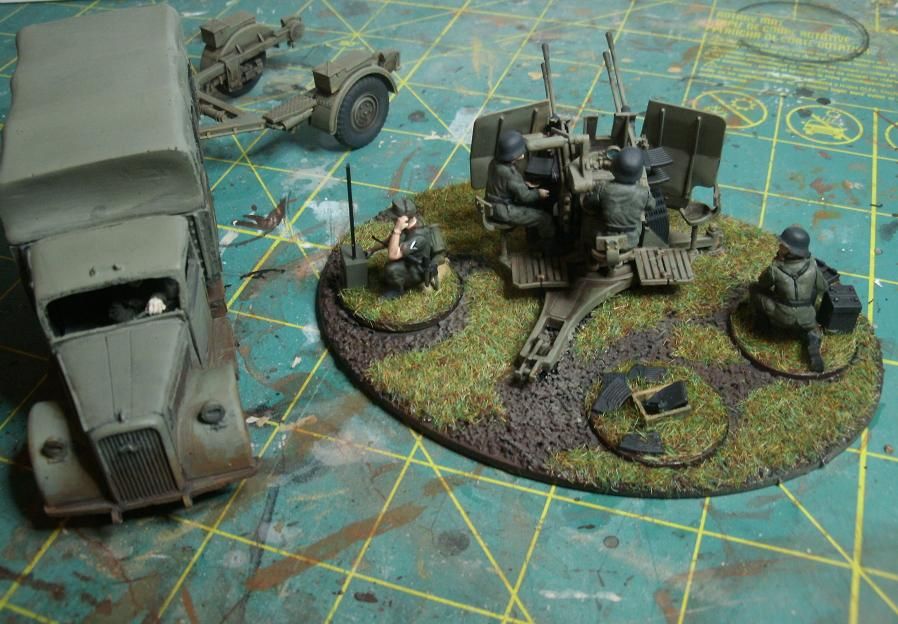
Flakvierling 38 and Opel Blitz

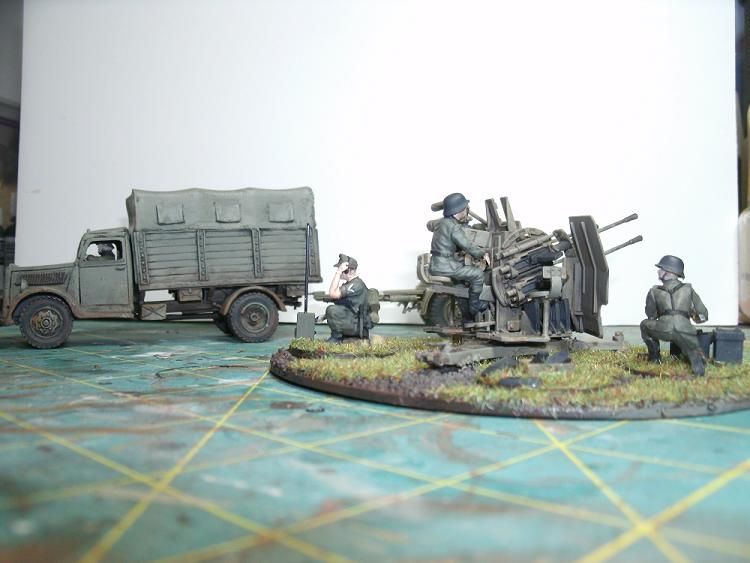
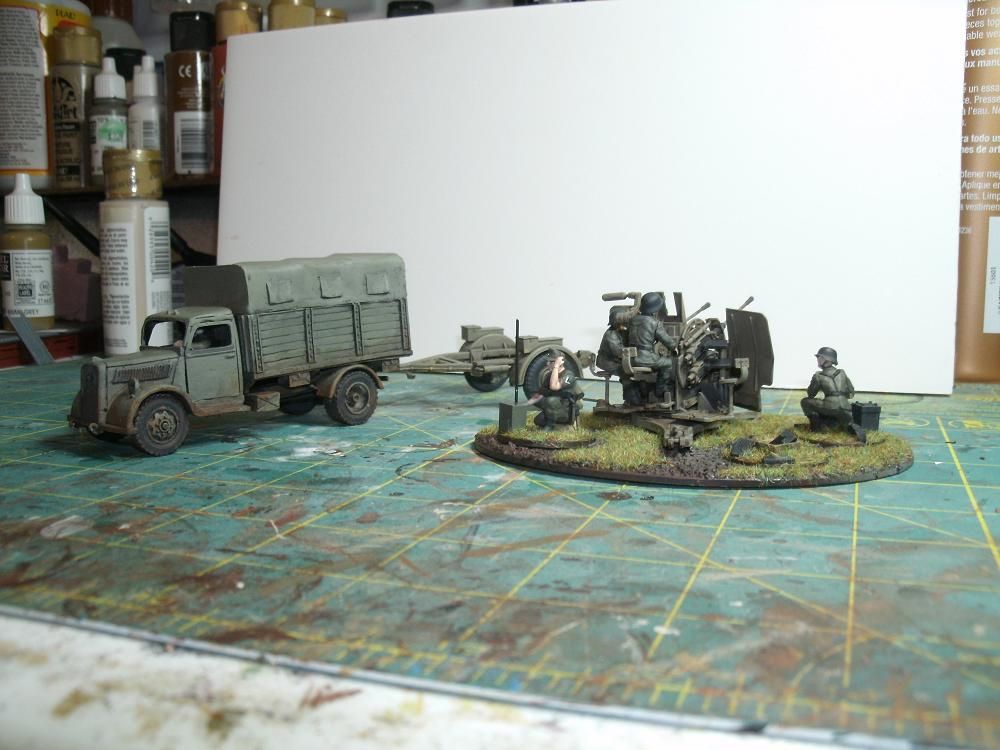
A short one for today. This are two models that I did a couple of months back for my German Army. They are still one of my favorite units as far as modelling and painting goes. Both turned out really nice and have gotten a fair bit of use. Occassionally the Blitz gets used for transporting my infantry, but it's main job is towing the Flak 38.


The Flak 38 is a Tamiya model that I got on sale for $10.00 and though it had a good number of pieces it really wasn't that difficult to put together. The Opel Blitz in from Warlord Games and was easy to assemble and paint and looks great. However the amount of time involved is a good 3-4 hours. Oddly enough the Opel Blitz hitch and the trailer for the Flak 38 actually hook together which is a nice bonus, even though the two models are different scales. Even though the two are different scales it is not that obvious. The trailer is slightly wider that the truck, which doesn't really bother me.


Also in the shot, between the Flak 38 and the Blitz is my German Observer. He was made out of a Wargames Factory body and extra arms, head and radio from the Tamiya kit. I particularly love the rolled up sleeves, and the hand painted rank actually turned out really well.


As far as the Bolt Action games rules go, the Flak 38 kind of gets the short end of the stick. Even though the gun shield is clearly visible on the model, there is no way in the rules to get a gun shield, and the gun shield rule for the Flak 38. So this unit is easier to kill than it should be. Also there seems to be some confusion in various forums as to how many shots this thing gets.

Saturday, June 15, 2013

M16 Multiple Gun Motor Carriage


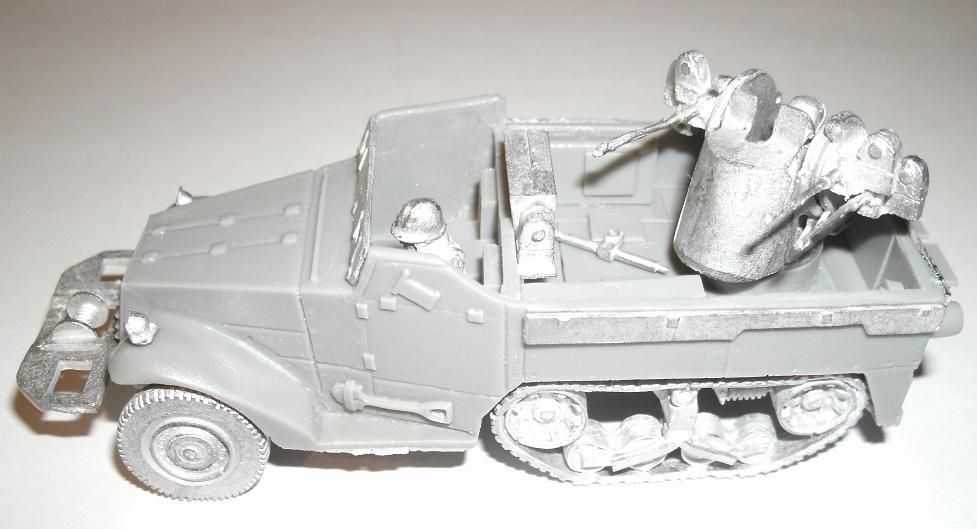
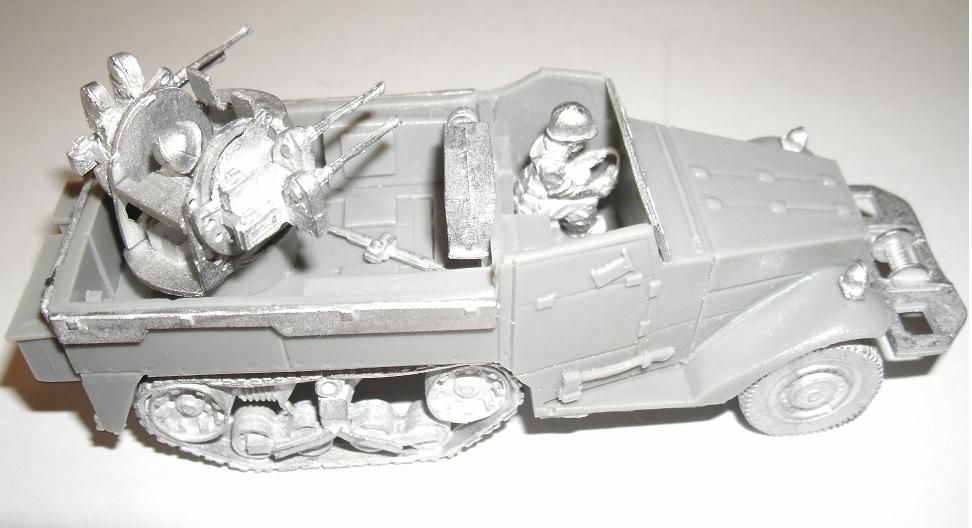
Okay, well you should know that I love quad mounted guns. Pure Awesome. So this thing mounts four .50 cal machinguns and can be used by my Americans or by my Soviet forces. These vehicles were designed as Anti-Aircraft vehicles, but were used in the ETO and PTO against ground forces. The model is from my recent order from Company B.

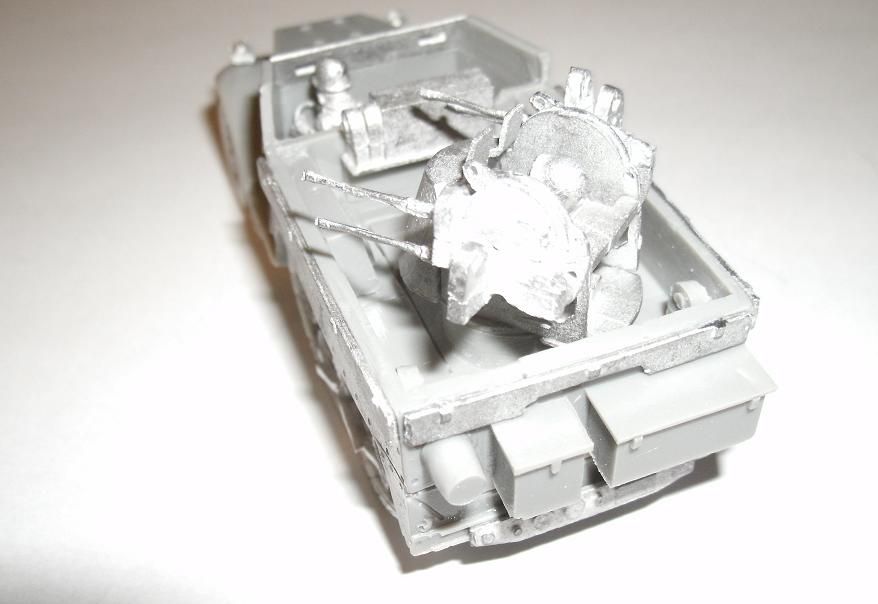
Sorry about the blurry picture.
Overall the model was cast really well with only a few minor areas of flash, and nothing I had to fix. I was slightly daunted by the number of parts, but that's just because me and superglue don't play well together. Had it been a plastic kit with 10 times the number of parts it wouldn't had bothered me nearly as much. However, I was able to get the model together with only gluing my fingers together a couple of times.

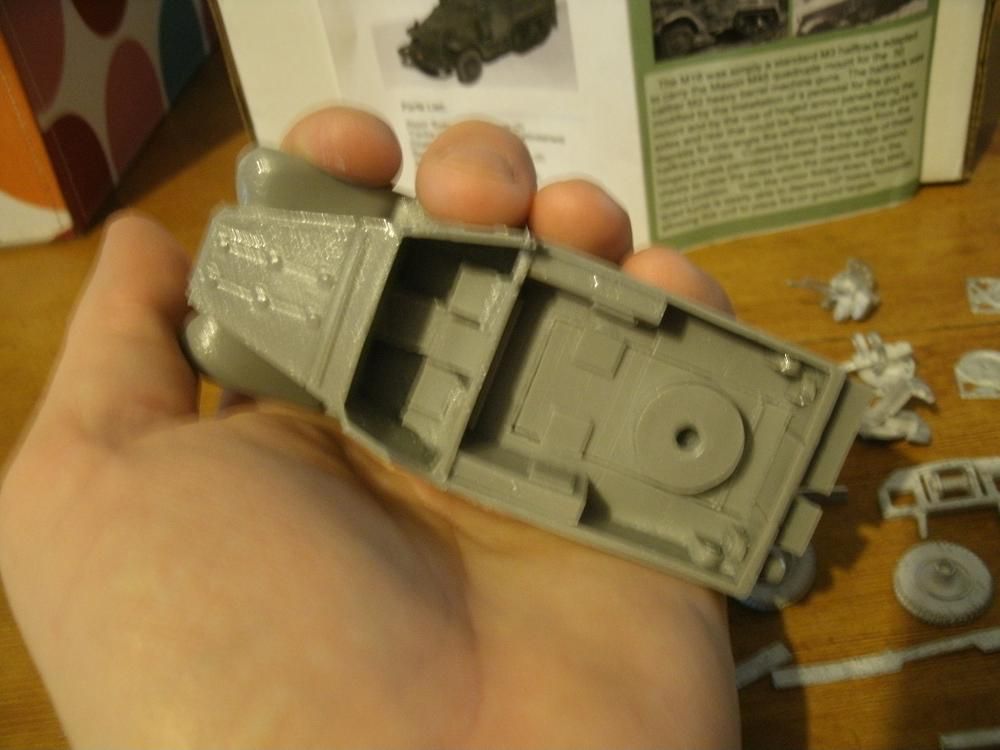
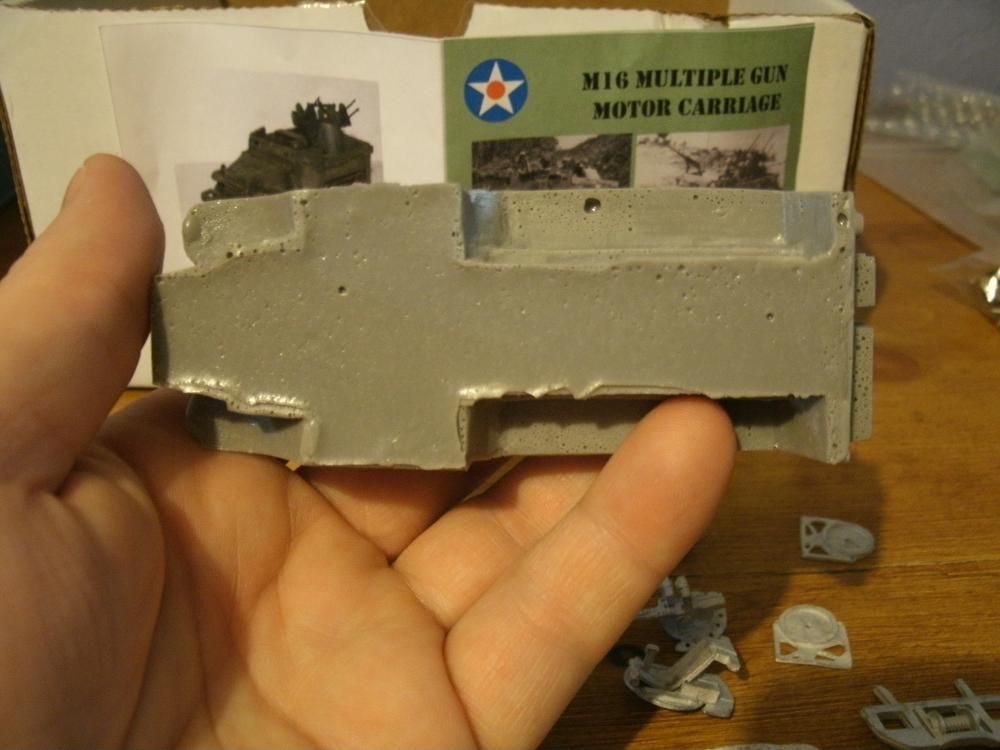
The bottom requries a bit of clean up, and has a fair number of air bubbles, but the rest of the resin model is bubble free.


I had to look around the internet to find some decent pictures of the vehicle to see how the turret went together, and which direction to put the treads on. Other than that the other bits were pretty straight forward. The front window guard, the radio deck behind the driver and the the fold down panels on the sides and the rear.


I learned my lesson with the Kubelwagen and left my crew unglued for the time being which is why the crossbar with the aiming sight for the gun is laying in the back of the truck right now. This way I can get him in and out of the turret until I get it all painted.


The model went together really easily and I really don't have any defects whatsoever to report. All together this model is pretty sweet and I highly recommend it.


Now I am thinking how am I going to get this thing painted up so that I can use it for both my Americans and my Soviets. I may have to paint them up as Americans and then overlook the fact when I use them for the Soviets. Though maybe I could find a Soviet driver and gunner that I could swap out, but that seems like a lot of work. What I really need to do is figure out a way to swap out vehicle air identification markings. This is of course assuming the Soviets bothered to put their Red Star markings on these things, which I assume they did. Anyway I will have to think about it for a while.

One thing that I really want to do, is cut up some lengths of copper wire to sprinkle around the truck bed as spent .50 cal shells. I think this will be a nice touch that will really bring the model to life.

Friday, June 14, 2013

Tower


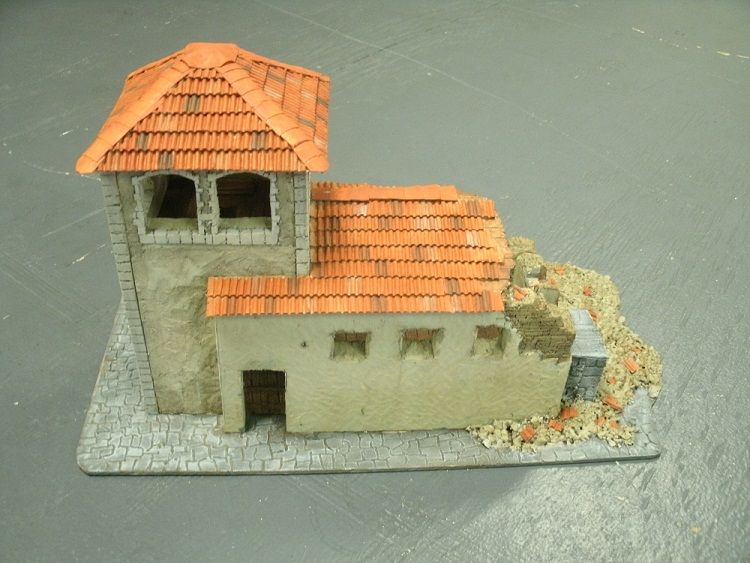
This is a model that I had been planning on building for quite a while but kept putting off to do other projects. Finally, the weekend before last I had an entire Saturday to myself and so I decided to get started on this one. After about four or five hours I had most of the model mocked up and ready to go. The building is kind of vague, maybe it's an old monastery, church or just a clock tower.


 The only things that remained after I took this picture, was to add in the rubble and paint the model.
I added the rubble on Sunday night. This was done by covering the area with glue and then sprinkling the area with clay kitty litter and a mix of small gravel (model train ballast). After that I let the whole thing sit and dry overnight. Then the next day I shook off everything that didn’t stick and then poured glue over the top of that and spread it around so that everything was covered. This helps keep everything attached and where it was supposed to be. While that was drying I cut out some single-sided cardboard and added pieces of roof tile to the rubble.  After that I let the whole thing dry overnight again. 

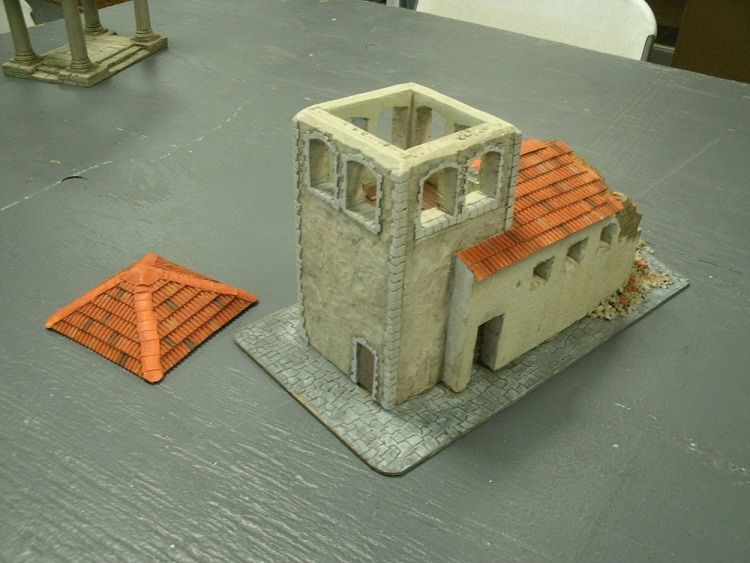
Then finally on Wednesday I started painting. I did a couple of thin coats of color on everything. Painting the walls a light brown or linen color and then washing them with a dark brown / black mix. After that I highlighted the walls with the original color to make the high points stand out. The stonework I painted a light gray but I didn’t like all that much so I went over it with a light brown color.  As you can from the pictures, the light brown color didn’t cover up the gray so it is still quite visible. I painted the wood timbers and the floor a dark brown.  The rubble I painted the same color as the walls then washed several times with the brown / black wash.  After that I picked out a few bits and painted them to match the dressed stone and painted the busted tiles in the rubble. After that I painted the roofs. These I painted with an orange color then painted various areas of the tile light gray and dark gray. After this dried I repainted the whole roof again with a slightly watered down orange in order to tone down the gray colors.


This was where I finished on Wednesday night. I had planned to go over the building again and give everything at least another coat of paint and repaint the dressed stone which I didn’t like. On Thursday I threw this building in the car with the rest of my stuff and headed up to the Game store to play some Bolt Action. Well, the model never made it back home.  I ended selling it to one of the owners of the FLGS, who really liked it, even though I told him that it wasn’t done. It turned out to be a small consolation prize for the fact that I let a guy who had never played before run my Soviet Army and he crushed me and my Germans under his boot heel. Well you know what they say, “if you can’t beat them, rock in the corner and cry”, or something along those lines.

So on Friday I realized that I hadn’t taken any pictures of the tower since I had started painting it Wednesday, so I took a few minutes out of my busy day and stopped off at my FLGS and take some pictures.


As you can see in the last picture the roof of the tower is removable so that you can put a sniper team or observer in there.  The bottom floor is also big enough that I could fit my AT gun in the bottom floor or put a squad up on the second floor to shoot out the windows.

Thursday, June 13, 2013

Dead Livestock


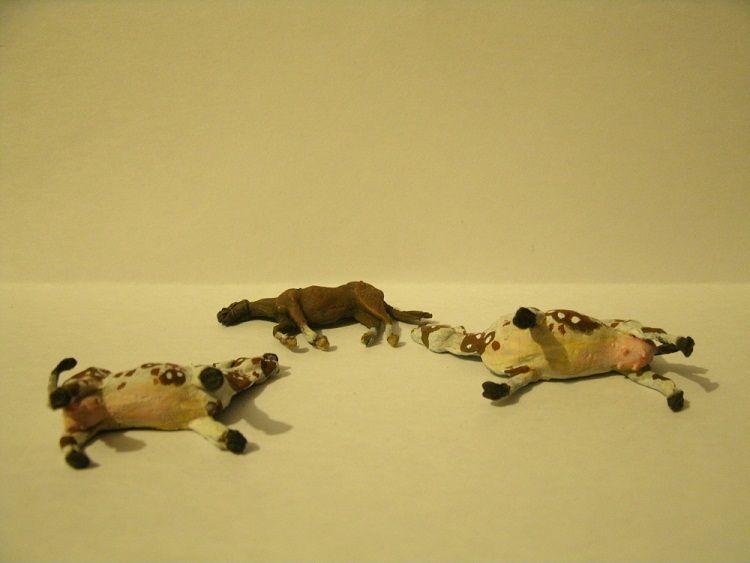
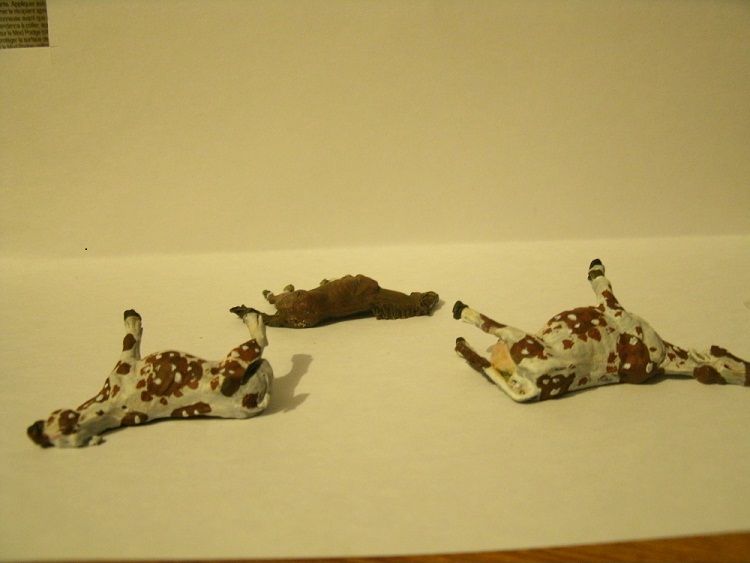
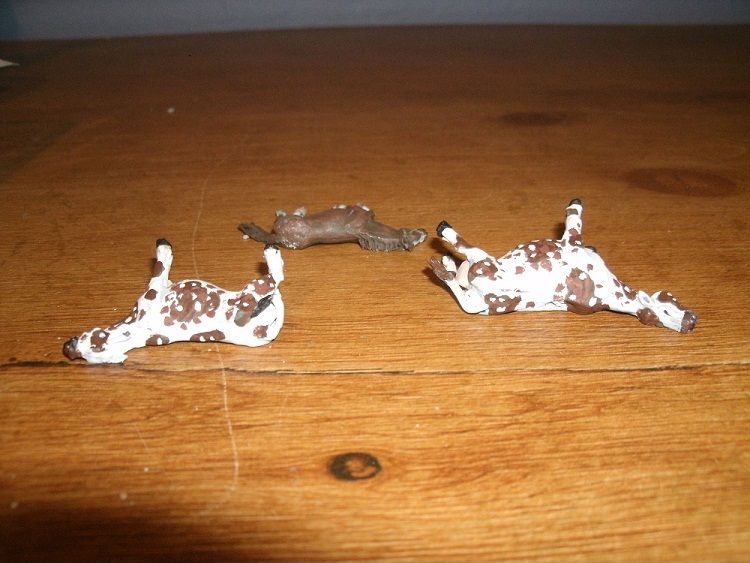
These are a recent purchase from Warlord Games that I have wanted for some time and finally picked up. There as some pretty famous pictures of dead livestock in the Normandy area during or after the D-day invasion. The Allied bombing campaign prior to D-day was pretty intense and took a heavy toll on the livestock of the region, especially the Normande breed of cattle that was nearly wiped out as a result. I thought that these would be a great addition to the gaming table. While not your ordinary terrain, to be sure,they look good in any skirmish game.

 I thought that as terrain they should have an impact on game play. So I have been tossing around some ideas, and for Bolt Action I think I am going to classify them as an obstacle that does not provide any cover. This way you just have to move around them, and they are just minor annoyances, but still something to be considered. 


The blister contained three models, a horse and two cows. The models are made of white metal and are well cast. There is not much flash in general but there is a lot of small bits on the hooves that are easy to overlook, as I did. I primed them and then started painted before I discovered these and so had to redo a little bit of painting. 

Painting was pretty straight forward. The horse I decided to paint brown and give him white socks, a white blaze on the nose, and some white mottling on his hind quarter. If you are not familiar with horses, perhaps because you were not raised by a horse fanatic who taught you to ride before you ever attending school, then you might appreciate some further information. Wikipedia, as always, has some basic information to help you with painting your own Horses, Horse Markings.  As for the cows, well there are some 800 breeds and vary quite a bit. So we have to focus in a bit more and look at dairy cows from the Normandy region. They have a particular type names Normande Cattle that are pretty common in the region, and the site linked to gives some pretty good pictures of what they look like, as well as the variety. Basically, these buggers are white with brown splotches, although these splotches can also be black. They are also many examples of the splotches being a mottled brown and black and white.. So I went the easy route and just made them white and brown, call me lazy. The other details are pretty simple. Paint the eyes, tip of the nose and lips black, with a small white dot in the corner so they look like they are reflecting light. The inside of the mouth, tongue and nostrils I painted pink. The underbelly I painted Vallejo Medium Flesh, the painted over the center of this with a coat of Vallejo Light Flesh. Then I put a thin was of pink on the udders. After that dried I painted the whole thing over with a wash of white and tried to blend it in with the white hair on the rest of the hide. The hooves are painted painted black.


Wow, can’t believe I just did a tutorial on how to paint cows, even if they are dead. 

If you want, you might add some dried blood, depending on how gory you like things. Then dull coat varnish the whole thing to seal it. After that I was thinking to do a satin finish on the horse to give it a shiny coat and maybe a bit of gloss varnish on the eyes to give them that glassy look.

Saturday, June 8, 2013

German Kubelwagen by Company B


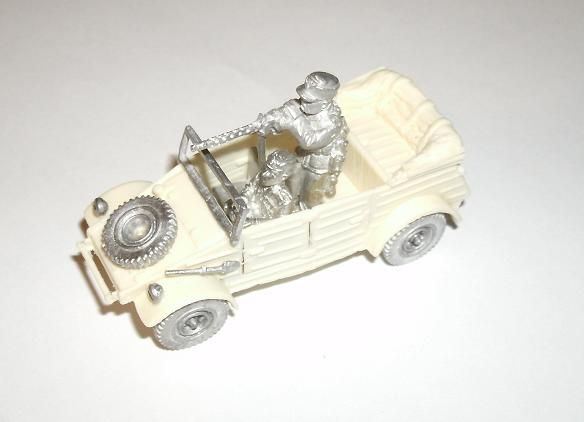
This is a resin and white metal model from Company B.  The first thing I noticed was how thin the doors are on this thing. Given that, I was impressed with how clean and detailed the casting was and the fact that it had no air bubbles, with the exception of a few on the bottom of the model that would not be visible while in use. There was also very little flash, one minor piece under the driver’s door, and that was easily removed.
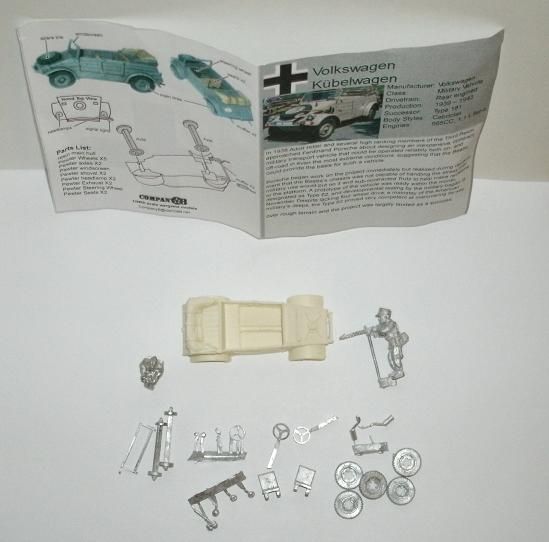
Overhead shot.


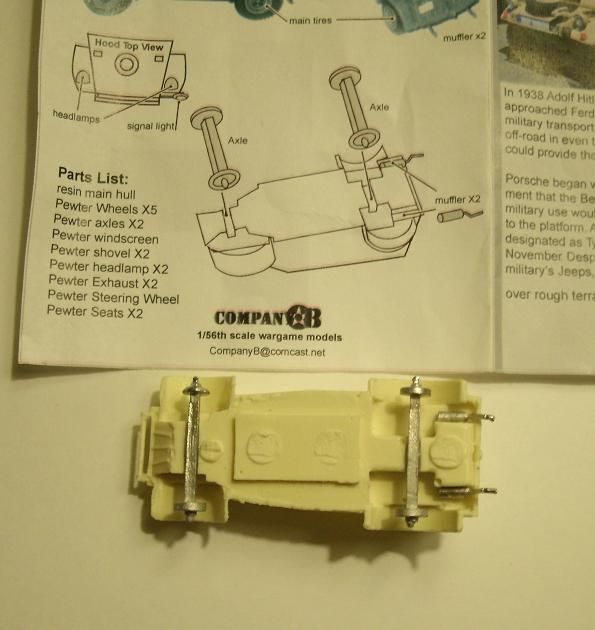
The model comes with an insert that has a color picture of the vehicle, basic stats, a brief history, a parts list, and an illustration to aid in assembly. I thought this was a nice inclusion, as the other models that I ordered did not come any instructions or assembly illustrations. Not that any were really needed for the Kubelwagen as everything was pretty straight forward. 

I decided to start with the axles and then the tires and noticed that when I picked up the axles that one of the wheel bases had been miscast and was rather lopsided. I figured that that it was in good enough shape to work so I continued. This piece proved a little more problematic than I anticipated as it was difficult to balance the tire on half the normal surface, and after falling off several times it finally stuck.
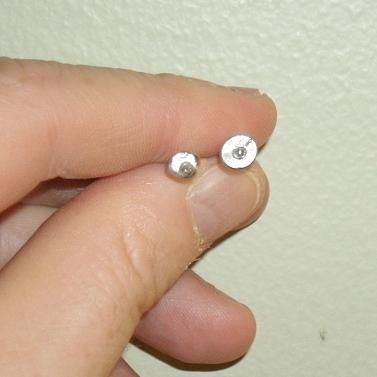
The wonky axle.


All the other tires went stayed on after the first try without any trouble. Then I attached the mufflers and let them dry while I watched a little TV.
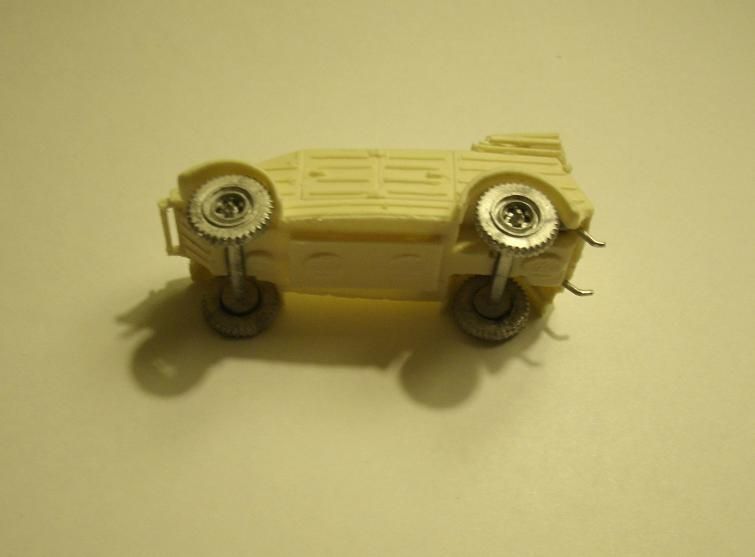


Waiting for the glue on the wheels to dry.

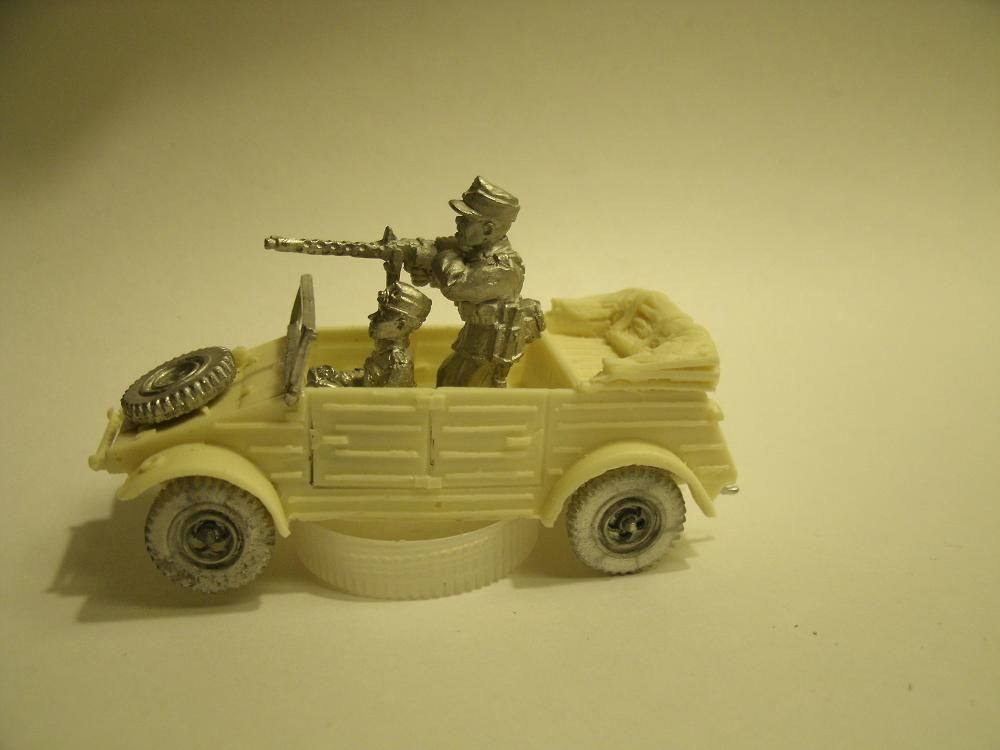
The interior of the car has two options. You can put in a steering wheel and an empty driver’s seat, along with the passenger seat, or the driver figure and a gunner, and an empty passenger seat. I decided to go with the driver and gunner combo. I suppose you could also just use the driver and find an officer figure, if you wanted a staff car. After I let the glue on the tires dry for a little bit I decided to put the driver and the passenger seat.  The driver wasn’t much trouble at all, whereas the passenger seat proved to be quite the little gremlin. I think this was due to a combination of factors, the gel super glue not curing fast enough and the metal seat back making the seat unbalanced. So after the one hundred and seventh time of falling over it finally stayed in place and I moved on to the gunner.
For this guy I had to cut the flash out from between his legs, but not high up enough to give him a vasectomy. I then had to pry them apart a little to get them to go over either side of the axle cover and sit flat on the back floorboard. Then I had to move the pintle-mount around a bit as it kept hitting on the drivers elbow, and I suspect that I may not have had the driver as far forward as it should have been. 
Waiting for the glue on the wheels to dry...again.

Done and waiting for a paint job.

Painting was pretty straight forward. Since I will be using the vehicle for late War scenarios and perhaps North Africa as well I decided to go with a base coat of Dunkelgelb. I then decided to leave off the green camo pattern that I applied to my SdKfz 251/1 and SdKfz 222, to make the vehicle more generic. Then I painted the wheels gray and washed them with black, then started painting the figures. At this point I decided that I probably should have primed and painted the figures separately, as I had already had trouble painting the interior of the vehicle, and was now have a hard time getting paint on some portions of the figures. So next time I know and will avoid this if possible.  Then I had to try and find some pictures on the internet that showed the color of the rag top, and decided to paint it Dunkelgelb as well but then highlight it with a slightly lighter yellow brown. Then I decided I didn't like that, so I painted it a Khaki Gray. The seats I went with a gray-green color just for the sake of variety. 


 I also added a windshield after I finished painting and dusted it with a bit of pigment to give it that dusty look. After that I took a few pictures, erased the pictures and painted the undercarriage a muddy brown and retook said pictures and they look a lot better.


I was also looking to see what type of markings was common on the Kubelwagen and found that mainly just the painted license plates. Not having these I have left them off, I am considering ordering some from Company B along with some other decal sheets, but for now I am leaving this off.


looking at this last shot, I just realized I also need to add the rank to the sleeve of the crew and a few other minor details.


Thursday, May 16, 2013

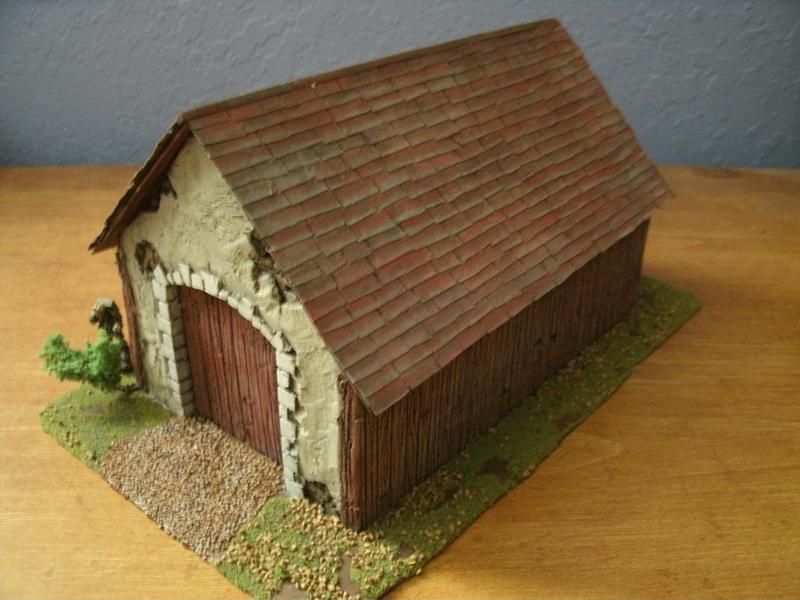
Outbuilding

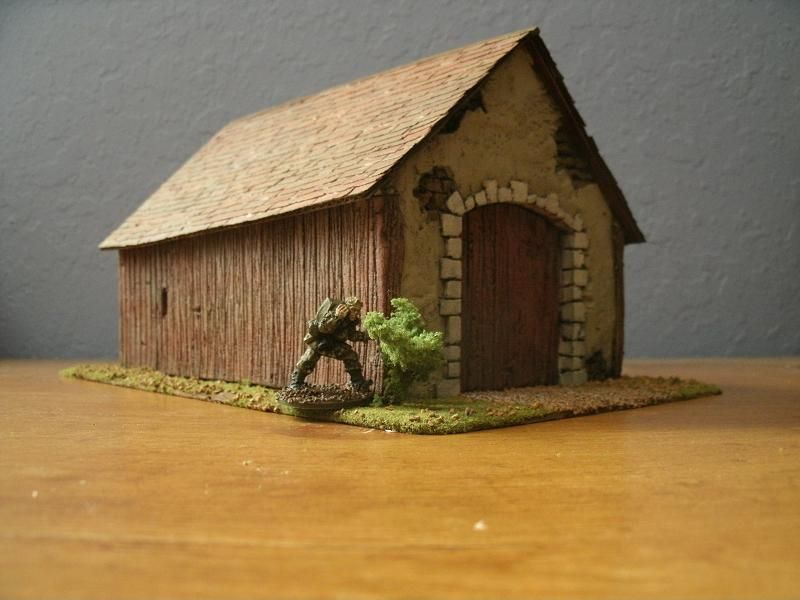
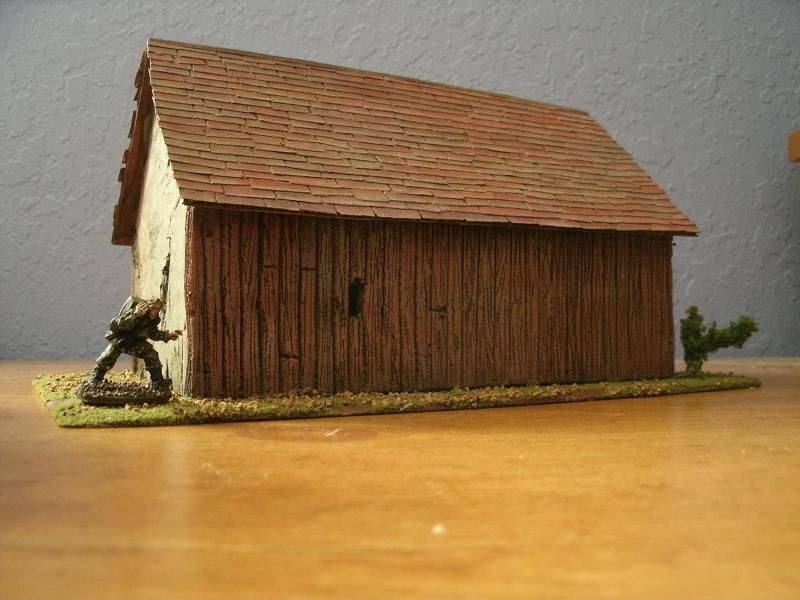
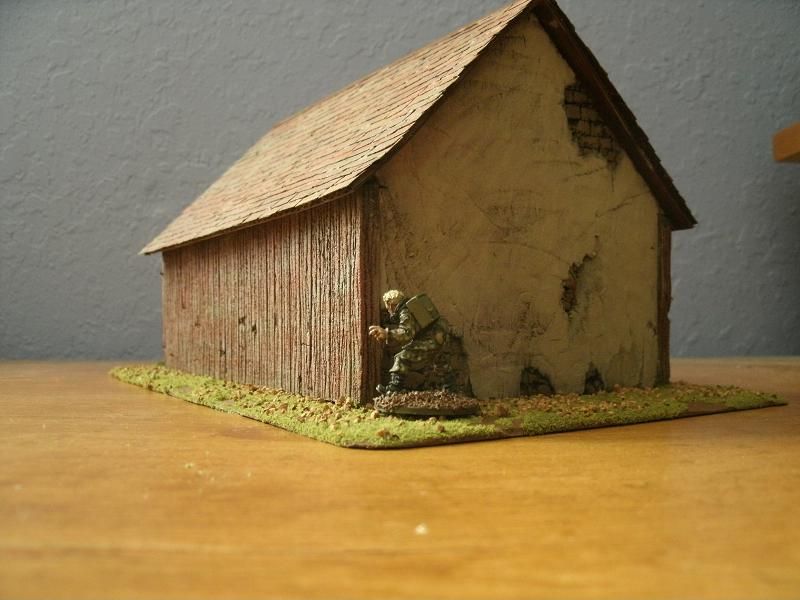
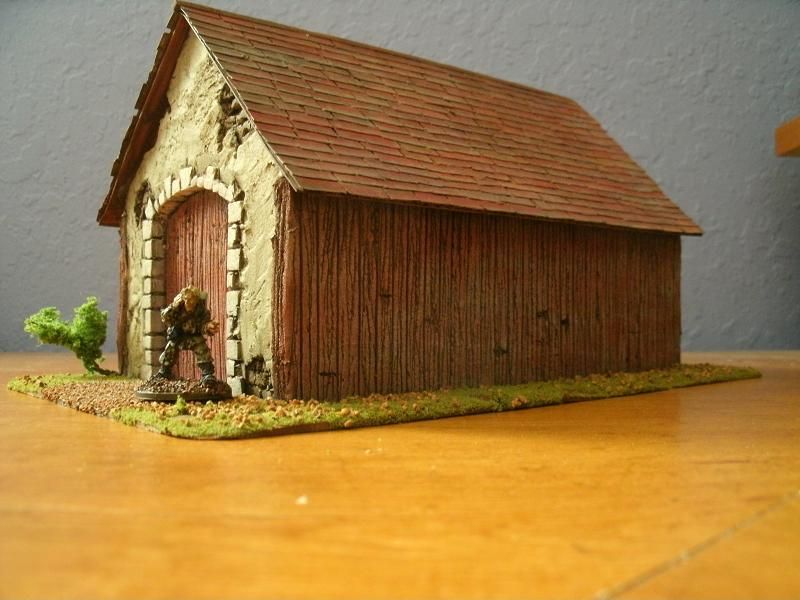
So I have been making buildings for a little while now, and have done mostly half-timbered houses and brick and plaster houses. So this week I decided to do something a little different. Originally I was going to make this a completely wooden barn but decided instead to to make it combination of materials. The sides are milled lumber while the front and back are brick or stone covered with plaster. It is supped to be a detached garage or shed, perhaps for a railroad?
Here we see Fritz snooping around, probably looking to steal my Duesenburg Model J I have safely stashed away in the building.

The building is made out of the ubiquitous insulation foam. The base is hardboard painted with a brown base coat and then flocked. I tried to give the wood a faded look that you often see on old wood where it turns a gray color from exposure to the elements, instead of just painting it brown. So after painting it gray I tried to make it look as though there were still some red paint still tenaciously clinging. However, I think I laid the red on a little thick to I didn't quite get the look I was going for but I think it still looks good, just not as weathered as I wanted. 


 The roof was constructed out of a piece of cardboard that I glued short strips of card stock to. Yep, one at a time. How long does this take? Well in this case it took me 1 hour and 40 minutes. I know this because I was watched ParaNorman with the family while I glued them on. BTW, this how I often work on my projects. Sure, they think I am weird, but they are used to it.


It used to be that I cut each shingle out by hand using a pair of scissors or a hobby knife. Then one fortuitous day I was shedding some old bills when I noticed that the width that it cut was about the same width of the shingles I had been cutting. So I put some card stock through the shredder and it came out fine. I then cut a dozen or so of the 1/4" strips at a time, easily making enough shingles to do the entire roof in a few minutes. Still, you have to glue them on one at a time, but I think the haphazard nature adds to the character of the building. A regular pattern of shingles would be fine for modern buildings but not for older buildings in my opinion. By the way, thicker card like that from cereal boxes are to thick to be cut by my shredder, and probably yours as well. That is unless you have one of those fancy shredders that cut through CD's and all sorts of other things.