Sunday, May 19, 2013

The Half-timbered House. Part 1: The walls


So I am going to detail the steps and techniques that I use to create half-timbered house walls with polystyrene foam.  Hopefully this will be pretty simple and straightforward and you will be knocking out your own in no time.

First I start by cutting four identical 4” x 6” sections for the four walls of the house. Two of the wall sections will be used as 4” high and 6” long sections that will be the front and back of the house. The other two sections will be used as 6” high walls and will form the peak of the roof; the walls will then be 4” wide. You can make yours however big you like, it’s your house after all.


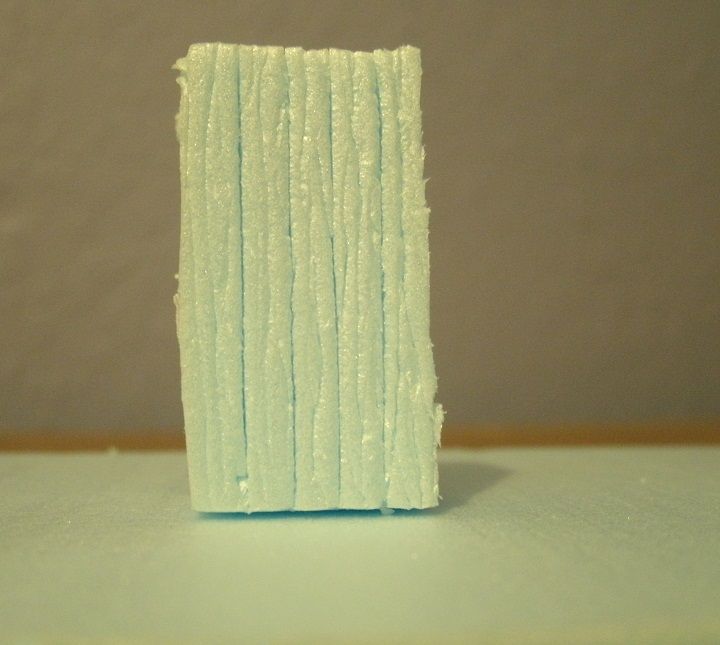
Exciting picture of 4 pieces of polystyrene foam

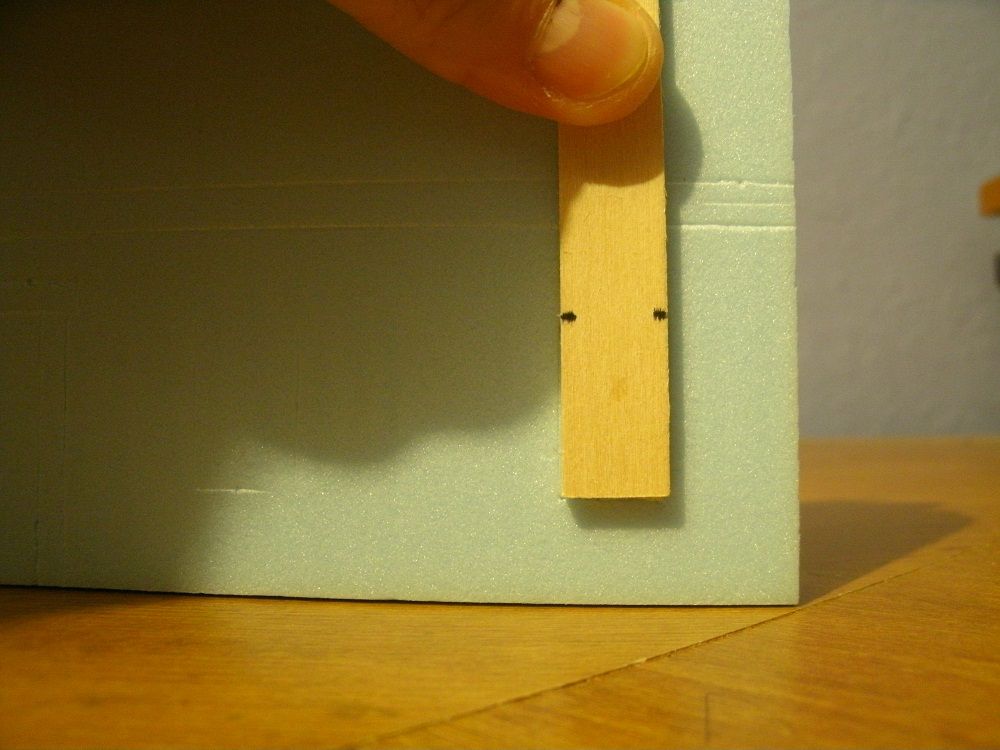
You can do this by measuring and cutting by hand, but I find that I simply cannot cut polystyrene foam in a straight line. To solve this problem I built a cutter just for this purpose. It consists of a 4” x 4” block of wood that has a guide (a thinner piece of wood), screwed to one side. This guide is slightly shorter in depth than the foam, so just under 1/2”.  On the opposite side I placed two screws diagonally and offset from each other. The blade is placed in between them and then tightened down to hold it in place. The blade does not cut fully through the foam. So you have to run the blade down one side, then flip over the foam sheet and cut the other side.

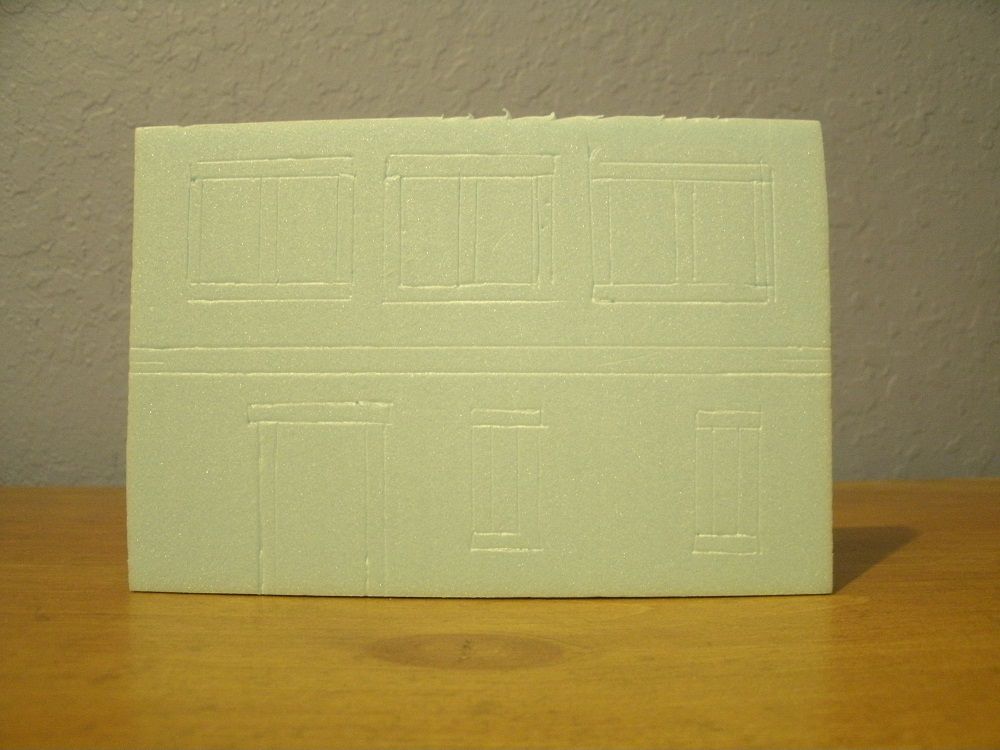
Now I take the first wall piece which will become the front and measure up two inches to the center. Then I measure and mark a few mm above and below the center-line. Then lightly etch both lines across the foam. For the etching part you can use just about anything with a point. I’ve used a mechanical pencil, a needle, but usually I use a sculpting tool that has a pointy end.
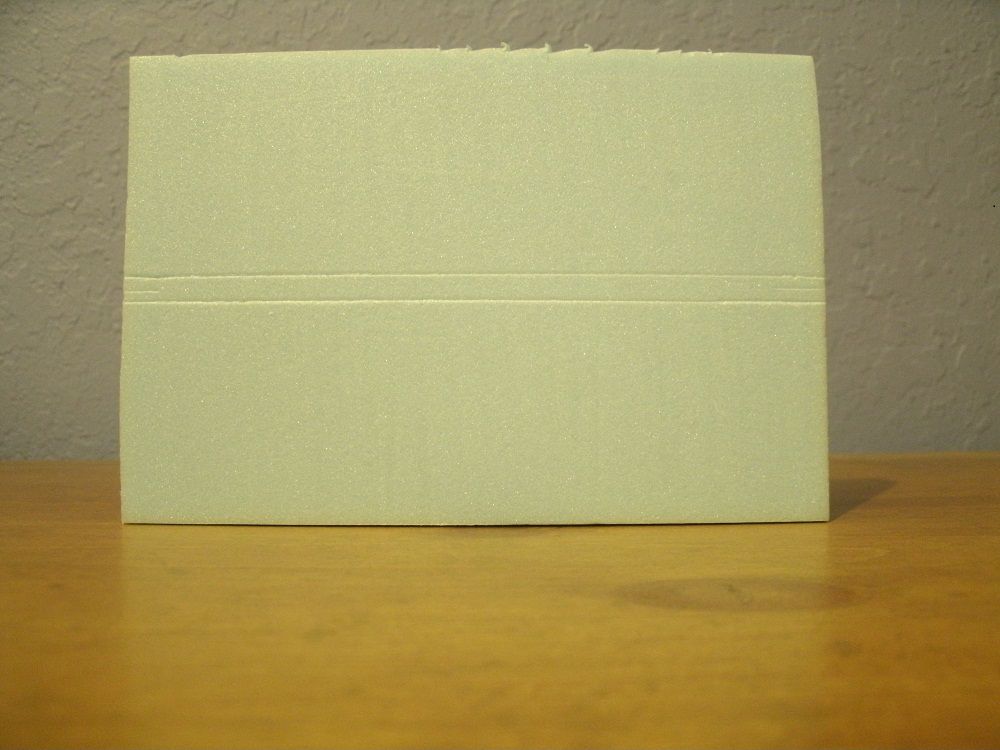

When will the excitement stop?


Okay now that this step is finished we can move on to more exciting things. Next I mark out the door and the timber posts above and to the sides of the door. The door I usually make 3/4" wide and about 1 1/2" inches tall. 

Not yet.


Then I measure 1/2" inch from the base of the wall where I want to put the windows on the bottom floor. Then holding my magic 1/2" inch stick in place I trace around it. Then, because I want really small windows on the ground floor (because this helps keep the burglars out, and the teenagers in) I then flip the stick sideways and use it to etch another set of lines on the inside of the square, which will become the timber window frame.


Then I do the pretty much the same thing on the upper floor, measure up 1/2” and etch the lines for the windows. These lines will be the inside of the window this time as I want the windows on the upper floor a bit bigger than the ones on the bottom floor.


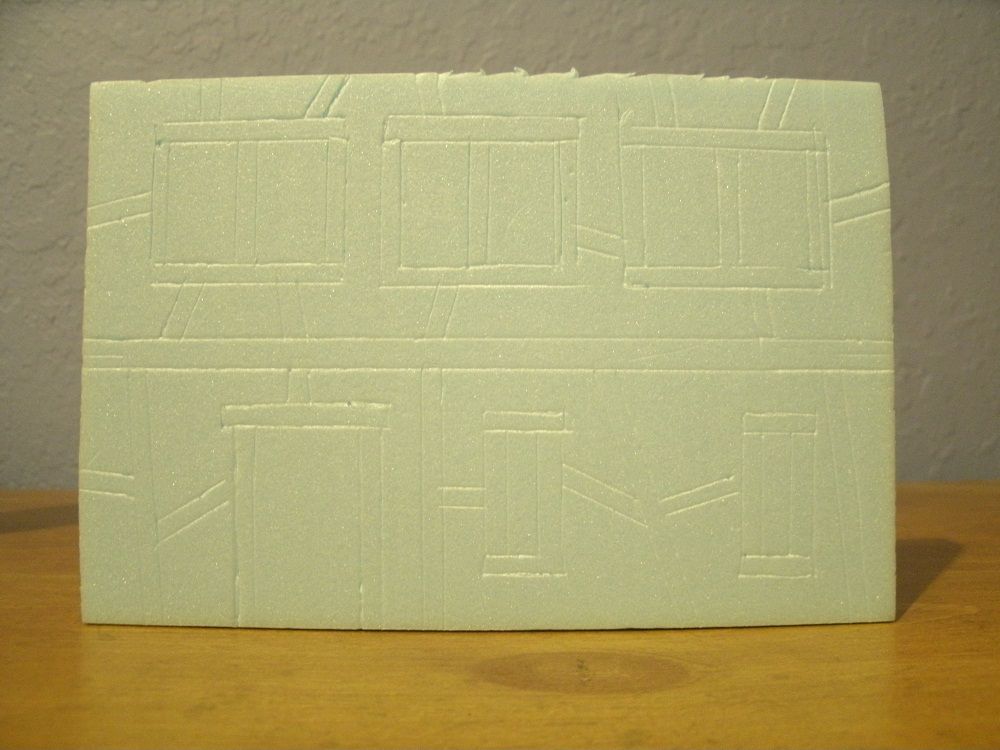
Now that the windows are done we move on to the wall timbers and etch these on. You can put these wherever, and however you want. Live a little and do some odd angles, you know you want to. 


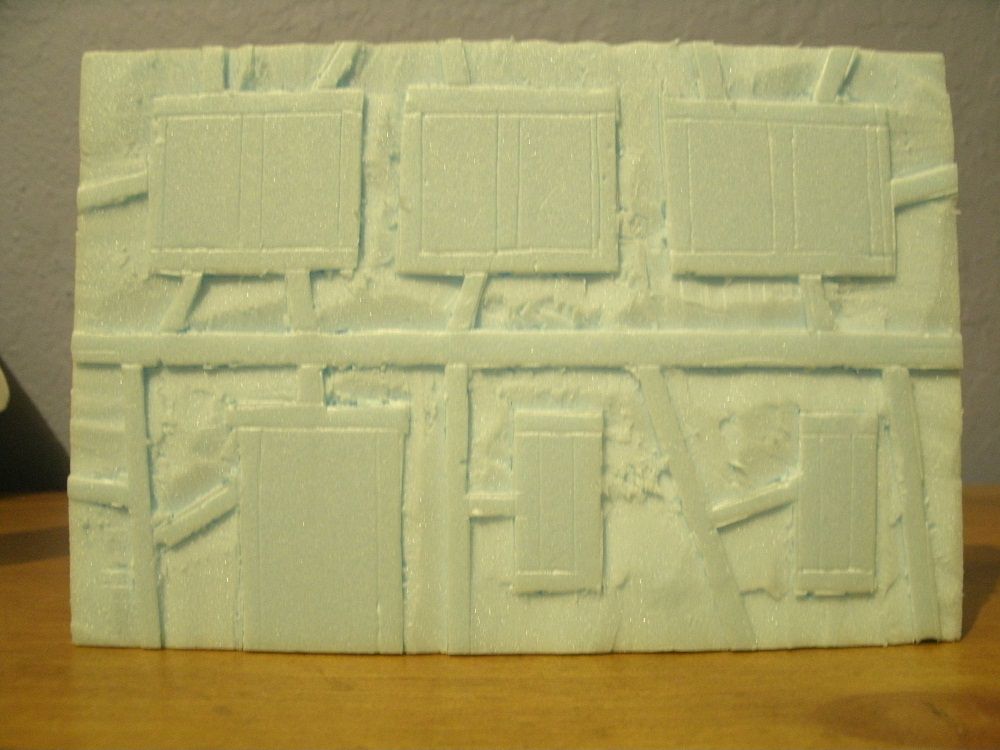
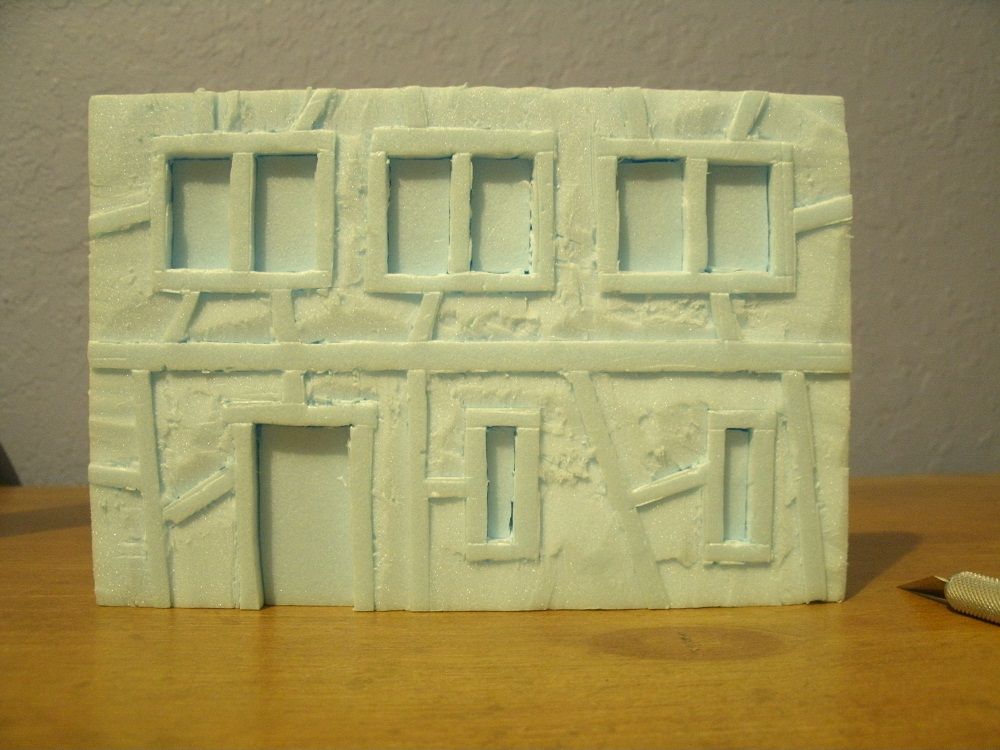
The next step is to now trace over all those lines you just finished etching with a hobby knife. So I know you are saying to yourself, why not just skip all the etching and cut all those lines to start with?  Well because if you mess up anything while etching, it will get cut out or can be covered up later, but if you cut them with a knife and mess them up, it will show up later on. Now, you want to cut just a few millimeters deep when you do this and try not to cut through any intersections as this may cause problems down the line. Also don’t worry about the inside of the windows just yet; we will get to those later. After that is done, take the hobby knife and start cutting out the areas that will become the stucco walls. Cut inward towards the part that will be the timbers trying not to cut too deep under them. When doing this part try to cut at a shallow angle using a sawing motion. The more sawing you do the rougher your stucco will look.  When you are done there will be some pieces left in the middle that you will need to cut out in the same way. You can use the hobby knife again or you can use a box knife with the blade fully extended to get these bits out. It really just depends on how difficult they are to get to. You can see the results in the picture.


Now we want to cut the door and the windows out. Using the hobby knife cut straight in along the edge of the widow. Since it is fairly deep you will probably have to cut in a sawing motion. Make sure that you tilt your knife when you get to the corners to make sure that get everything. It also helps to flip the foam over and check the back to see if there is anything you missed. Try not to cut from the back as it may not line up with what you have already done. Once you think you have it you can use the back of the knife or your finger to push the window through, breaking it loose from any remaining bits that didn’t get cut. Once the windows are loose, just push them back in. We will get to these later but for now it is best to just keep them in place so they don’t get lost.


Take the door out and use you etching tool to make four or five planks that will make up the door if you want the rustic look. After this cut them with the hobby knife and then use the etching tool on them again to give them more depth. Then take the back of your knife or your etching tool and scratch some lines in to make it looks like the grain of the wood. You can get fancy if you want and do knot holes and type of thing, but anything should do. Remember, you want the grain to show, but not to be as deep as the cracks between the planks. Now if you want a more modern looking door you can cut off a thin piece of the door from the back side. Then cut out several squares from this then glue this part to the front of the door, with the flat side of the back against the flat part of the front. Once it is dry you can glue the whole thing back in place. 
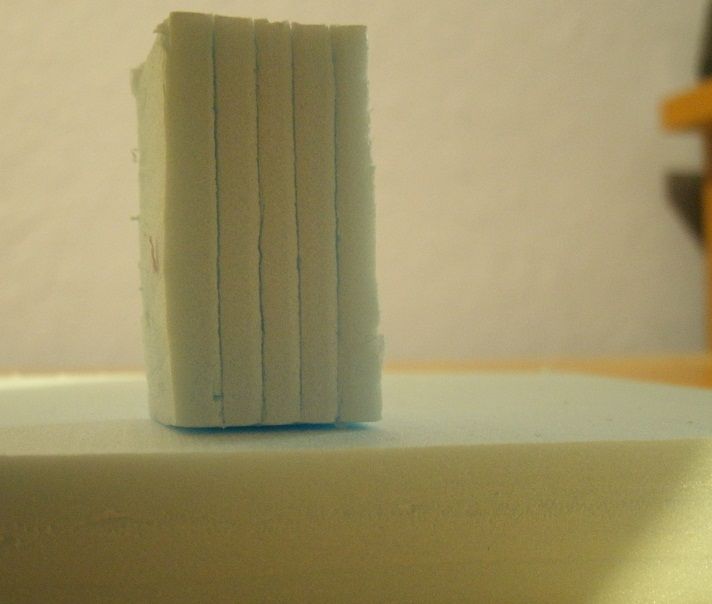

Before


After
Now that you have a little practice with scratching in the wood grain of the door, do the same thing to all of the timbers on the wall, including around the windows and the door. At this point you can stop if you want to, I often do. However, if you think the stucco looks a bit too rough then can take a small file or some fine grains sand paper and lightly sand down the stucco areas, and I mean lightly. Pressing to hard while you are doing this can tear it more and make it look even rougher, so go easy. Also a small piece of sandpaper run into the corners between the stucco and the timbers can be used to get any little bits that are stuck in there. 

You may notice that I didn’t put a timber running down either side. I left these out on purpose, as I always put the timbers on the corners of the building on opposite pieces.  So the corner timbers of our building will be on the side walls in this build, but you could easily put them on either end of the front and back pieces and it would work just find.  Then I use my Airscrew balsa stripper to make a rabbet cut on the side walls of the house, and inset the other wall. This way the wall timbers will be flush with the corner timbers. This also gives the model more stability and helps hide the seams if you can’t get it to glue together flush, as it appears to be cracked stucco along the side of the corner timber. I will cover this in the next part of the tutorial with some pictures to clearly illustrate what I am trying to explain.

So I am going to have to leave off here for a while as I am going to be out of town for a bit. However, if anyone actually wants to try building something similar, just do the same thing on the other four walls. Remember to turn the side walls sideways and cut the peak of the roof from the 4” mark on either side of the wall to the top center at 6”. You will also want to create a timber running across the wall at the 4” mark to separate the second floor from the attic. I will still be online from time to time if anyone has any questions, feel free to ask.
Thursday, May 16, 2013

Outbuilding

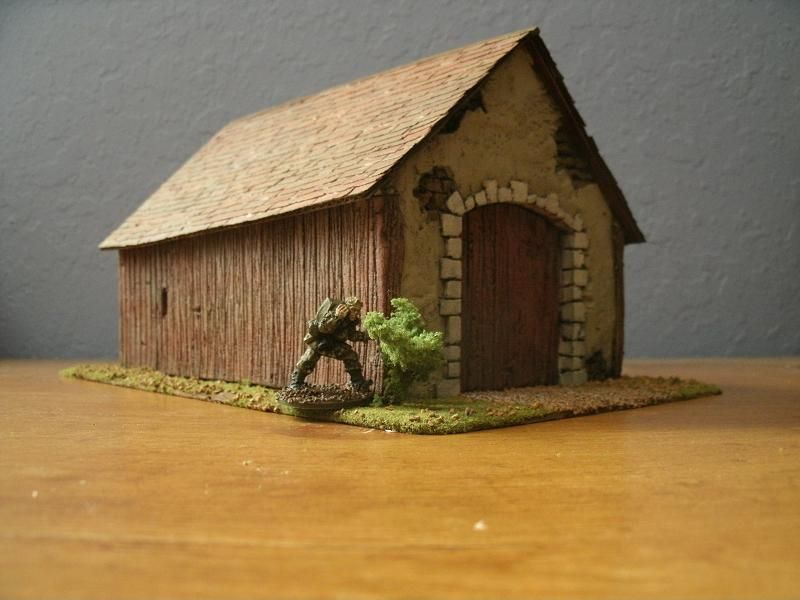
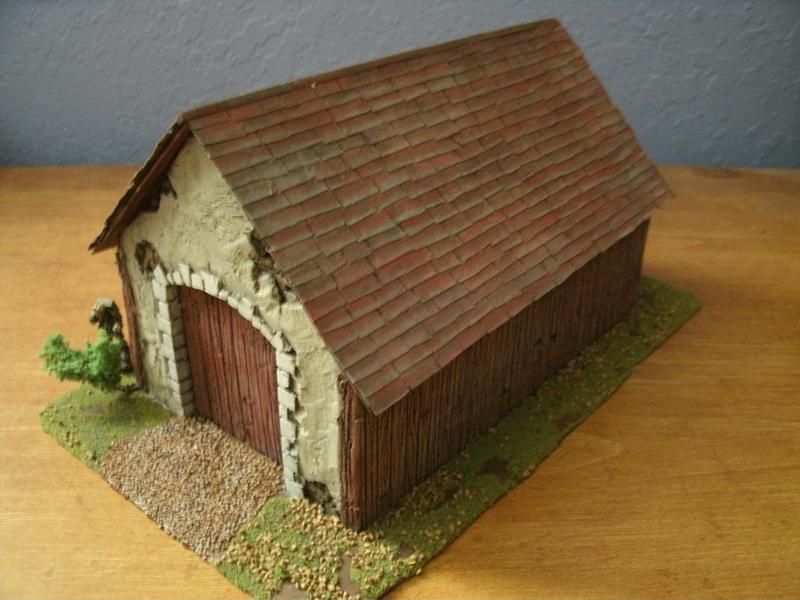
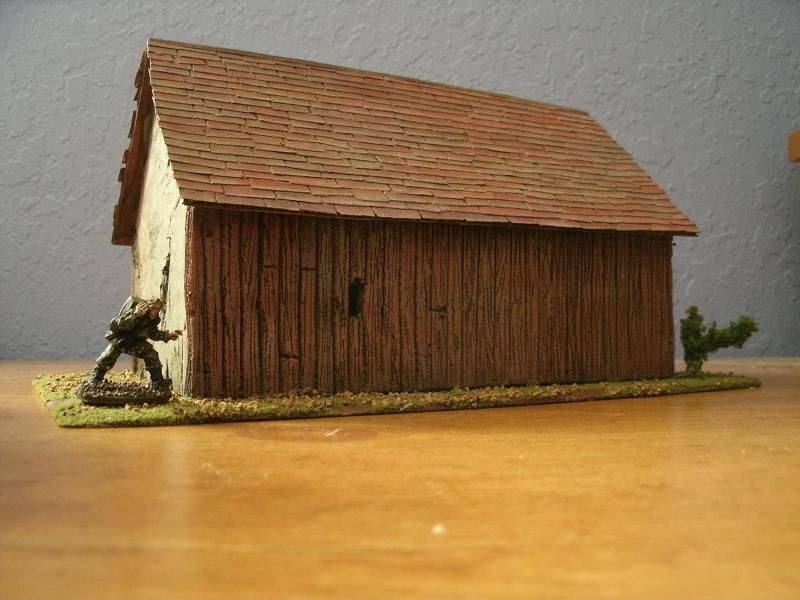
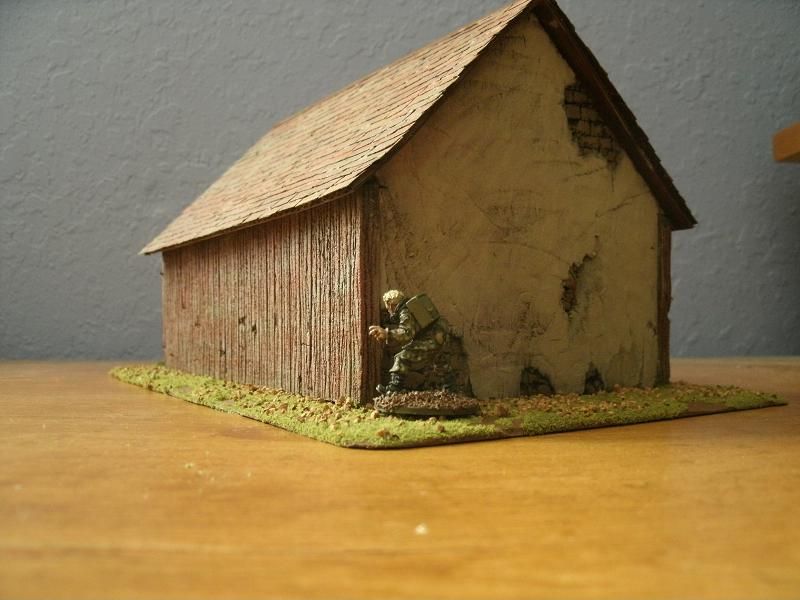
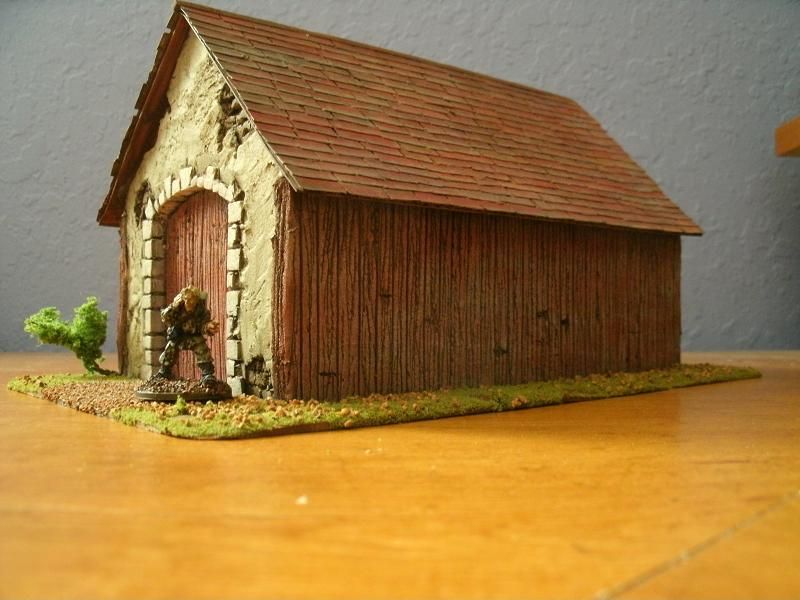
So I have been making buildings for a little while now, and have done mostly half-timbered houses and brick and plaster houses. So this week I decided to do something a little different. Originally I was going to make this a completely wooden barn but decided instead to to make it combination of materials. The sides are milled lumber while the front and back are brick or stone covered with plaster. It is supped to be a detached garage or shed, perhaps for a railroad?

Here we see Fritz snooping around, probably looking to steal my Duesenburg Model J I have safely stashed away in the building.

The building is made out of the ubiquitous insulation foam. The base is hardboard painted with a brown base coat and then flocked. I tried to give the wood a faded look that you often see on old wood where it turns a gray color from exposure to the elements, instead of just painting it brown. So after painting it gray I tried to make it look as though there were still some red paint still tenaciously clinging. However, I think I laid the red on a little thick to I didn't quite get the look I was going for but I think it still looks good, just not as weathered as I wanted. 


 The roof was constructed out of a piece of cardboard that I glued short strips of card stock to. Yep, one at a time. How long does this take? Well in this case it took me 1 hour and 40 minutes. I know this because I was watched ParaNorman with the family while I glued them on. BTW, this how I often work on my projects. Sure, they think I am weird, but they are used to it.


It used to be that I cut each shingle out by hand using a pair of scissors or a hobby knife. Then one fortuitous day I was shedding some old bills when I noticed that the width that it cut was about the same width of the shingles I had been cutting. So I put some card stock through the shredder and it came out fine. I then cut a dozen or so of the 1/4" strips at a time, easily making enough shingles to do the entire roof in a few minutes. Still, you have to glue them on one at a time, but I think the haphazard nature adds to the character of the building. A regular pattern of shingles would be fine for modern buildings but not for older buildings in my opinion. By the way, thicker card like that from cereal boxes are to thick to be cut by my shredder, and probably yours as well. That is unless you have one of those fancy shredders that cut through CD's and all sorts of other things. 


Tuesday, May 14, 2013

Sd.Kfz 222


by Warlord Games

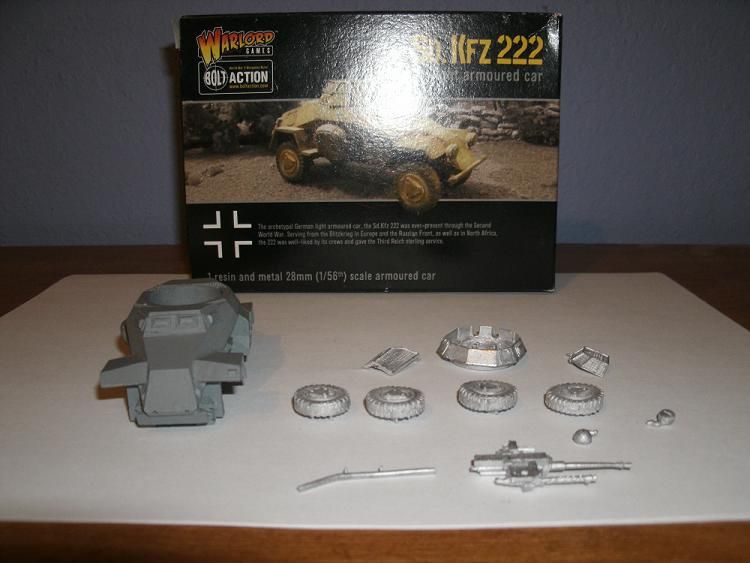
I purchased this model just over a week ago as I lacked any recon vehicle for my Bolt Action German forces. Sure I could have gone with a Puma or an 8RAD but the 222 was a more common vehicle and saw widespread use.


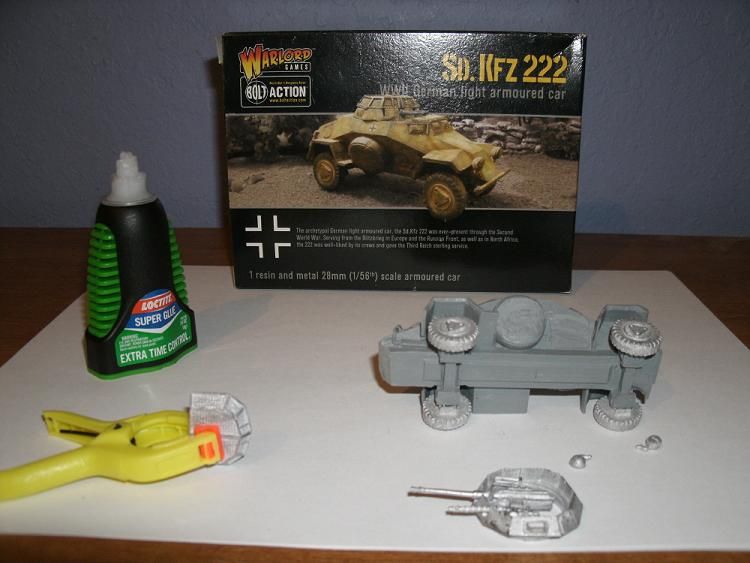
The white metal parts had very little flash and I had them cleaned up in just a few minutes. The resin hull had no defects that I was able to detect. Construction was pretty straight forward and was made even easier by the assembly guide for the model on Warlord’s web site. Wheels went on no problem but the way the model is constructed they can only be put on one way and cannot be turned.


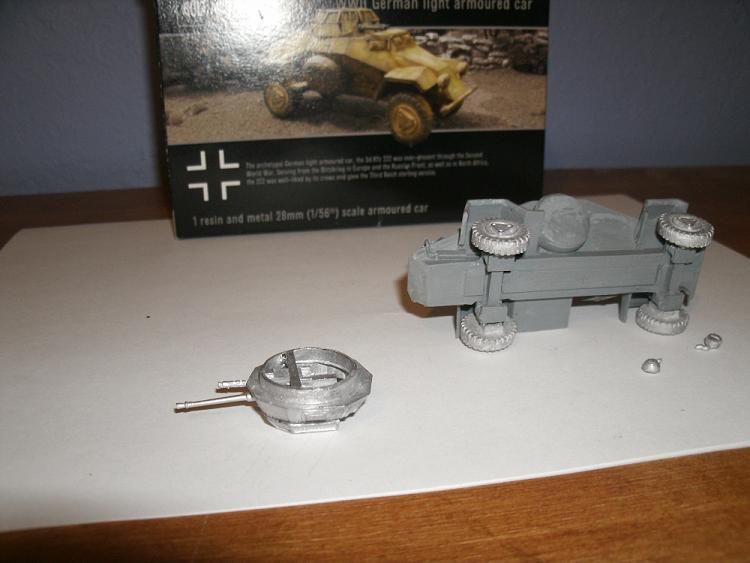
The trickiest part of building the model was gluing the wire mesh hatches together and then to the turret. This was easily enough done by clamping the two halves together while the glue dried. Then I figured out that the turret stayed together better when it was flipped over, and then I simply left it to dry, as shown in the picture below.


Total, it took me 20 minutes to put the model together. This is one of, if not the fastest build of a model that I have done so far. So the 222 gets a big thumbs up in that department. The most difficult and frustrating part of the build was when I broke the tip off my bottle of super glue.


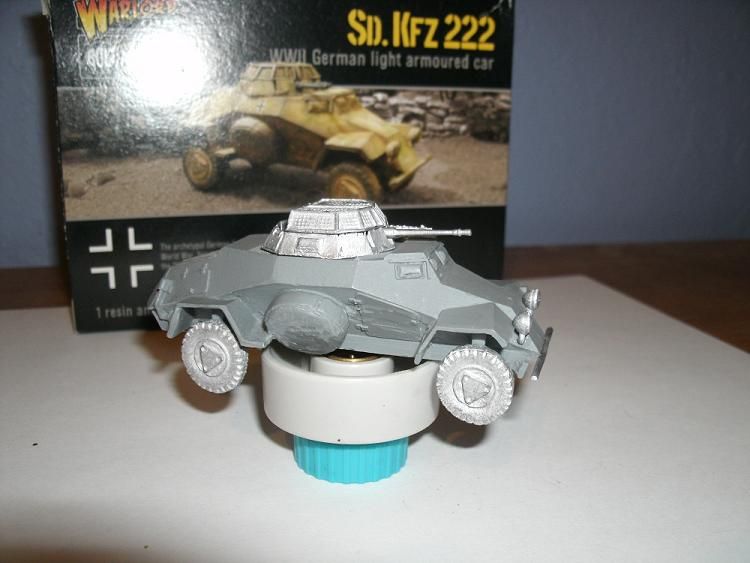
Here is the finished model, propped up the cap of my old (excuse me, I mean vintage) airbrush can adapter while the glue dries thoroughly. 


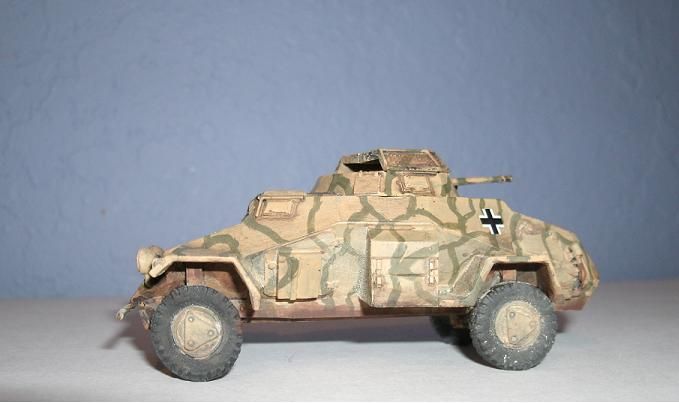
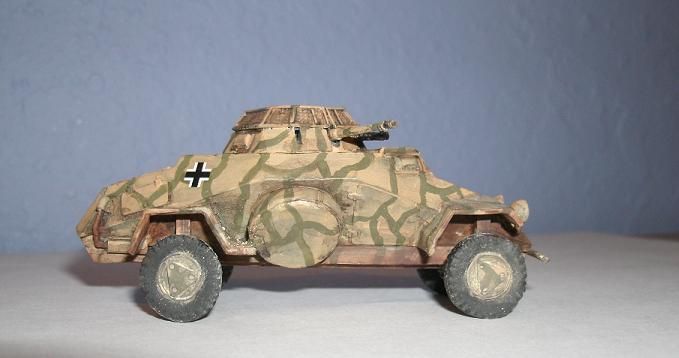
Later that night I primed the model and then went to bed. The next evening when I had time I gave it two coats of Vallejo Yellow Tan. After the base coat had dried I came back and painted the green camo, so that the vehicle would match my Sdkfz 251/1’s that I painted last month.  Once the green camo dried I gave it a light wash of dark brown the painted the under carriage dark brown to make the whole thing look a little muddy.  While that was drying I started looking around for pictures of how and what markings were done on these vehicles. Once the whole thing had dried, I applied the water slide decals as you see in the photos. I don’t currently have any license plates transfers that I can use on this thing, but I am hoping to get some soon. As a result, I have not given it a second was of dark brown. So the decals may look a little too bright and shiny at the moment.


I also recently purchased some Vallejo pigments and used them on the 222 to give it that dusty look. The results weren’t exactly as I had hoped and I will have to do some more research to learn how to use it more effectively, I hope.

I have to say again that this was one of the easiest and quickest builds that I have done so far. Twenty minutes to build and not much more time to paint if you don’t count drying time.

Sunday, May 5, 2013

Courtyard


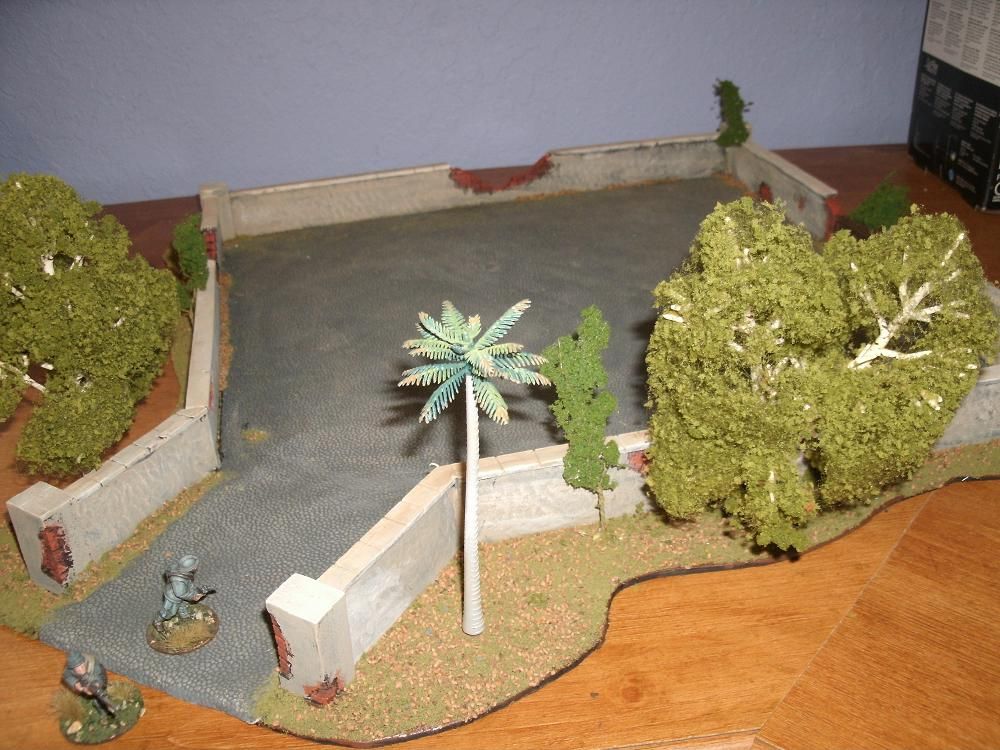
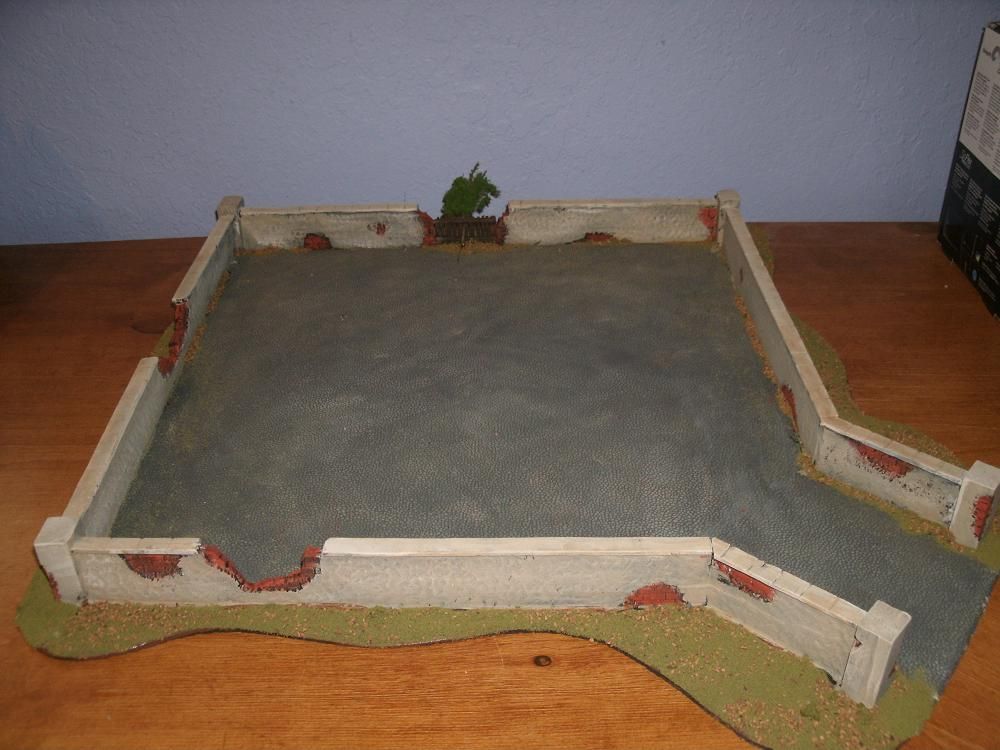
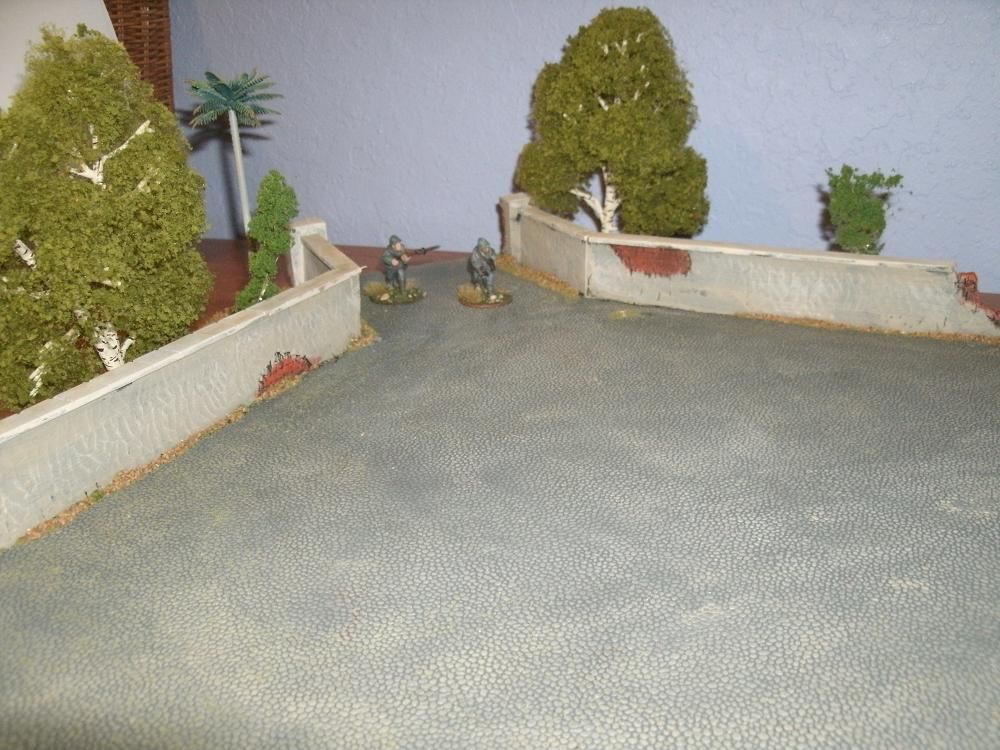
This is a courtyard for use with some of the houses I have built in the past. I have tried to make it as versatile as possible. I went for plaster covered brick walls that would have been fairly common across much of Europe. At the same time, I tried to give it character by adding small details to make it unique; such as the fence with the tree growing through it, and the shell hole in the wall. The trees are removable and can be moved around the board and set up in numerous different arrangements. I have both deciduous and palm trees on it in the picture to show that it can be used for temperate as well as sub-Saharan locals by simply changing the trees.


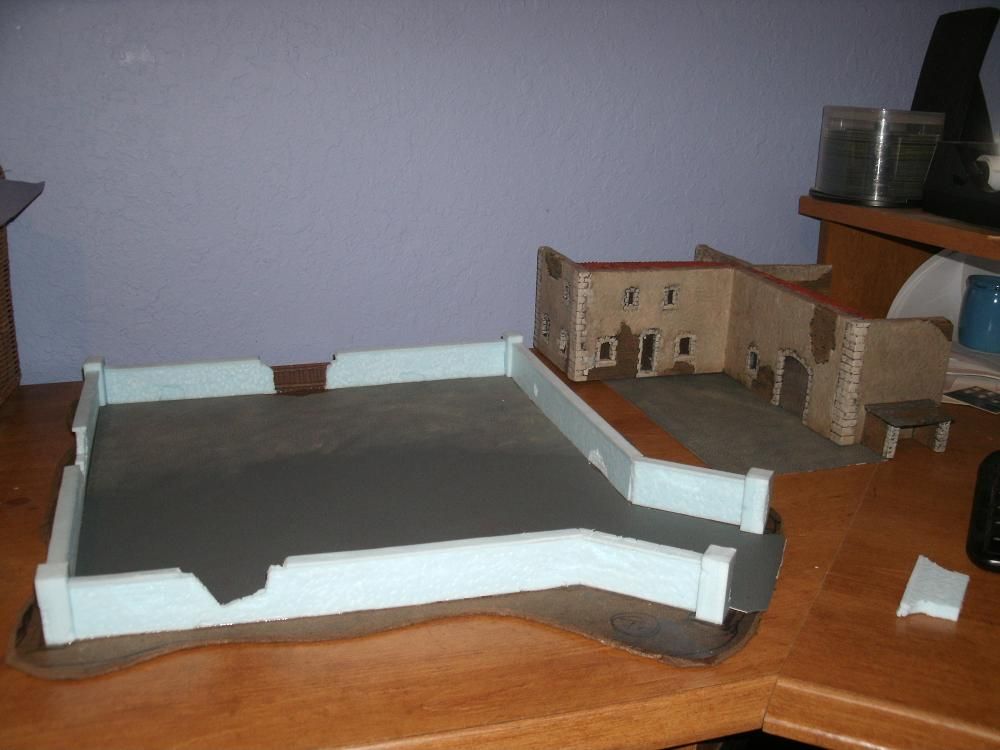
For the base I used some hardboard with an irregular edge. Once I determined the layout I wanted and how big my walls were going to be I cut out some 2” tall foam strips. I then took these and my Master Airscrew Balsa Stripper, setting it to 1/4” thickness and cut the foam strips lengthwise on all sides. The blade won’t cut all the way through, but it gives a good guide on both sides. Then I took a box cutter and cut the center out. This gave me 1/4” thick pieces with which to make the walls. I cut these down to the appropriate length and started removing thin sections in random places. These sections were for the underlying brickwork. This was made by using the back of the box cutter or xacto knife and a straight edge. The corner sections are made from 1/2” x 1/2" sections slightly larger than the wall. Once that was done I glued all the pieces to the board and let it dry. I came back later and added the top of dressed stone. These are made out of long thin strips of foam cut out with the Balsa Stripper and then glued on to the top of the wall. Once dried the grooves between the stones was made tool impression just like the brickwork.

The cobble stone pavement was made using some shelf liner that I bought at Wal-Mart for making roads and it worked nicely for this project as well. Hopefully, being glued to the base will make this more durable than my roads.

The wooden fence is from Renedra Plastics, and was cut down to fit the gap in the wall.


After construction I painted the whole thing, except the shelf liner, which I had already partially painted.


Cobblestones: Hippo Gray (FA ?), with Butter Pecan highlight (FA 939)
Stucco: Butter Pecan (FA 939), with Linen (FA 402) highlight.
Bricks: Georgia Clay (Americana)


After painting I flocked the outside edge and the inside between the shelf liner and the walls with some green flocking mixed with some brown model railroad ballast, and a few bits of clump foliage. Once the flocking had dried I drilled a few holes to fit the diameter of the base nipple on the trees and simply stuck them in.


Wednesday, May 1, 2013

M7 Priest Unboxing and Build

Recently I pulled the trigger and ordered several vehicles from Company B for use with my Bolt Action American's and German's.. This is the first time I have dealt with this company. Shortly after placing my order I received an e-mail letting me know that one of the models I ordered was out of stock.
While this news was a bit of a letdown, they gave me a couple of options. Order a new model, to be shipped with my current order, or shipping the G3A, free of charge, when it was back in stock. I opted to wait, as the Mercedes G3A is one cool truck, and made even more icon by the Indiana Jones Films. It is useful for both Bolt Action and the Pulp 30's game that I co-run with a good friend.

So before even receiving my order I have to give them a thumbs up for customer service. Especially after hearing stories from my friends about getting half-filled orders and then spending days or weeks trying to get a response from whichever company to get the issue resolved.


So on to the M7 Priest. I must admit that the Priest has been one of my favorite WWII vehicles even since I was a kid and played my first game of squad leader back in the day. So my choosing this model for my American army has more to do with my own personal quirks than it does with how effective, or historical it is with the rest of my troops.


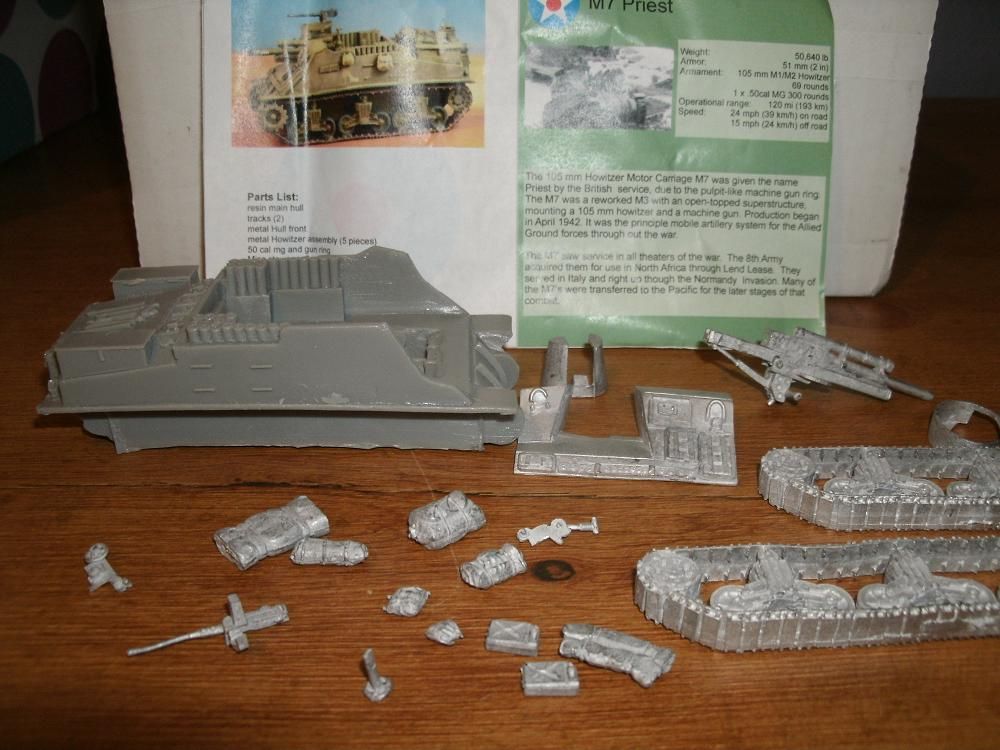
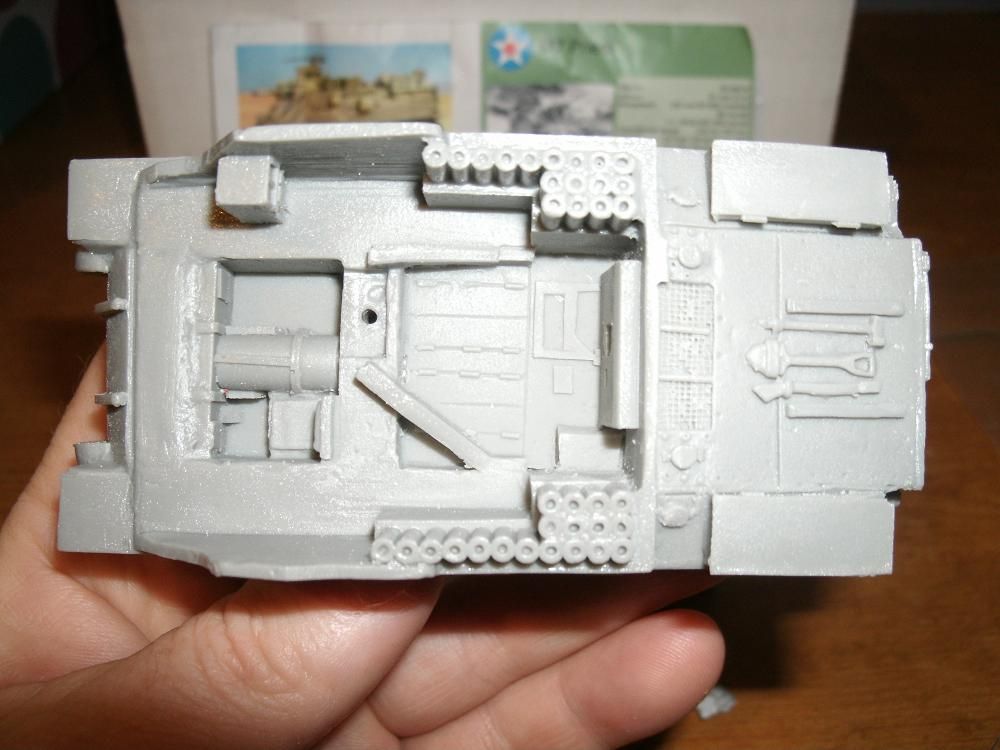
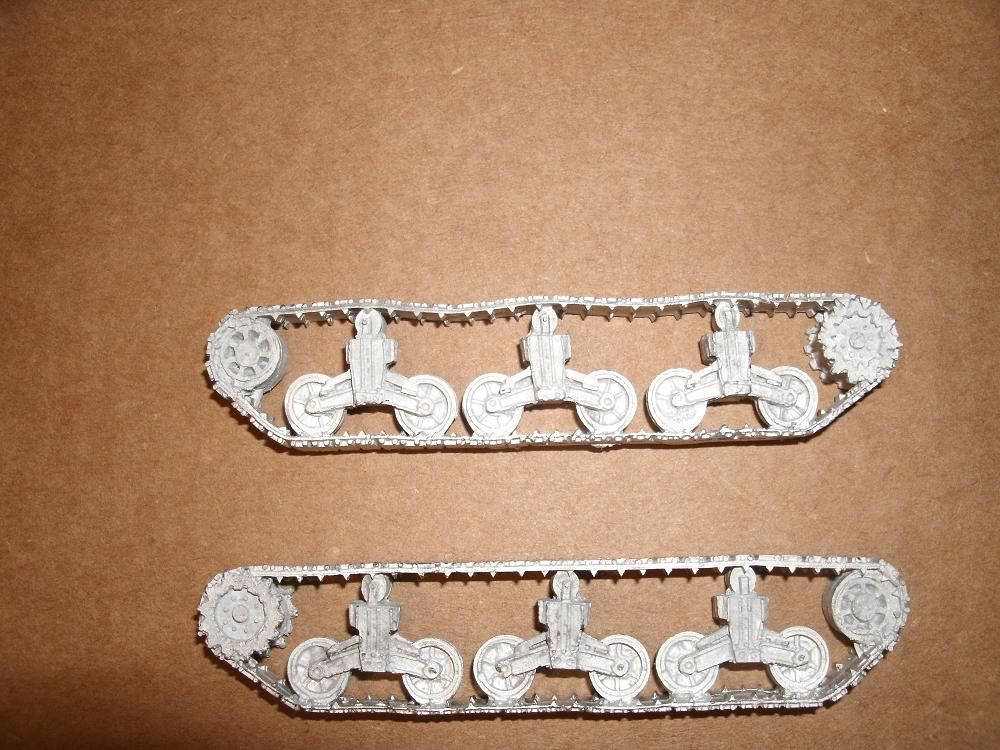
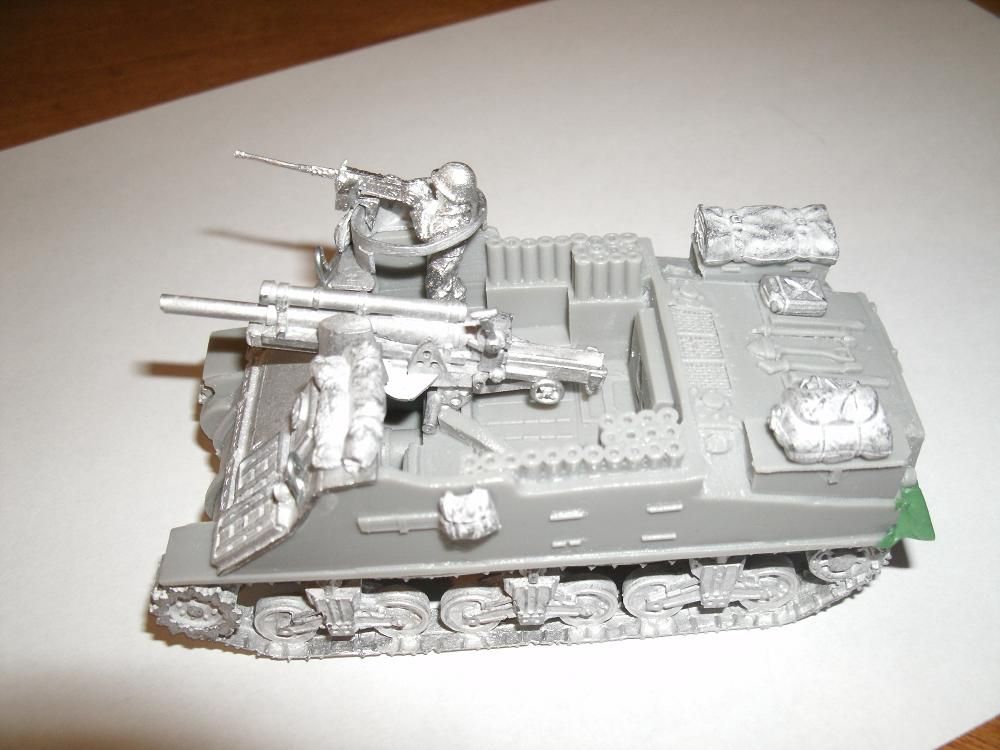
 Here it is in all it's un-assembled glory. Overall, both the metal and resin parts have very little flash, and the resin hull only has two air bubbles. 


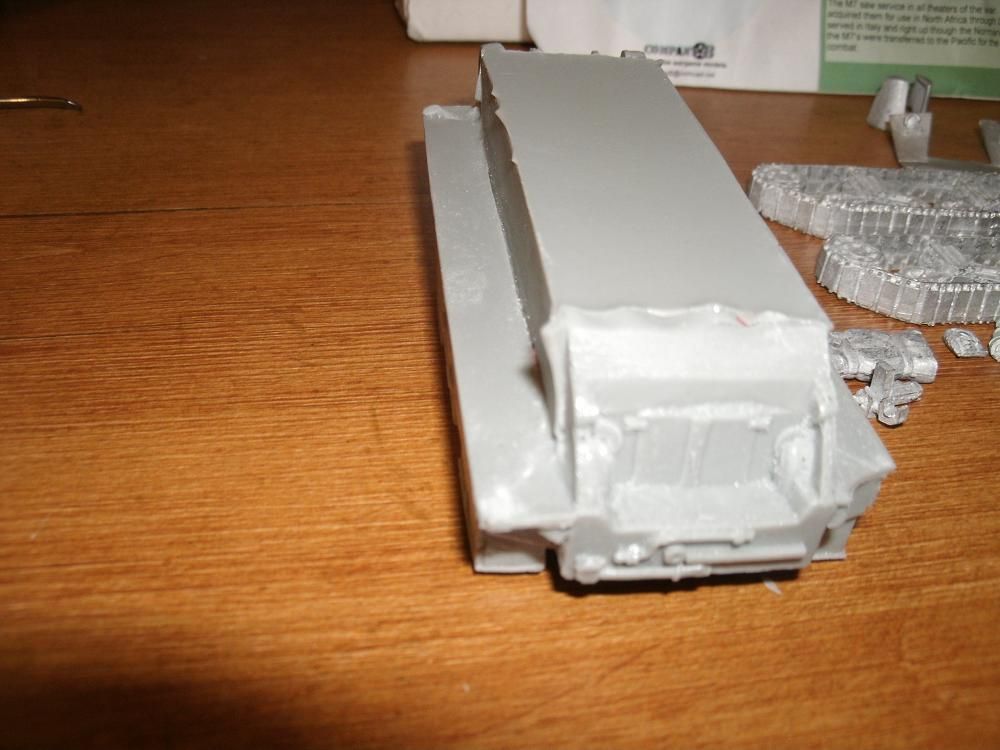
Both the air bubbles are located on the rear of the vehicle with one on the exhaust and the other on the fender. Neither of which will take much work to fix.


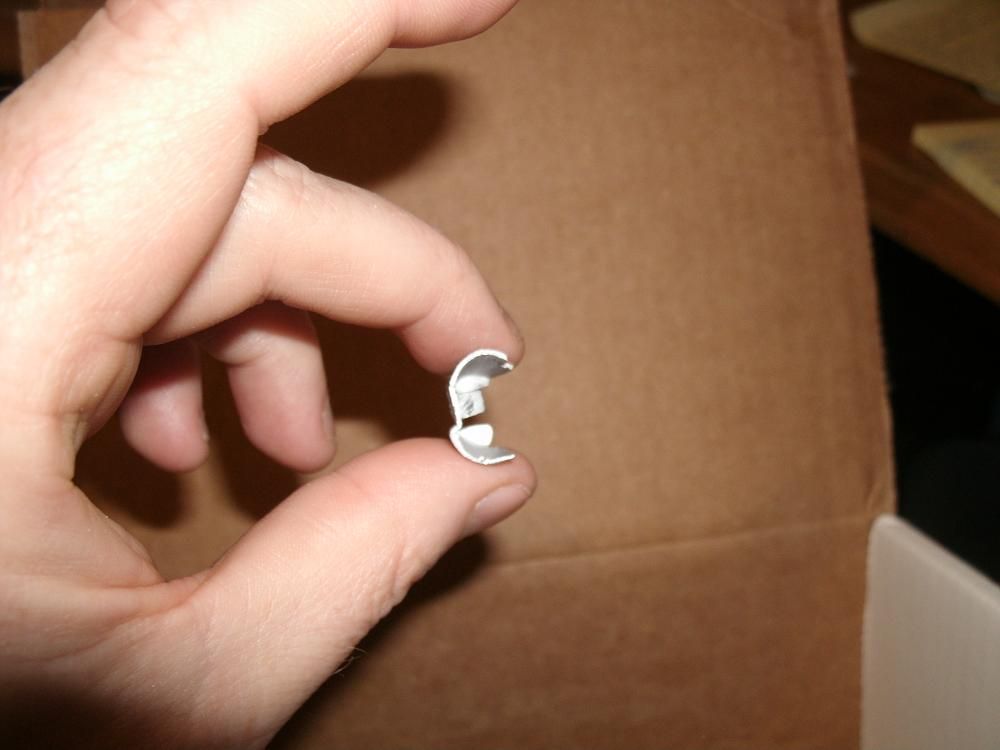
Of the metal parts only one, the turret shield of the howitzer will required much work. This was because it found its way inside the metal tracks and got a bent up a great deal during shipping. Aside from this everything else was in good shape.


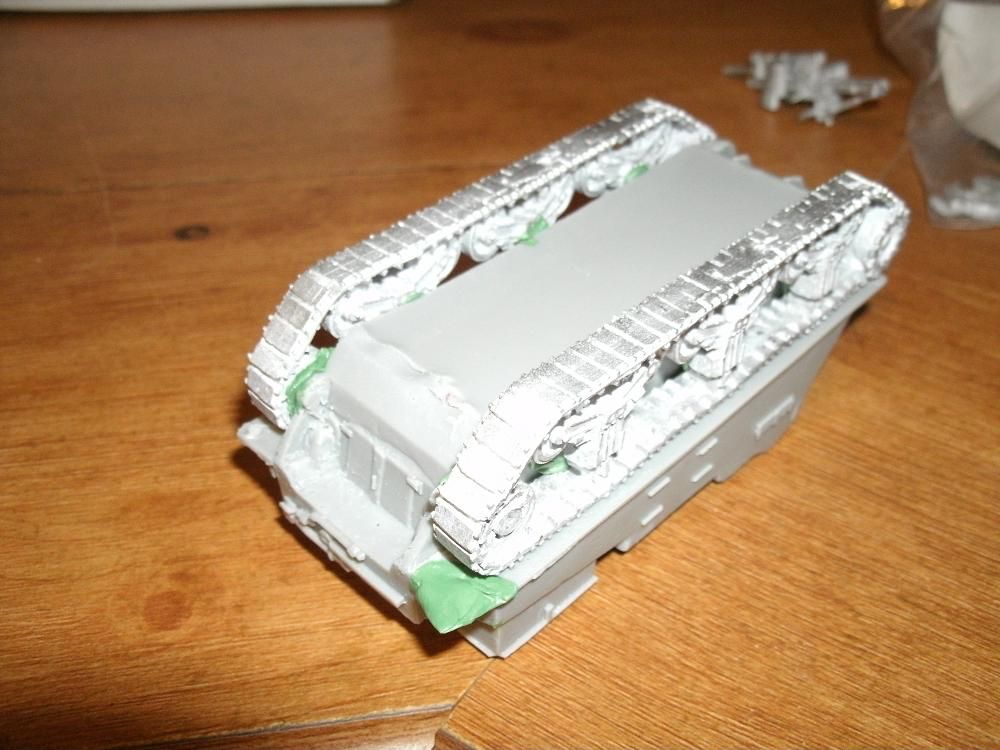
Having worked on previous models that have all had a resin hull and resin tracks, I found that I really liked the metal tracks. Simply for the fact that I was able to easily push down on the top of the track and give them that "saggy track" look that you often see in photographs of tracked vehicles.


On the downside, I had trouble getting the tracks glued to the hull and finally had to use some green stuff to get them to stay attached.


After getting the tracks on, I discovered that I broke of the left rear fender and had to do make a new one out of green stuff as I couldn't find the piece.

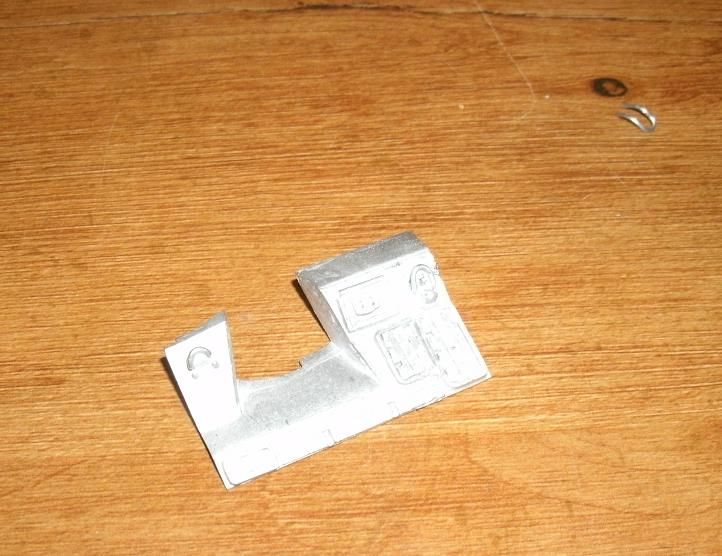
The front of the tank is made of white metal and requires a bit of shaping,which is easily done by pushing it up against the model so that it sits properly. The only thing is that this parts seems to be slightly larger than the resin hull and I had to file down the sides to make it fit better. One might also fill this in with some green stuff and work it a little to make it look like it is welded on.


Another problem with the model, are the covers for the lights, they were not fully cast. So I cut them off and replaced them with some wire.


None of the models come with instruction diagrams so I spent some time looking at pictures of M7 priest on the internet, to figure out where some of the smaller more fiddly bits went.

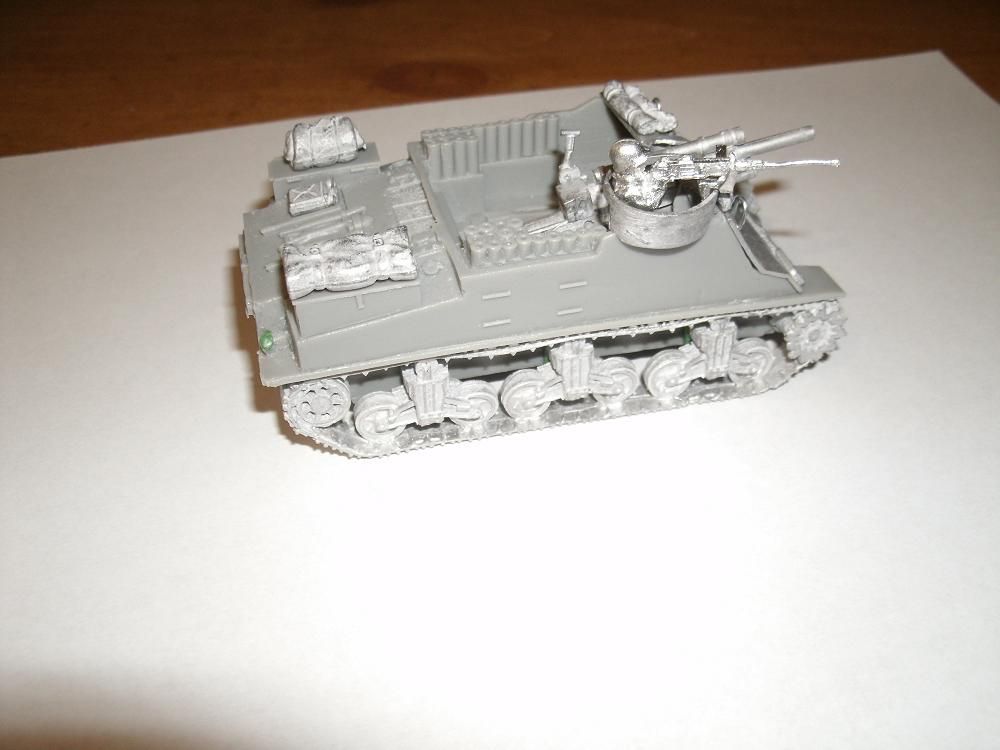
I was easily able to put the M7 together in one evening, with plenty of time for watching TV, searching the Internet and losing multiple games of Candy Land to my son, in between gluing parts together. Overall I really like this model but it does have a few problems, but nothing that wasn't fixable. Quality is on par with resin models I have from other companies. The model also comes with a copious amount of stowage, some of which I will be using with other models.

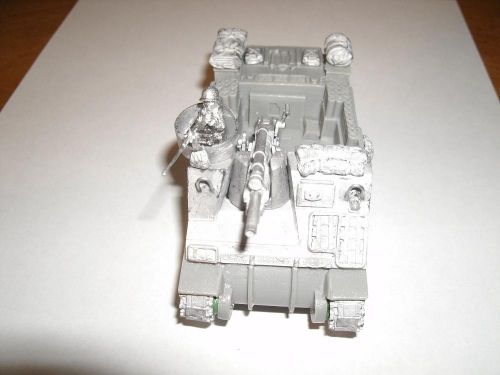
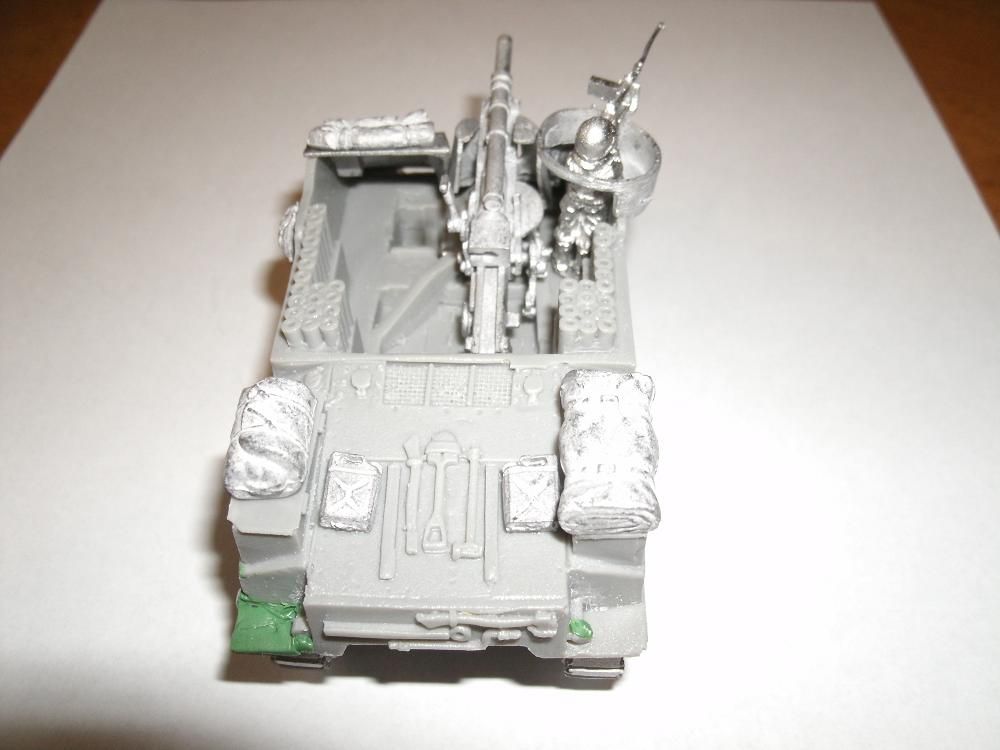
Below are some shots of the vehicles from all angles. I hope to have it painted up soon, but it may have to set up on the shelf next to the M4 Sherman until my water slide decals come in. Also I will be looking for some crew to put in along with the .50 cal gunner, but I have yet to order them. At some point down the line when I get all of these thing together, I will post a follow up.