
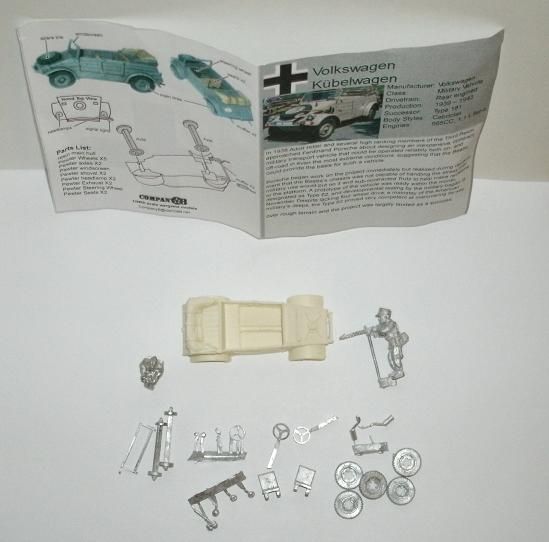
This is a resin and white metal model from Company B. The first thing I noticed was how thin the
doors are on this thing. Given that, I was impressed with how clean and
detailed the casting was and the fact that it had no air bubbles, with the
exception of a few on the bottom of the model that would not be visible while
in use. There was also very little flash, one minor piece under the driver’s
door, and that was easily removed.
 |
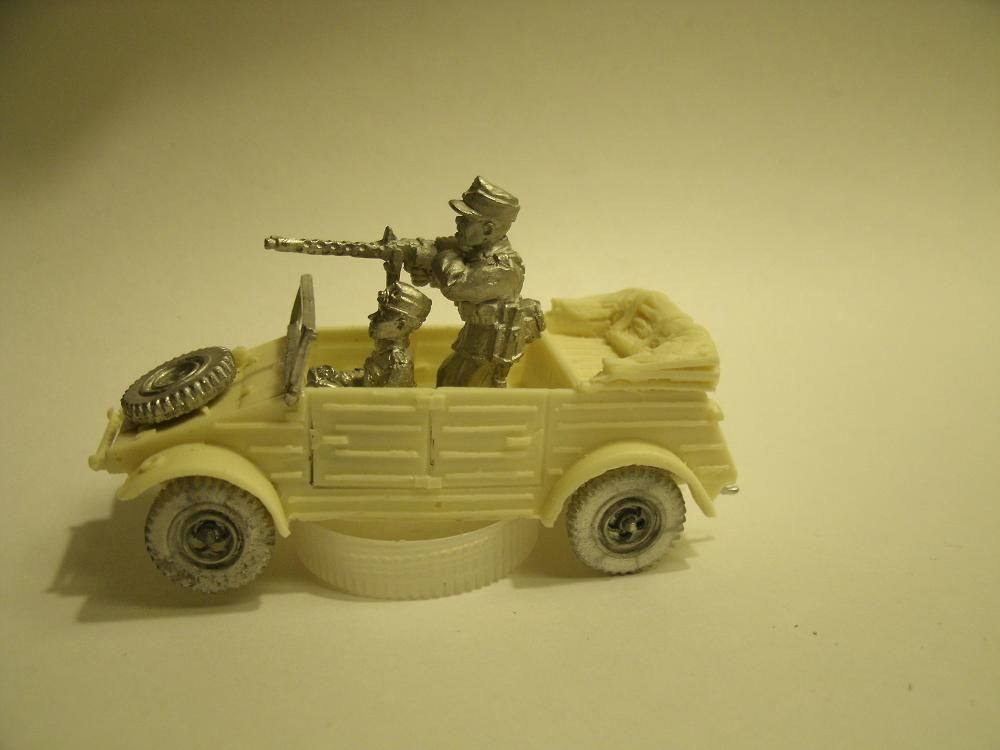
| Overhead shot. |
The model comes with an insert that has a color picture of
the vehicle, basic stats, a brief history, a parts list, and an illustration to
aid in assembly. I thought this was a nice inclusion, as the other models that
I ordered did not come any instructions or assembly illustrations. Not that any
were really needed for the Kubelwagen as everything was pretty straight
forward.
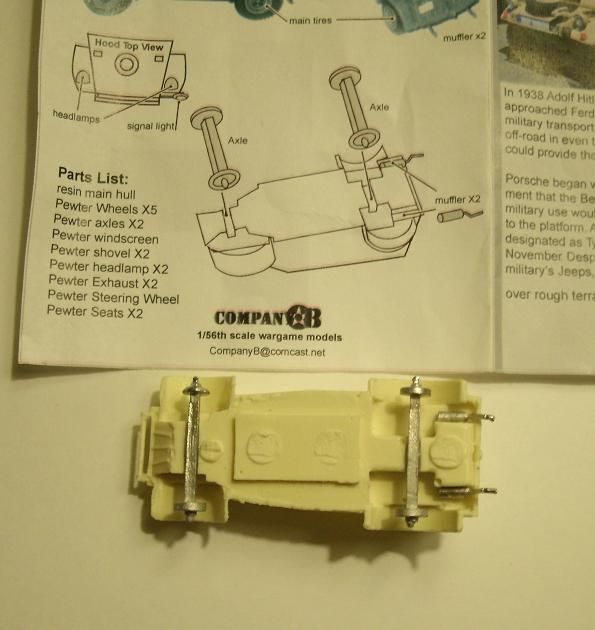
I decided to start with the axles and then the tires and
noticed that when I picked up the axles that one of the wheel bases had been
miscast and was rather lopsided. I figured that that it was in good enough
shape to work so I continued. This piece proved a little more problematic than
I anticipated as it was difficult to balance the tire on half the normal
surface, and after falling off several times it finally stuck.
All the other tires went stayed on after the first try without any trouble. Then I attached the mufflers and let them dry while I watched a little TV.
 |
| The wonky axle. |
All the other tires went stayed on after the first try without any trouble. Then I attached the mufflers and let them dry while I watched a little TV.
 |
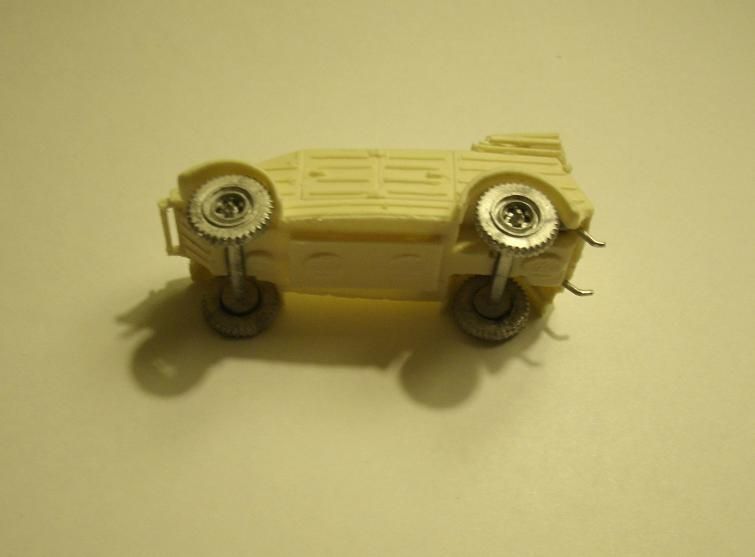 |
| Waiting for the glue on the wheels to dry. |
The interior of the car has two options. You can put in a
steering wheel and an empty driver’s seat, along with the passenger seat, or
the driver figure and a gunner, and an empty passenger seat. I decided to go
with the driver and gunner combo. I suppose you could also just use the driver
and find an officer figure, if you wanted a staff car. After I let the glue on
the tires dry for a little bit I decided to put the driver and the passenger
seat. The driver wasn’t much trouble at
all, whereas the passenger seat proved to be quite the little gremlin. I think
this was due to a combination of factors, the gel super glue not curing fast
enough and the metal seat back making the seat unbalanced. So after the one
hundred and seventh time of falling over it finally stayed in place and I moved
on to the gunner.
For this guy I had to cut the flash out from between his
legs, but not high up enough to give him a vasectomy. I then had to pry them
apart a little to get them to go over either side of the axle cover and sit
flat on the back floorboard. Then I had to move the pintle-mount around a bit
as it kept hitting on the drivers elbow, and I suspect that I may not have had
the driver as far forward as it should have been.
 |
| Waiting for the glue on the wheels to dry...again. |
 |
| Done and waiting for a paint job. |
Painting was pretty straight forward. Since I will be using
the vehicle for late War scenarios and perhaps North Africa as well I decided
to go with a base coat of Dunkelgelb. I then decided to leave off the green
camo pattern that I applied to my SdKfz 251/1 and SdKfz 222, to make the
vehicle more generic. Then I painted the wheels gray and washed them with black, then started
painting the figures. At this point I decided that I probably should have primed
and painted the figures separately, as I had already had trouble painting the
interior of the vehicle, and was now have a hard time getting paint on some
portions of the figures. So next time I know and will avoid this if possible. Then I had to try and find some pictures on
the internet that showed the color of the rag top, and decided to paint it
Dunkelgelb as well but then highlight it with a slightly lighter yellow brown. Then I decided I didn't like that, so I painted it a Khaki Gray.
The seats I went with a gray-green color just for the sake of variety.

I also added a windshield after I finished painting and dusted it with a bit of pigment to give it that dusty look. After that I took a few pictures, erased the pictures and painted the undercarriage a muddy brown and retook said pictures and they look a lot better.


I also added a windshield after I finished painting and dusted it with a bit of pigment to give it that dusty look. After that I took a few pictures, erased the pictures and painted the undercarriage a muddy brown and retook said pictures and they look a lot better.
I was also looking to see what type of markings was common on the Kubelwagen and found that mainly just the painted license plates. Not having these I have left them off, I am considering ordering some from Company B along with some other decal sheets, but for now I am leaving this off.

looking at this last shot, I just realized I also need to add the rank to the sleeve of the crew and a few other minor details.
No comments:
Post a Comment