Well somebody asked, so here you go. A step by step guide to building shacks.
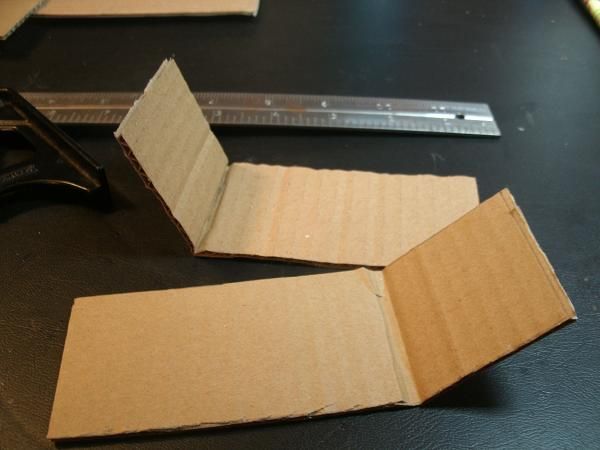
Here we have the humble beginnings of a shack. Two pieces of 2"x4"x6" cardboard, and pretty flimsy cardboard at that. You can also use a small box or foam board of the appropriate size. I am going to use cheap card board for this shack because I am not going to make the interior accessible. If you are wanting to go that route I think I would use something sturdier like the foam board.
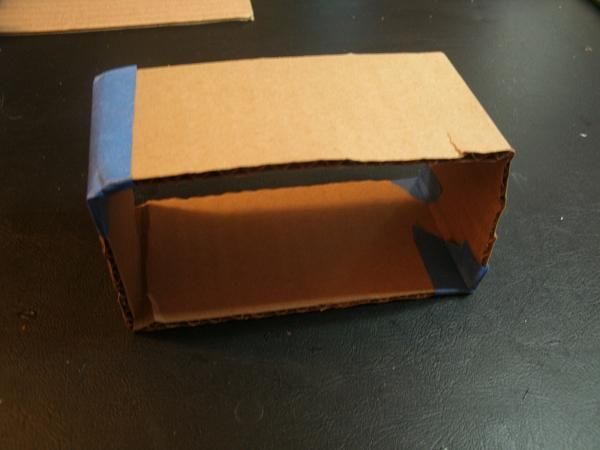
So then you tape the two pieces together to make your rectangle. Then I hit the inside corners with some hot glue to help it keep its shape and make it a little sturdier.
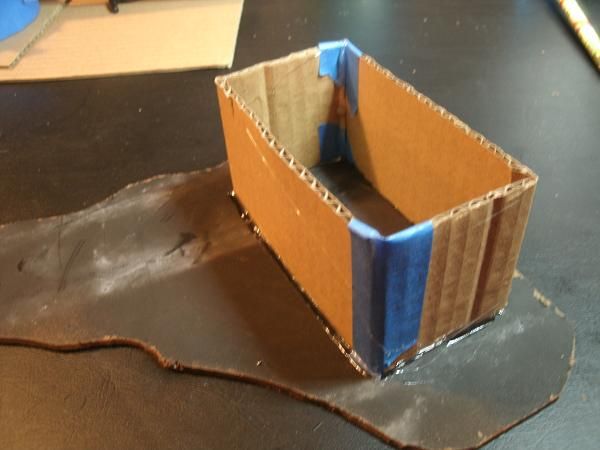
Then I hot glue it to the base, which is a piece of hardboard or fiberboard. After that I like to run the hot glue gun across the base of the outside to help keep it in place.
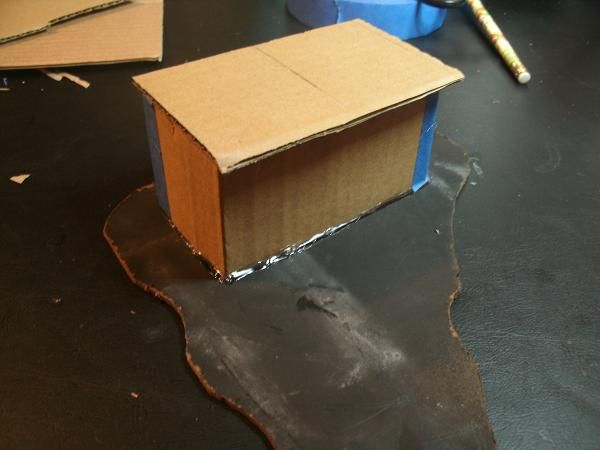
Again, this inside will not be accessible so I just hot glue the roof in place. The roof is another piece of cardboard that is slightly larger than the shack. Now the easy part is over, and we will get to work making it look like this thing is made out of wood planks and whatnot.
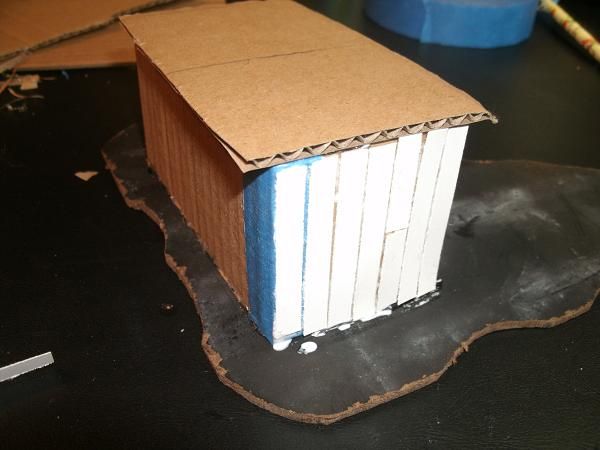
So here is a shot of the main building material, which is just card stock paper that I ran through my shredder. My shredder will also handle thicker material like the thinner card from some cereal boxes and other packaging. The shredder makes this part easy, but cutting it by hand wont add too much time, but a bit anyway. If you do have a shredder that cut paper into 1/4 inch thickness, another tip is to mark your paper in 2 inch increments (or whatever length you need) this way after you run it through the printer everything is already marked.
After cutting your paper start gluing it to the sides of the building. Be sure to leave some small cracks between the boards. Every once in a while you might try cutting a piece in half to make the board look like two joined pieces.
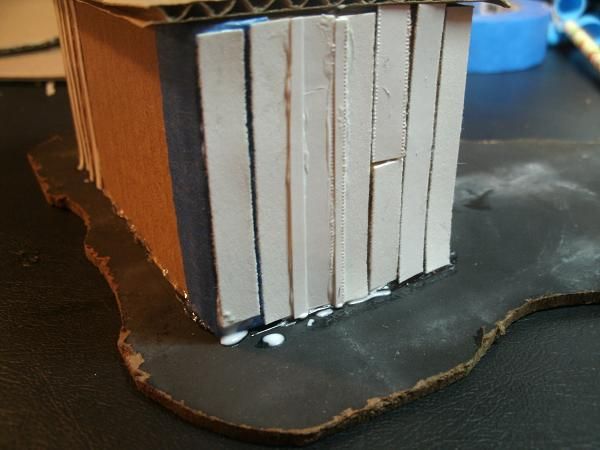
Next I wanted to show a construction technique that involves overlapping boards. The cracks of the first planks are covered with smaller strips to seal the cracks in the building. I just did two on this side so that when I do the backside it will give the latter the illusion of being constructed using the same method.
Here is the back side of the building and as you can see, I didn't glue the first set of planks on. Instead I just glued the small strips on the entire back of the shack and it makes it look like the side, but in better shape. I just use the ribs of the cardboard as a guide since they are spaced at 1/4" also.
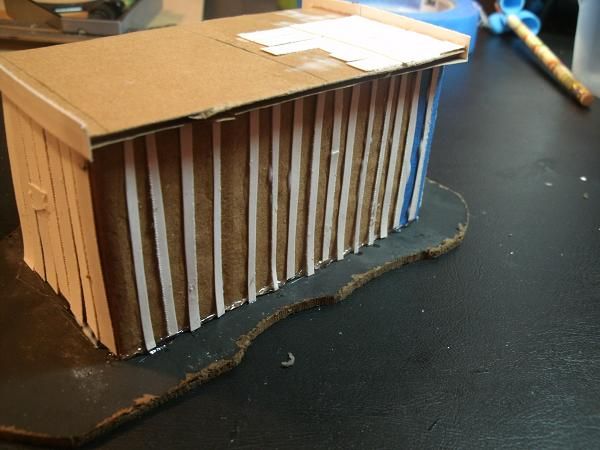
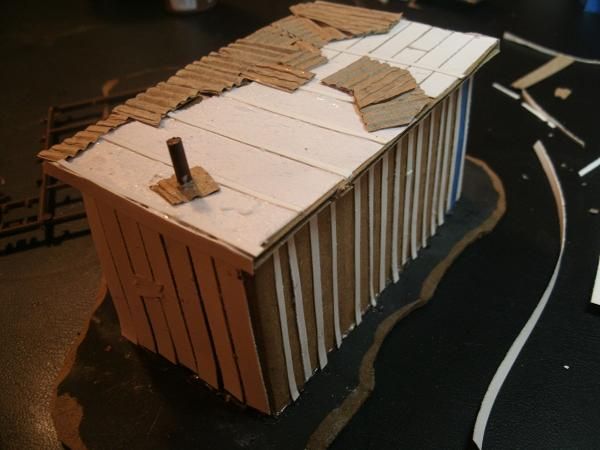
All finished up with the back side, and the second side of the building. I have also glued a couple of strips of paper up on the sides of the roof piece to cover up the corrugated cardboard that was showing. I have also started gluing a few strips of paper on the roof that will be exposed planks on the roof.
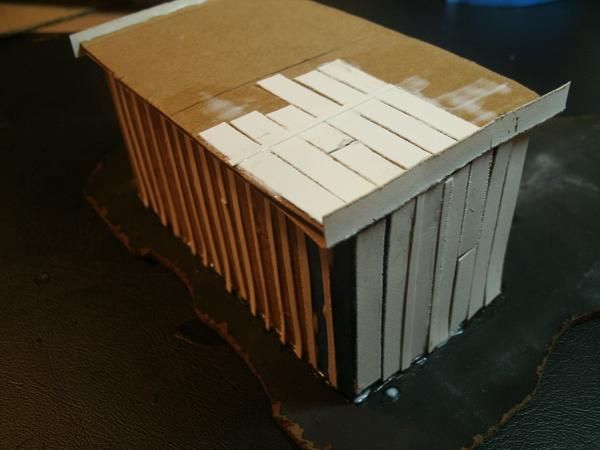
Just a much better shot of the roof planks, and the cross piece that once held the tar paper in place. The side planks on the roof are a bit big as you can see. I was waiting for the glue to dry and when it finally dried, I then simply shaved off the excess with a box knife.
Then I added another bit to the roof. This piece is going to be tar paper. It was the paper from a piece of foam board paper that was in my scrap box. I picked at the edges a bit to give it that torn look, and then scraped off any remaining foam and glued it rough side up.
After the tar paper I put some strips on top to represent the boards holding it down. Then I drilled a hole in the roof and used a bit of plastic sprue to make the stove pipe. You can use anything round for this, bamboo skewer cut to size, juice straw etc. I glued it in place along with a piece of single sided cardboard. The rest of the roof I covered the best I could with bits of SSC.
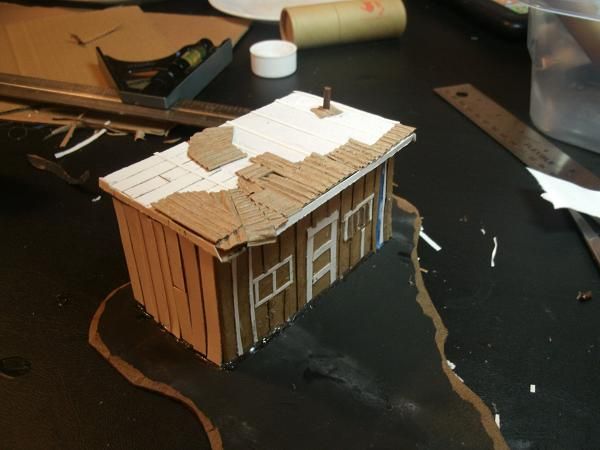
Next I tackled the front of the building. First I started with the door and window frames and then the bits to finish them off. Again, these are just strips of paper glued into rectangle shapes. The right window is covered up with some SSC, as if the windows had been knocked out or shattered at some point. The left window I left intact. After this I finished it off by putting in the strips that will be the smaller boards covering up the cracks in the planks.
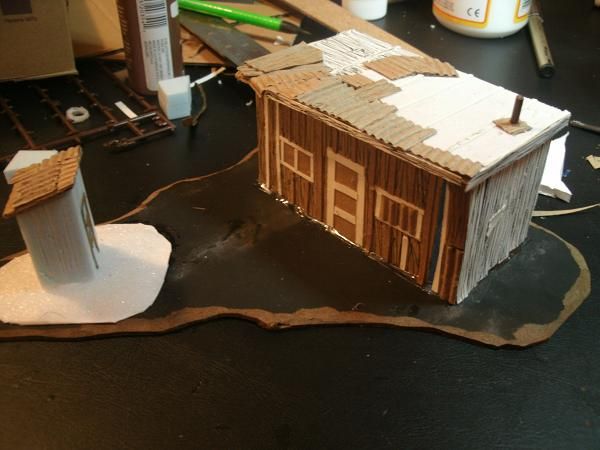
I finished the piece of by adding an outhouse and then using a pen to scribble some wood grain on the planks. It's a bit hard to make out in this picture, but I just used a black pen and drew lines up and down any parts that are going to be painted as wood.
At this point I think I have approximately an hour and a half (at the most) into the piece. Tomorrow I will flock the base and seal that, then paint it brown. After that, maybe this weekend I will paint it. I'll do a part 2 in case anyone is interested in seeing it through to completion.
Later.


Great tutorial! Thanks for sharing.
ReplyDeleteVery nice - and comes with an outside loo too!
ReplyDeleteThanks
Dan
Thank you so much for the tutorial. My son is doing a project on the Great Depression, and wanted to replicate a Hooverville shack. He will use your tutorial to do it.
ReplyDeleteI see an A on the way! :) Thank You!